Mouting Distance and Lens Selection
- 13 May 2025
- 打印
- PDF
Mouting Distance and Lens Selection
- 更新于 13 May 2025
- 打印
- PDF
The content is currently unavailable in Chinese (Simplified, People's Republic of China). You are viewing the default English version.
文章摘要
您觉得此摘要对您有帮助吗?
感谢您的反馈
The OV20i camera comes equipped with a standard 12mm lens. Depending on your application's requirements, you might need to replace this with a different lens size. This section provides detailed instructions for safely swapping lenses.
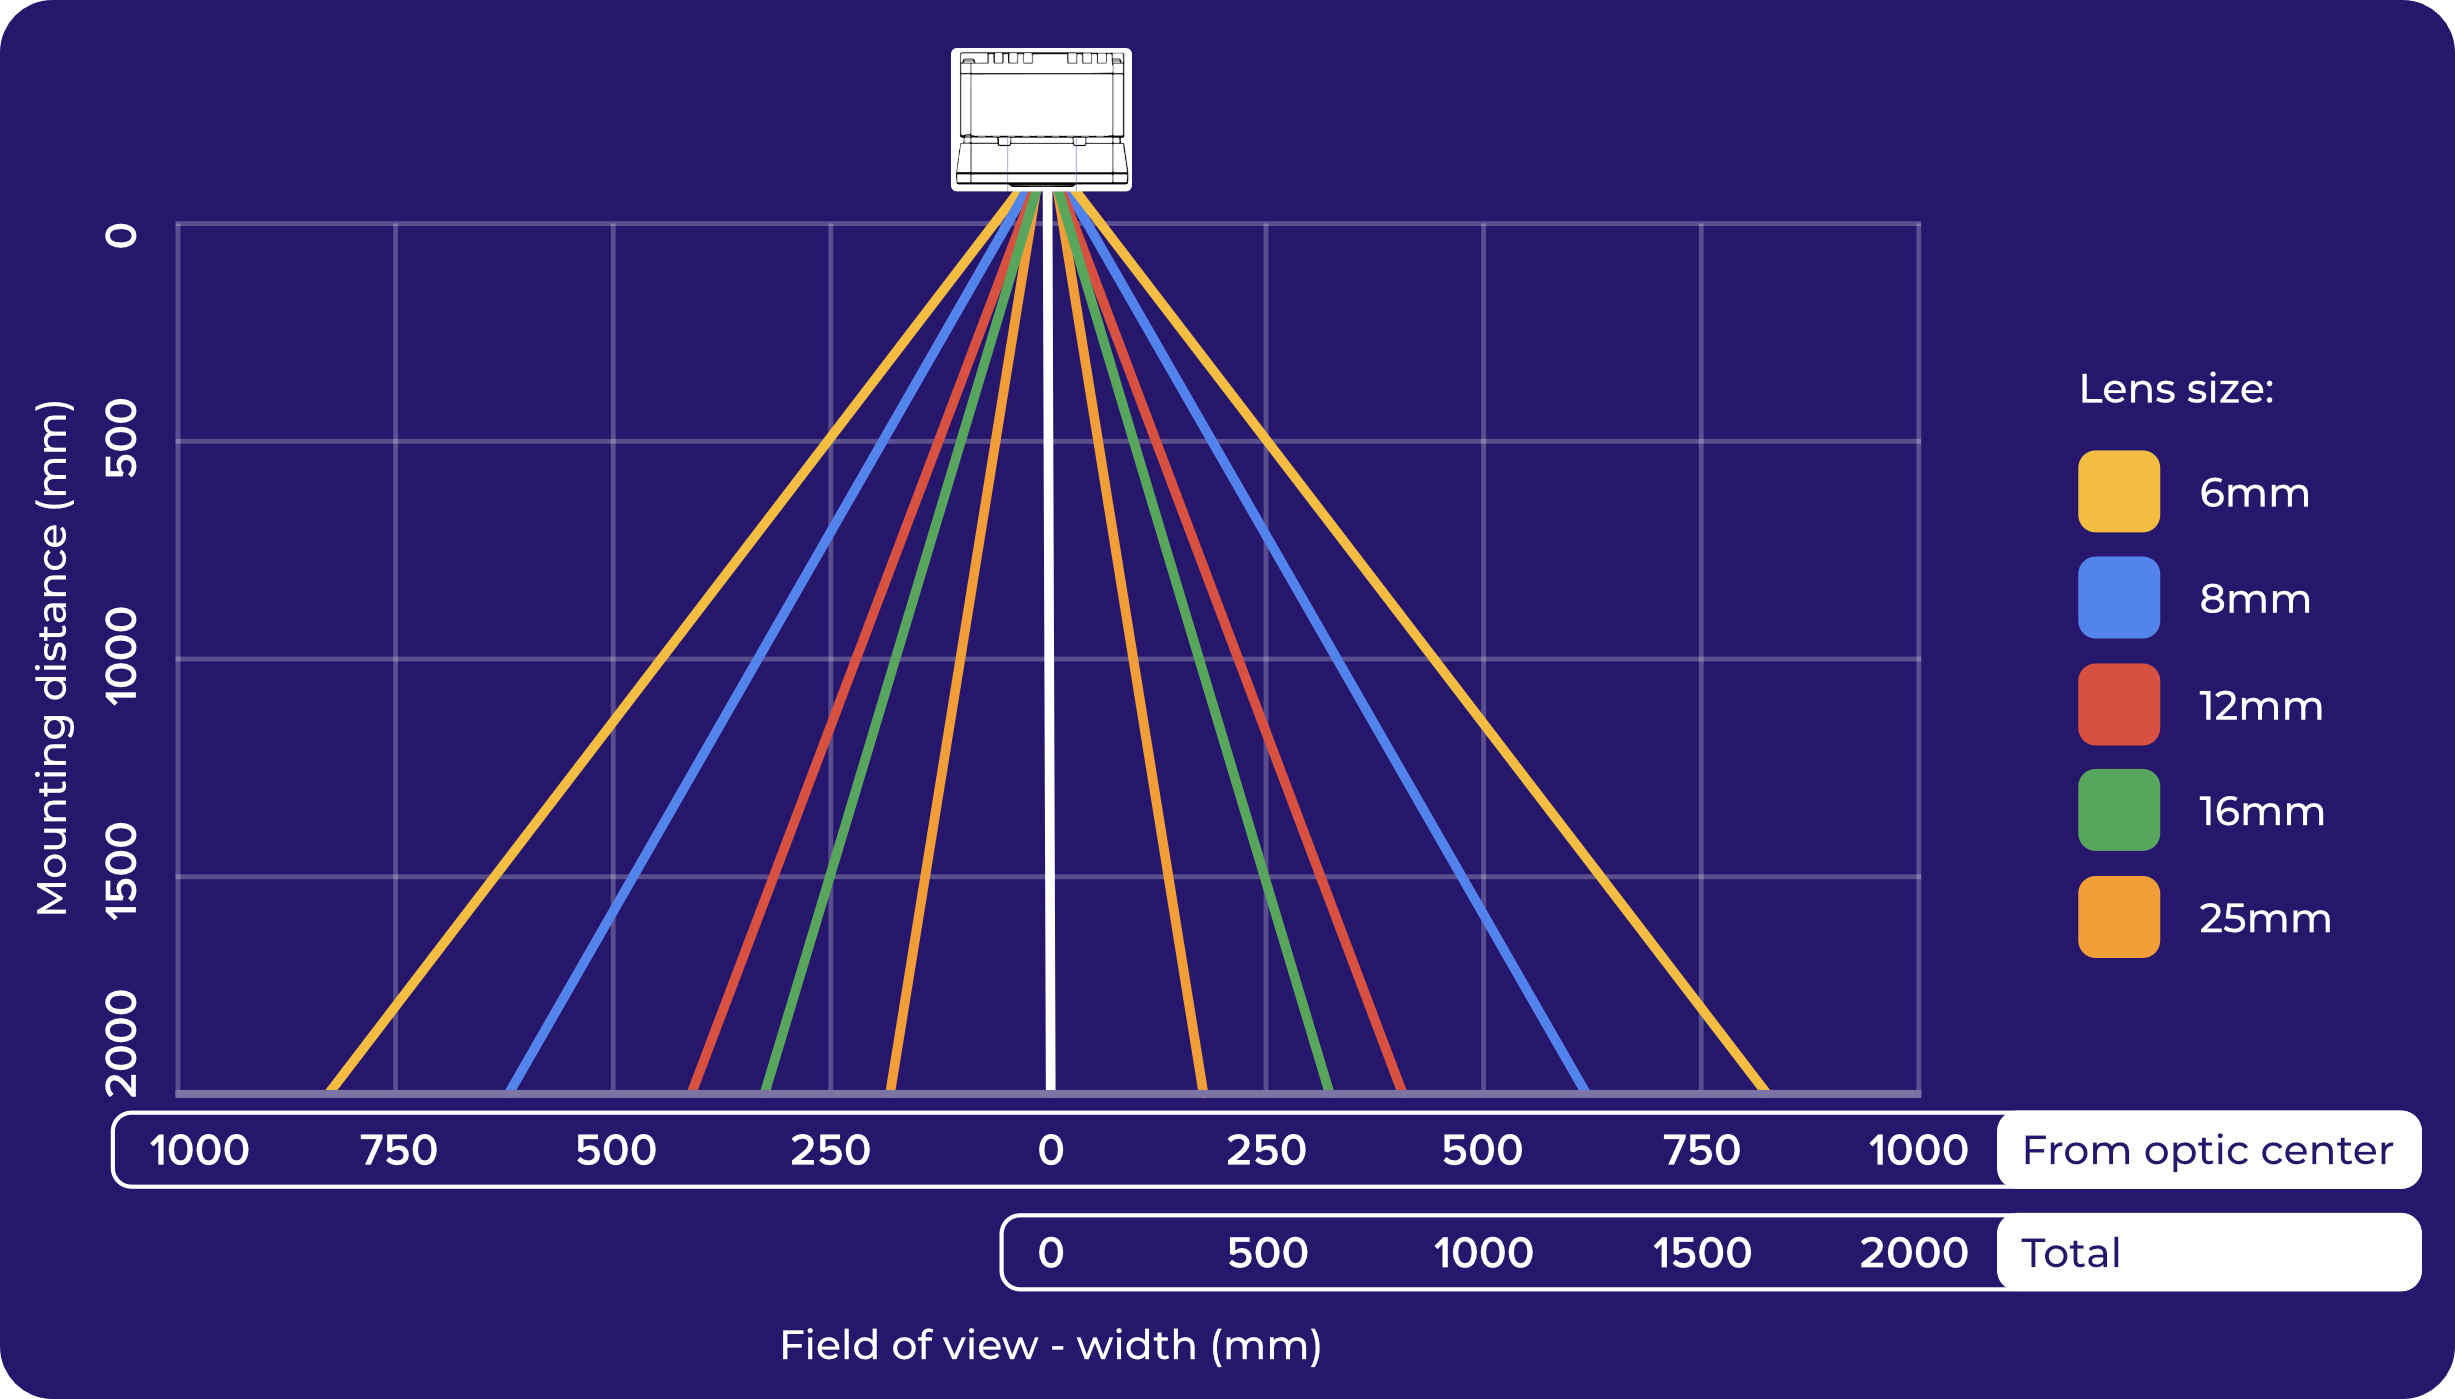
Calculating the Mounting Distance and Lens Size
The Field of View (FoV) is determined by the lens size and the working distance. Refer to the chart below or our calculator for guidance.
Field of View (FoV) Widths at 100mm, 1m, and 2m mounting distances
The camera has a 4:3 aspect ratio. The dimensions provided below refer to the width of the FoV. Multiply the width by 0.75 to calculate the height at the same distance.
General Lens Replacement (6mm to 16mm Lenses)
Reference
To find where to buy different lenses, refer to this link.
- Remove the Faceplate
- Using a Phillips-head screwdriver, unscrew the four corner screws on the camera's faceplate.
- Carefully remove the faceplate to expose the LED board and the current lens.
- Detach the Existing Lens
Gently unscrew the existing 12mm lens by turning it counterclockwise. - Install the New Lens
- Insert the new lens into the camera and hand-tighten it by turning clockwise.
Caution
Do not use tools to tighten the lens. Over-tightening can damage the lens or camera.
- Reattach the Faceplate
- Place the faceplate back onto the camera.
- Secure it by tightening the four screws removed earlier.
Installing the 25mm Lens
Requirements
The 25mm lens requires additional components for proper installation. Ensure you have the following items:
- M12 25mm lens
- 15mm faceplate spacer
- Spacer rings
- 4x M3x22 socket head cap screws
When installing the 25mm lens kit, you may want to optimize resolution at different working distances. In some cases, the lens needs to sit slightly farther out than the full thread depth of the M12 mount. To accommodate this, we use ring spacers.
A practical way to find the correct distance is as follows:
- Remove the faceplate.
- Set up your camera configuration.
- Slowly screw in the lens until you achieve the best image—try to keep the focus centered on the bar.
Once you have a sharp image, measure how far the lens extends beyond the mount. Then, choose the appropriate combination of ring spacers to match that distance.
Lens Installation – Step-by-Step (after determining correct distance)
- Prepare the Lens
- Slide the ring spacers to the correct size of the setup.
- Install the Lens
- Insert the lens with spacer rings into the camera's lens mount.
- Hand-tighten the lens by turning it clockwise.
- Attach the Faceplate Spacer
- Position the 15mm faceplate spacer over the camera's front.
- Secure it using the four M3x22 socket head cap screws provided.
- Finalize the Installation
- Place the original faceplate onto the spacer.
本文对您有帮助吗?