Creating Your First Classification Recipe
  • 15 Nov 2024
  • PDF

Creating Your First Classification Recipe

  • PDF

The content is currently unavailable in Chinese (Simplified, People's Republic of China). You are viewing the default English version.
文章摘要

Once you’ve followed the steps in Creating Your First Recipe to configure the Imaging Setup, Template Image and Alignment, and Inspection Setup, follow the steps below to train a Classification model.

Classification Block

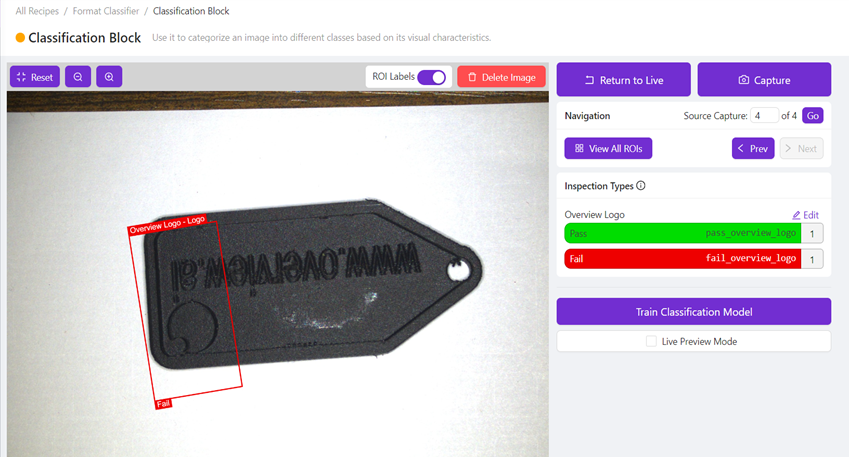
In this section, you’ll capture several images of the object and label (classify) the ROIs to train the model. You’ll need to capture at least five images for each class. By default, the classes are “Pass” and “Fail”. You can rename these or add other classes.

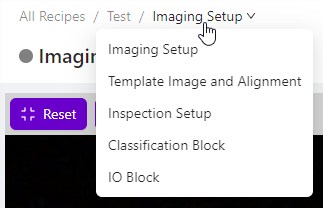
  1. From the Inspection Setup page, use the breadcrumb menu to select Classification Block. Alternatively, select Classification Block from the Recipe Editor.

    Recipe Editor Breadcrumb Menu

    Note

    The preview pane (on the left-hand side) displays a live preview, until an image is captured or is selected using the Navigation menu.

  2. Under Inspection Types, click Edit to rename the default classes or add additional classes. Once you have all the classes you need the camera to identify, continue to the next step.

  3. With the object in the camera’s field of vision, select Capture.

  4. A Region of Interest (ROI) will appear over the image. Click on the ROI to cycle through the different classes and select the class that applies to this image (Pass or Fail by default).

  5. Place another example of the same object in the camera’s field of vision and repeat steps 3 and 4 until you have added at least five labeled examples for each class type (Pass or Fail by default).

    Tip

    The model will be more accurate if each image is different (do not repeat the same image).

    Double check that each capture is labeled correctly as this is what will be used to train the model.

  6. Continue to IO Block.

Note

For more information about the Classification Block page, see Classification Block.

IO Block

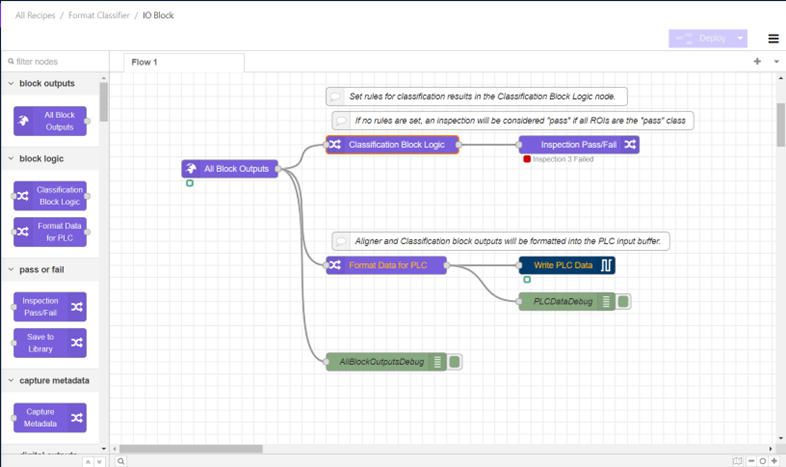
In this section, you’ll define the pass/fail logic for your Recipe. For this simple example, we’ll set the logic so that the ROI must be classified as “Pass” for the capture to result in a PASS. Other examples are available in IO Block and Node-RED Logic.

  1. From the Classification Block page, use the breadcrumb menu to select IO Block. Alternatively, select Configure IO from the Recipe Editor.

    Recipe Editor Breadcrumb Menu

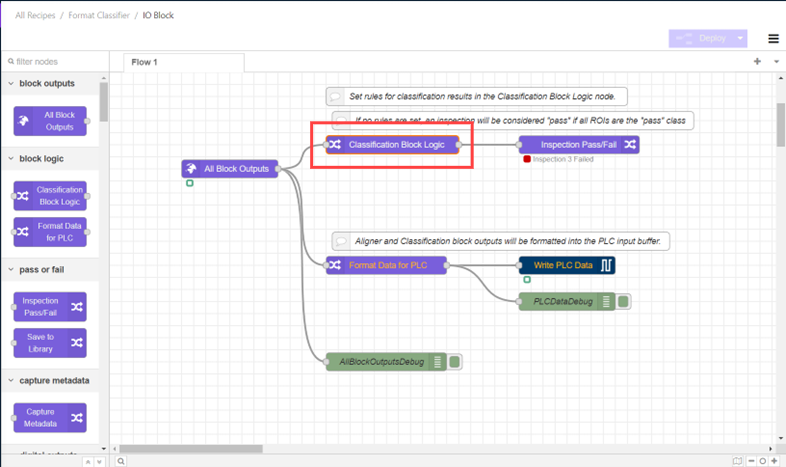
  2. Double-click on Classification Block Logic to open the edit tab.

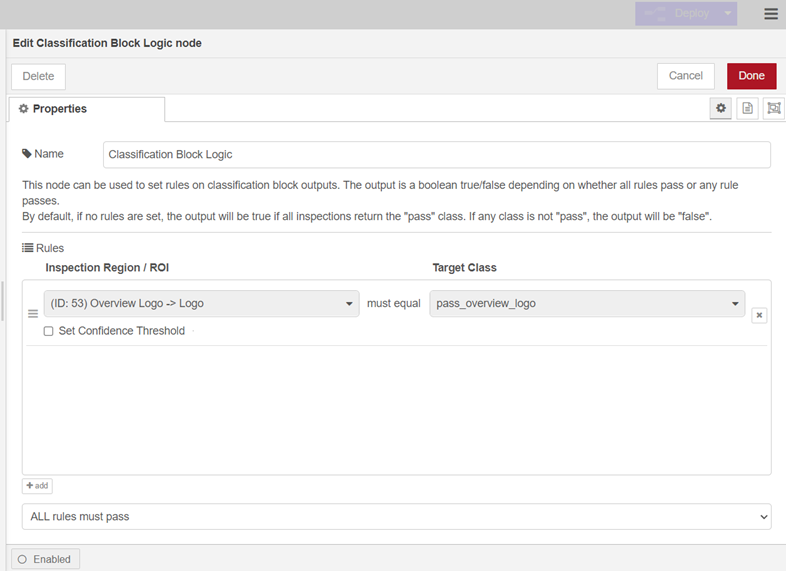
    image-1728660513967

  3. Click + add at the bottom of the tab.

  4. Under Inspection Region / ROI, select the relevant ROI you want to base the pass/fail logic on from the drop-down menu.

  5. Under Target Class, select the class you want the logic to consider as a “pass” from the drop-down menu (by default, this will be pass_[Inspection Type Name]).

  6. Click Done.

  7. Click Deploy.

  8. Continue to Train Classification Model.

Note

For more information about the IO Block page, see IO Block and Node-RED Logic.

Train Classification Model

In this section, you’ll train the model using the images labeled earlier.

  1. From the IO Block page, use the breadcrumb menu to select Classification Block. Alternatively, select Classification Block from the Recipe Editor.

    Recipe Editor Breadcrumb Menu

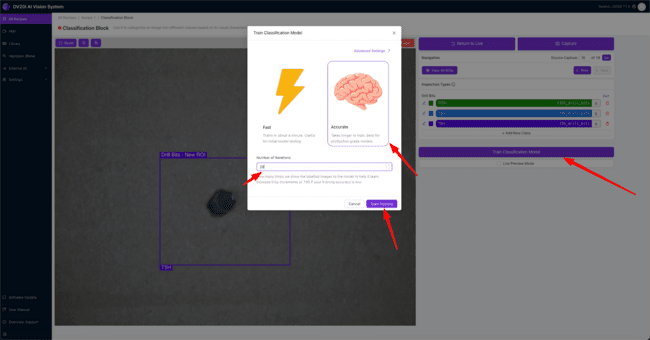
  2. Click Train Classification Model.

  3. Select Fast or Accurate, depending on how much time you have available, and how accurate you want the model to be.

    Note

    The Fast option is great for testing out a proof of concept. It is significantly faster, but is generall less accurate and is not optimized. For production use, you will want to use the Accurate option.


    creating-a-basic-single-roi-classifier-1-image-sg8rk9mf

  4. Adjust the Number of Iterations using the arrows on the right-hand side of the field to set how many times the labeled images are shown to the model to help it learn.

    Note

    Increasing the number of iterations will improve the model’s accuracy, but will also take longer to train.

  5. Click Start Training. A modal will display the progress of the training.

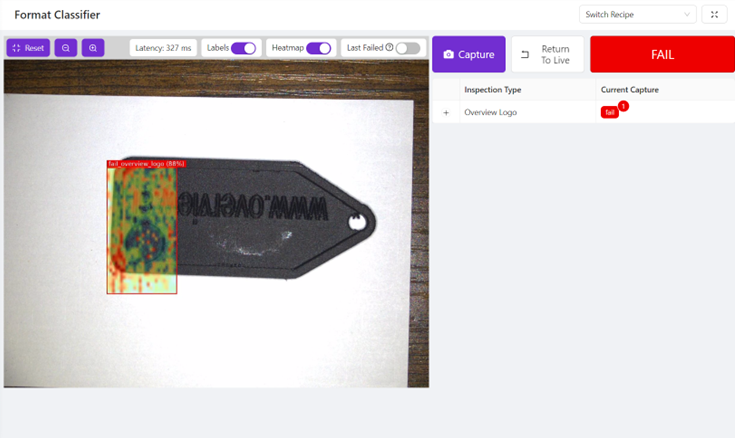
  6. Once the model is trained, use the Live Preview Mode or the HMI tab to verify the functionality of your Recipe. Place different examples of the object in the camera’s field of vision and verify the model classifies each example correctly.


本文对您有帮助吗?