Send custom data from PLC to camera
Step 1: Create and Configure the Custom Data Tag
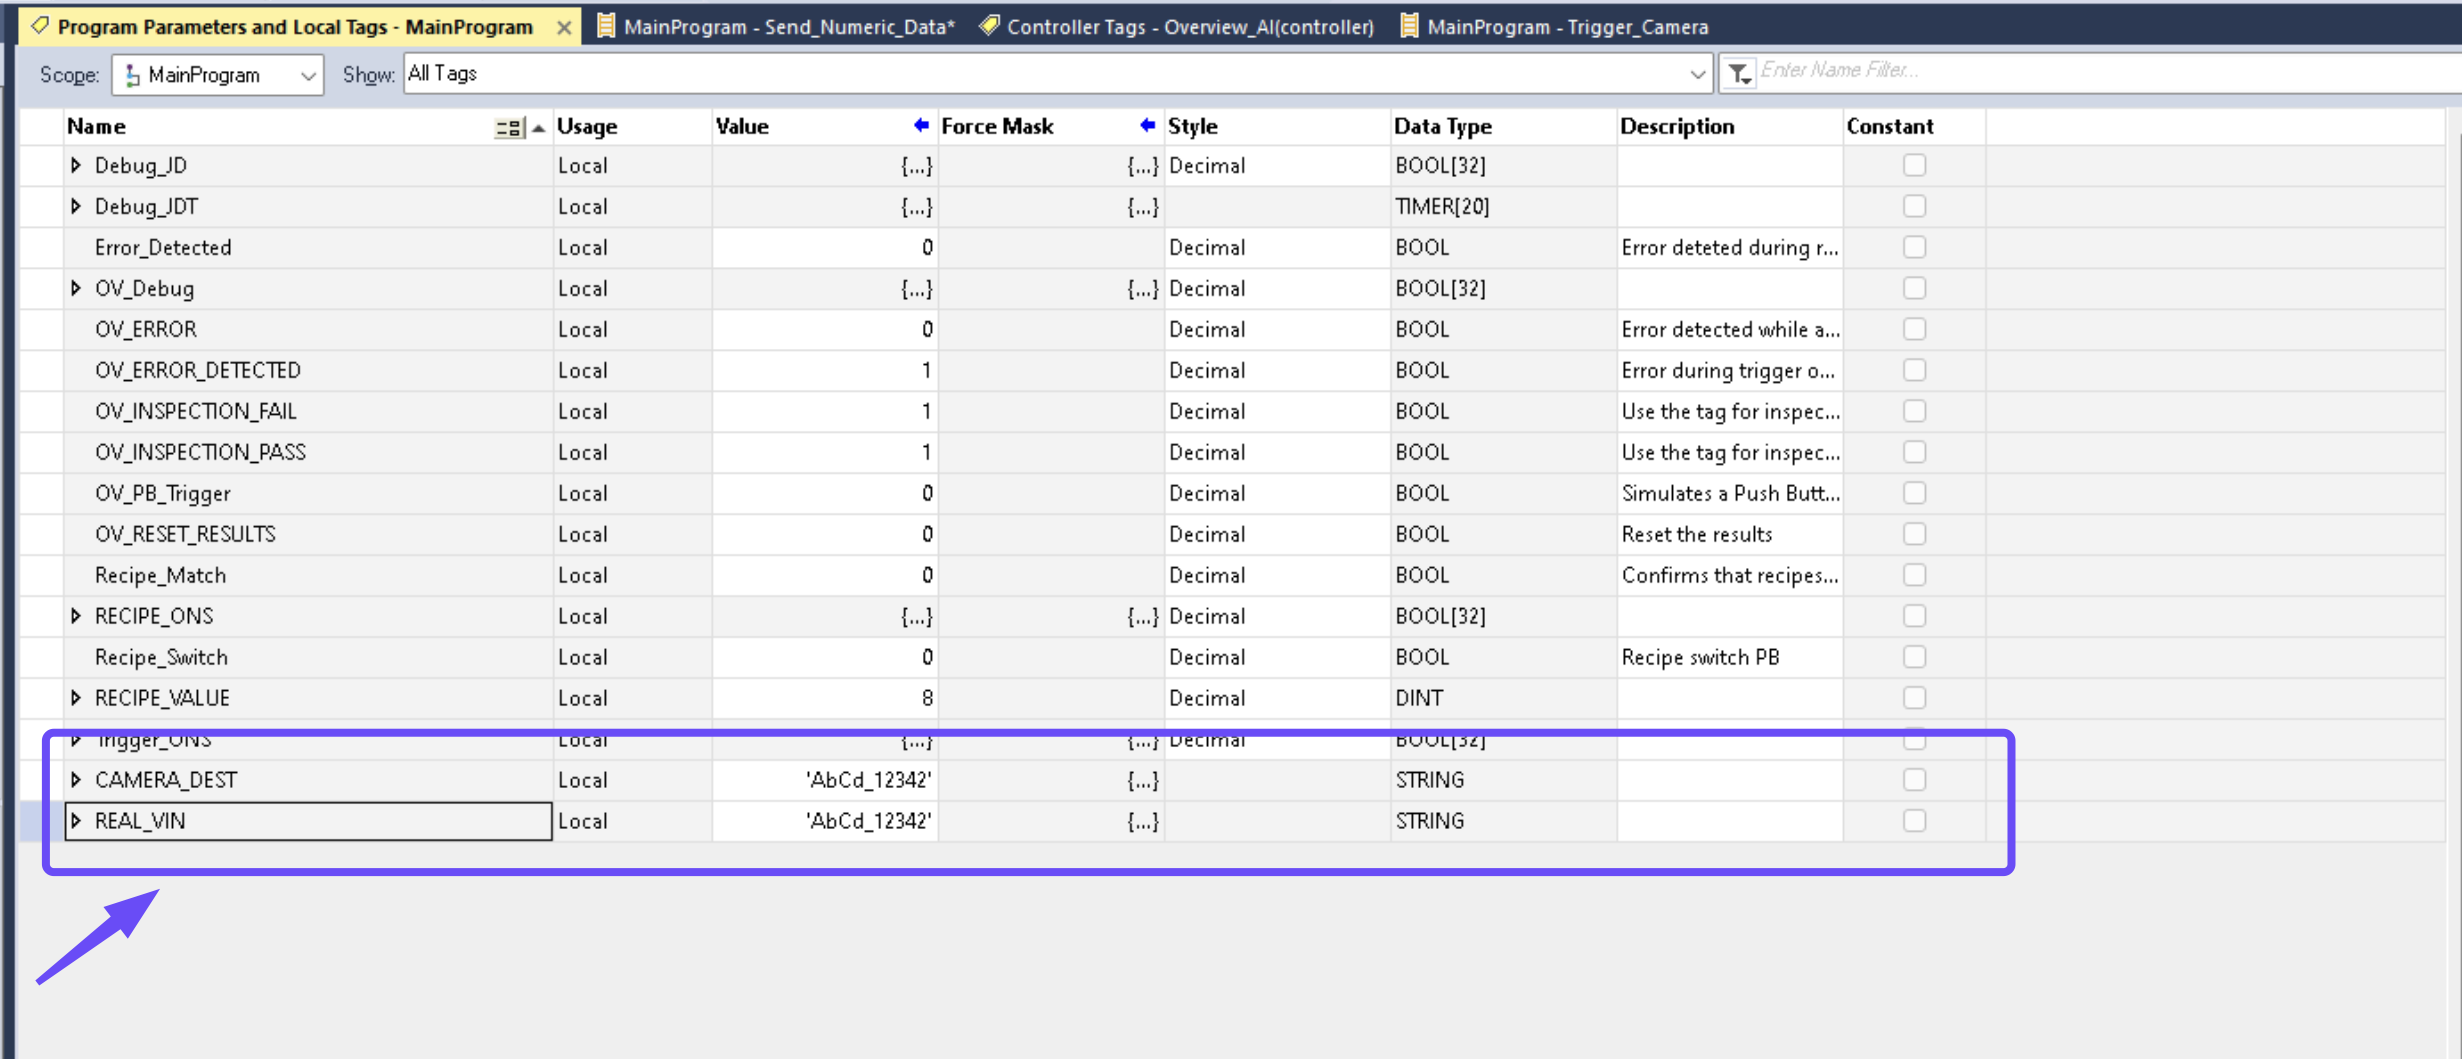
Start by creating two tags, one to copy data from the custom data tag and the other to move it on to the camera output tag. Both have to be a STRING data type.
Step 2: Define the Byte Order for Node-RED
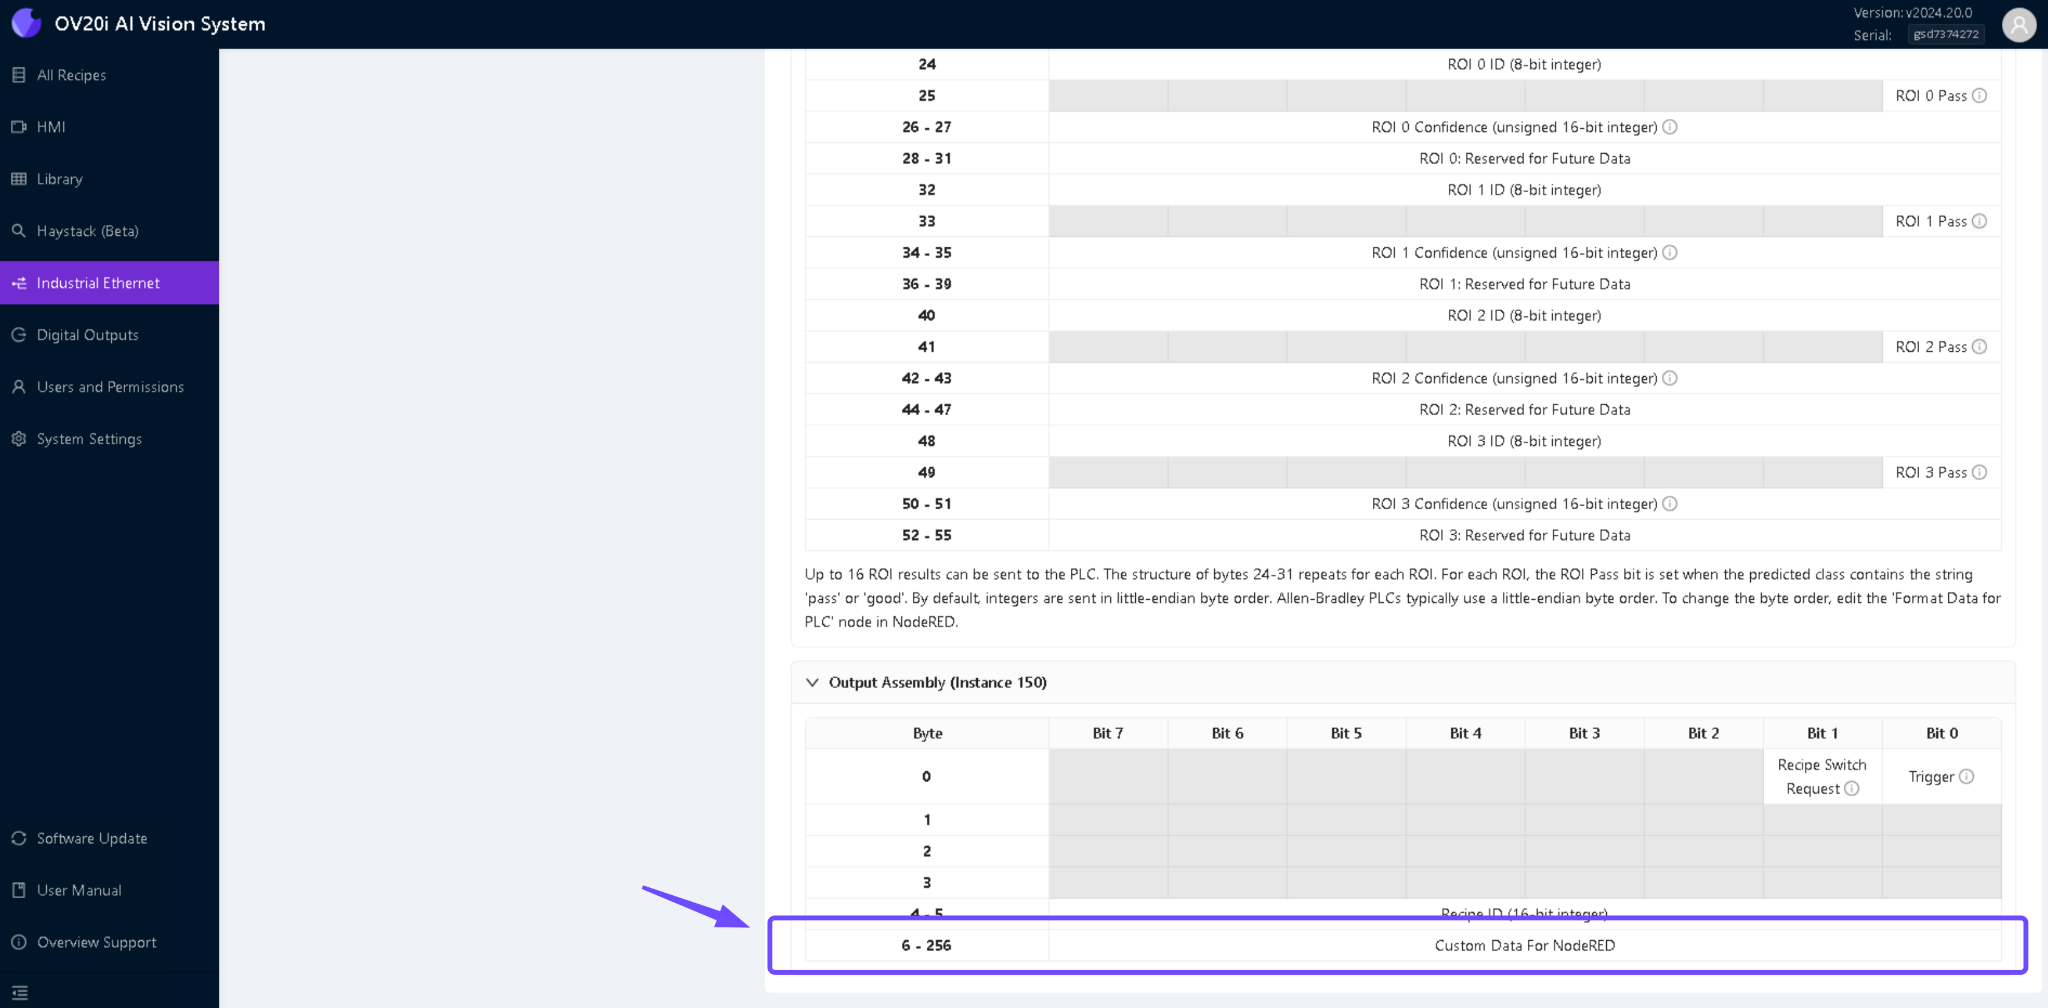
You can choose any byte order from the output assembly assigned for Node-RED. The byte order refers to how the data is formatted and transmitted.
Step 3: Develop Trigger Logic
After creating the custom data tag, use the trigger logic detailed in Trigger Using a PLC to create a new set of logical instructions. The trigger logic should handle the camera's activation, ensuring that it captures an image whenever specific conditions are met.

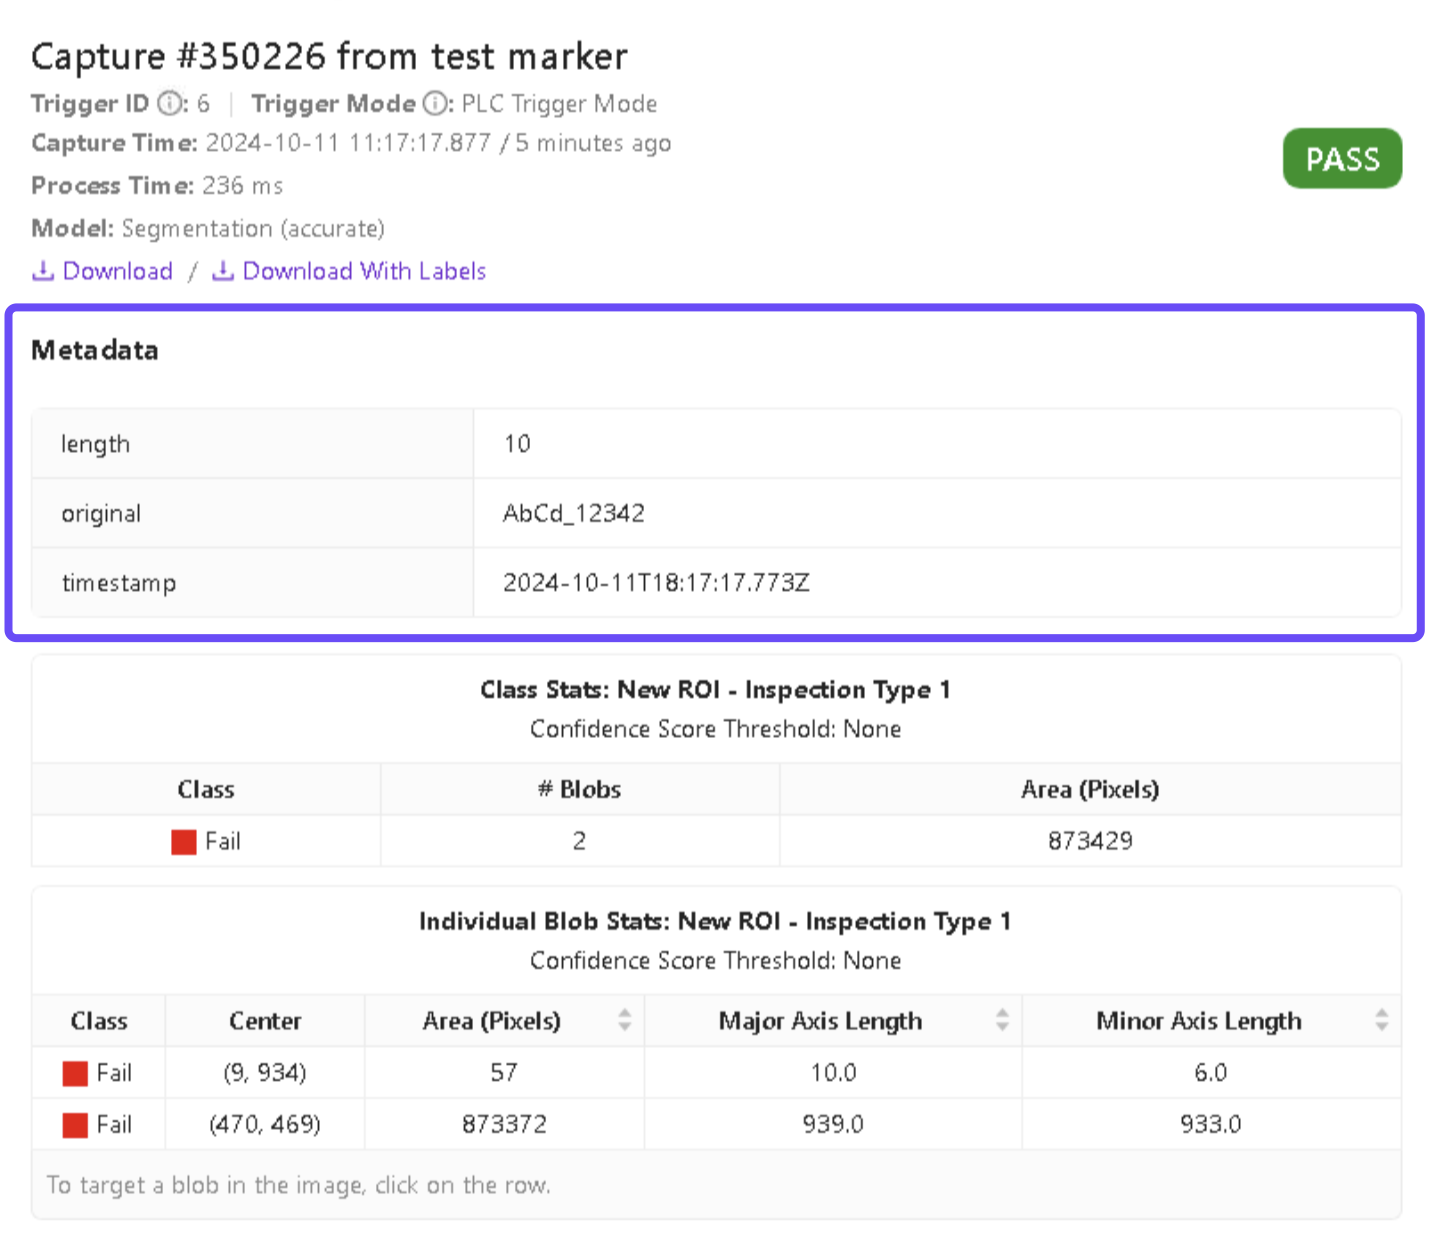
If you trigger the same VIN twice the data won’t be stored on the second image. Try to clear the data before sending the new one in.
Step 4: Create a Flow in Node-RED
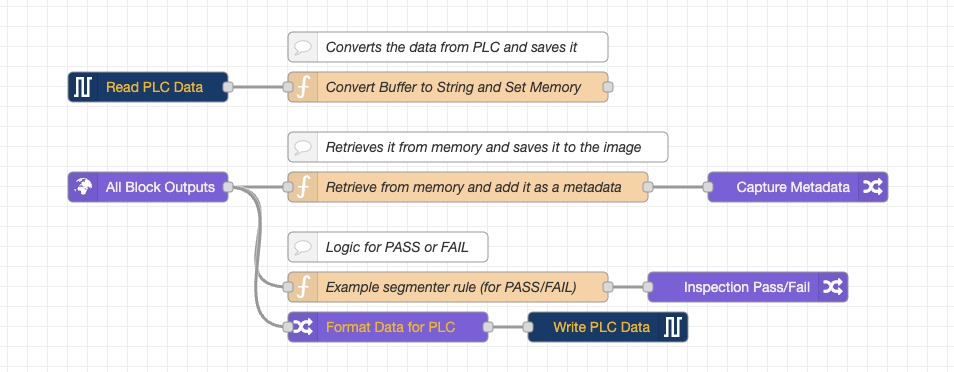
Access the Node-RED flow and create a new flow that mirrors the required functionality.
Step 5: Capture the Image and Associate Metadata
After triggering the camera, verify that the image capture process is working as expected.
Ensure that each image the camera takes has metadata, including the custom data.