AI-POWERED DOCS
What do you want to know?
Your Journey to AI Inspection
You just received your OV80i camera. In the next hour, you can go from an unopened box to a fully running AI inspection. This guide walks you through every step, in the exact order you'll experience it.
Three steps to success
Your journey has three clear steps. Each one builds on the last:
1. Install the Camera: Unbox, mount, choose your lens, set up lighting, and connect cables. Get the physical setup right because everything else depends on it.
2. Open in Your Browser: No software to install. Set your laptop to the same subnet as the camera, type its IP into Google Chrome or Microsoft Edge, and you'll see the All Recipes page. Firefox and Safari are not supported.
3. Create Your First Recipe: This is where the magic happens. You'll set up imaging, align your part, draw regions of interest (ROIs), train the AI, and configure outputs. One recipe = one complete inspection.
The one rule that will save you hours
Before you dive in, there's one concept you need to understand. We call it the Waterfall Principle, and it's the single biggest reason customers either love this camera or get frustrated with it.
The rule
Only move to the next step once you've fully optimized the current step.
Every step in creating a recipe builds on the one before it. If you skip ahead and then need to change something earlier, you have to redo everything that came after.
Physical Setup
Mount · Lens · Light
Image Settings
Exposure · Gain · Lens
Template & Aligner
Capture · Align
Regions of Interest (ROIs)
Draw ROIs
AI Training
Label · Train model
Outputs
Pass/Fail · Deploy
Here's what the Recipe Editor looks like. Each section maps directly to a waterfall step:
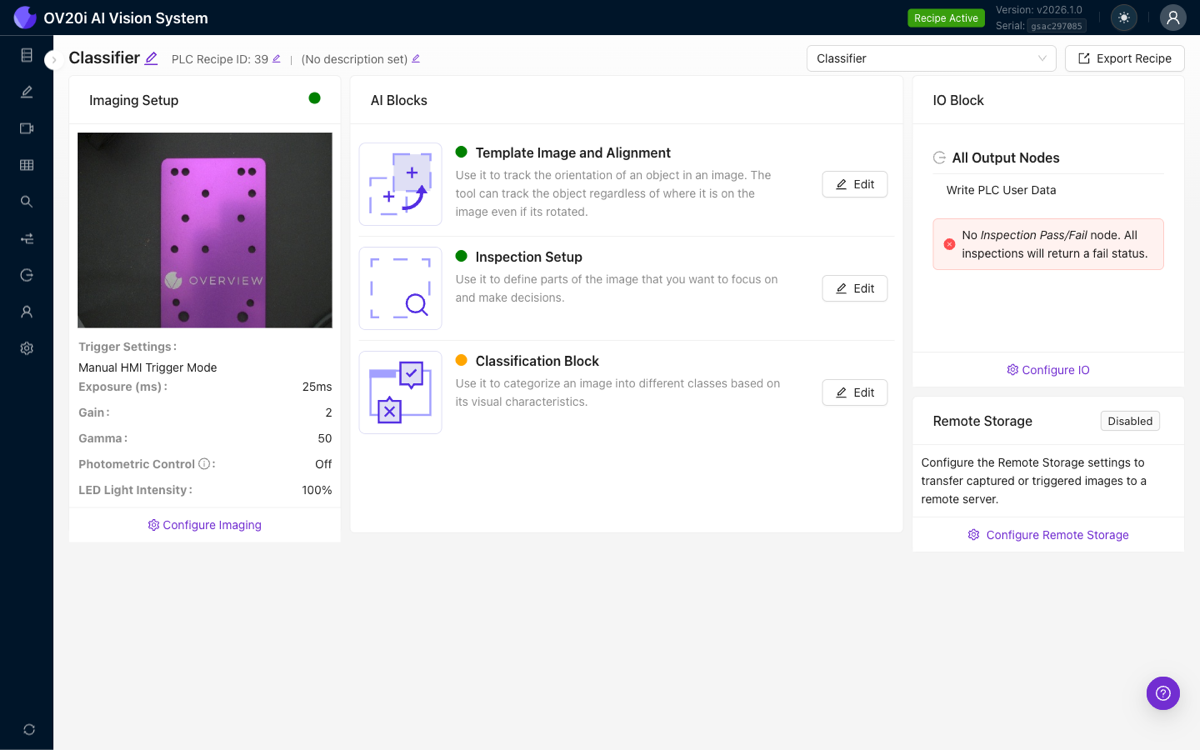
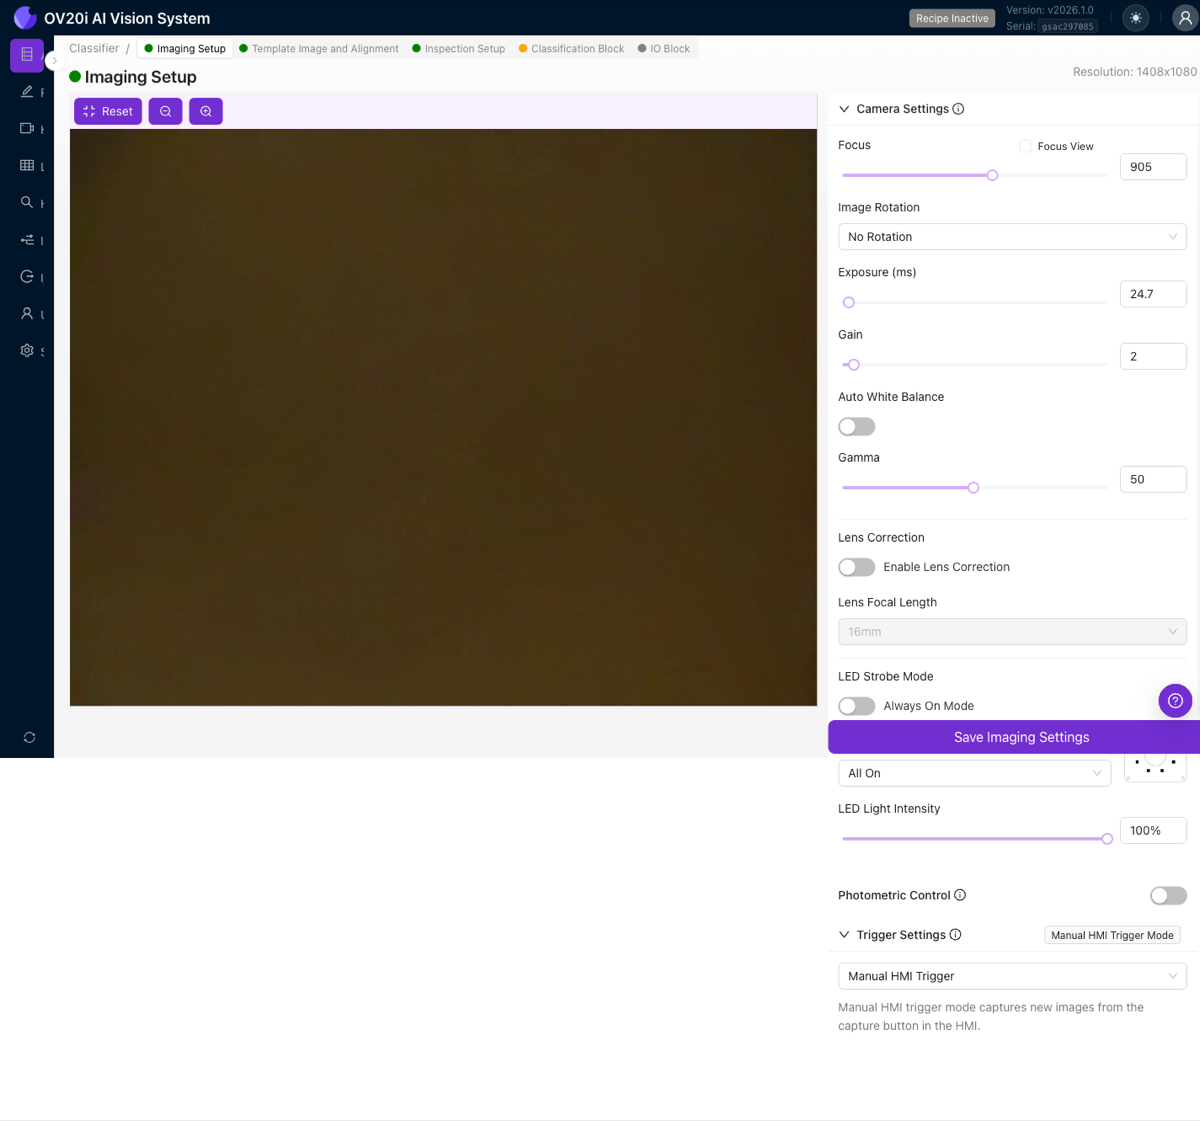
The Imaging Setup panel (step 2) is where you configure exposure, gain, and lens correction. Click Configure Imaging to open the full Image Settings page:
Why it matters: a real example
Imagine you rush through image settings without enabling lens distortion correction. You capture your template image, spend 20 minutes setting up the aligner, carefully draw 15 regions of interest (ROIs), and start training your AI model.
Then you notice the aligner is unreliable near the edges of the frame. You realize it's because of lens distortion, something you should have fixed in image settings.
Now you have to:
- Go back to image settings and enable lens correction
- Recapture the template image (the old one is now invalid)
- Redo the entire alignment setup
- Reposition all 15 regions of interest (ROIs)
- Retrain your AI model
20 minutes of skipping turned into 2 hours of rework.
The good news
When you follow the waterfall, every step gives you visual feedback. You can always click Live Preview to verify your work before moving on. The camera is designed to make this easy, but only if you go in order.
Think of it like building a house. You wouldn't paint the walls before the foundation is set. Each step in the recipe is a layer. Get it right, verify it, then move on. Customers who understand this upfront find the camera works amazingly well.
| Step | What you do | What to verify before moving on |
|---|---|---|
| 1. Physical Setup | Mount camera, choose lens, set up lighting | Image is sharp, well-lit, part fills the frame |
| 2. Image Settings | Exposure, gain, lens distortion correction | Clean, consistent image in Live Preview |
| 3. Template & Alignment | Capture template, set up aligner | Alignment tracks the part reliably in all positions |
| 4. Regions of Interest (ROIs) | Draw ROIs on areas to inspect | ROIs are small, well-positioned, move with alignment |
| 5. AI Training | Label images, train model | Model shows correct results |
| 6. Outputs | Configure pass/fail rules, IO | Global pass/fail matches your expectations |
For the full deep dive, see The Waterfall Principle.
Video: See it all in action
Need help at any point?
- AI Assistant at tools.overview.ai. Ask questions in plain English; it knows everything about the camera.
- Learning Center at overview.ai/resources/learning-center. Interactive step-by-step walkthroughs.
- This documentation. Use the search bar above to find anything.
- Troubleshooting video: Watch common issue fixes if you get stuck.