AI-POWERED DOCS
What do you want to know?
Open the OV80i in Your Browser
The camera is mounted and powered. Now let's see what it sees.
The OV80i is controlled entirely through a web browser; no special software to install. You just need a computer (or tablet) on the same network as the camera.
Step 1: Get on the same network
Connect your computer to the same network as the camera. You can do this two ways:
Option A: Direct connection (simplest for setup)
Best when you're setting up the camera for the first time, working at a bench or test station, or don't have a network switch nearby. This gives you a private one-to-one link with no other network traffic.
- Plug an Ethernet cable directly from your computer to the camera
- Set your computer's IP address to something in the same subnet as the camera (e.g.,
10.250.0.50if the camera is at10.250.0.100)
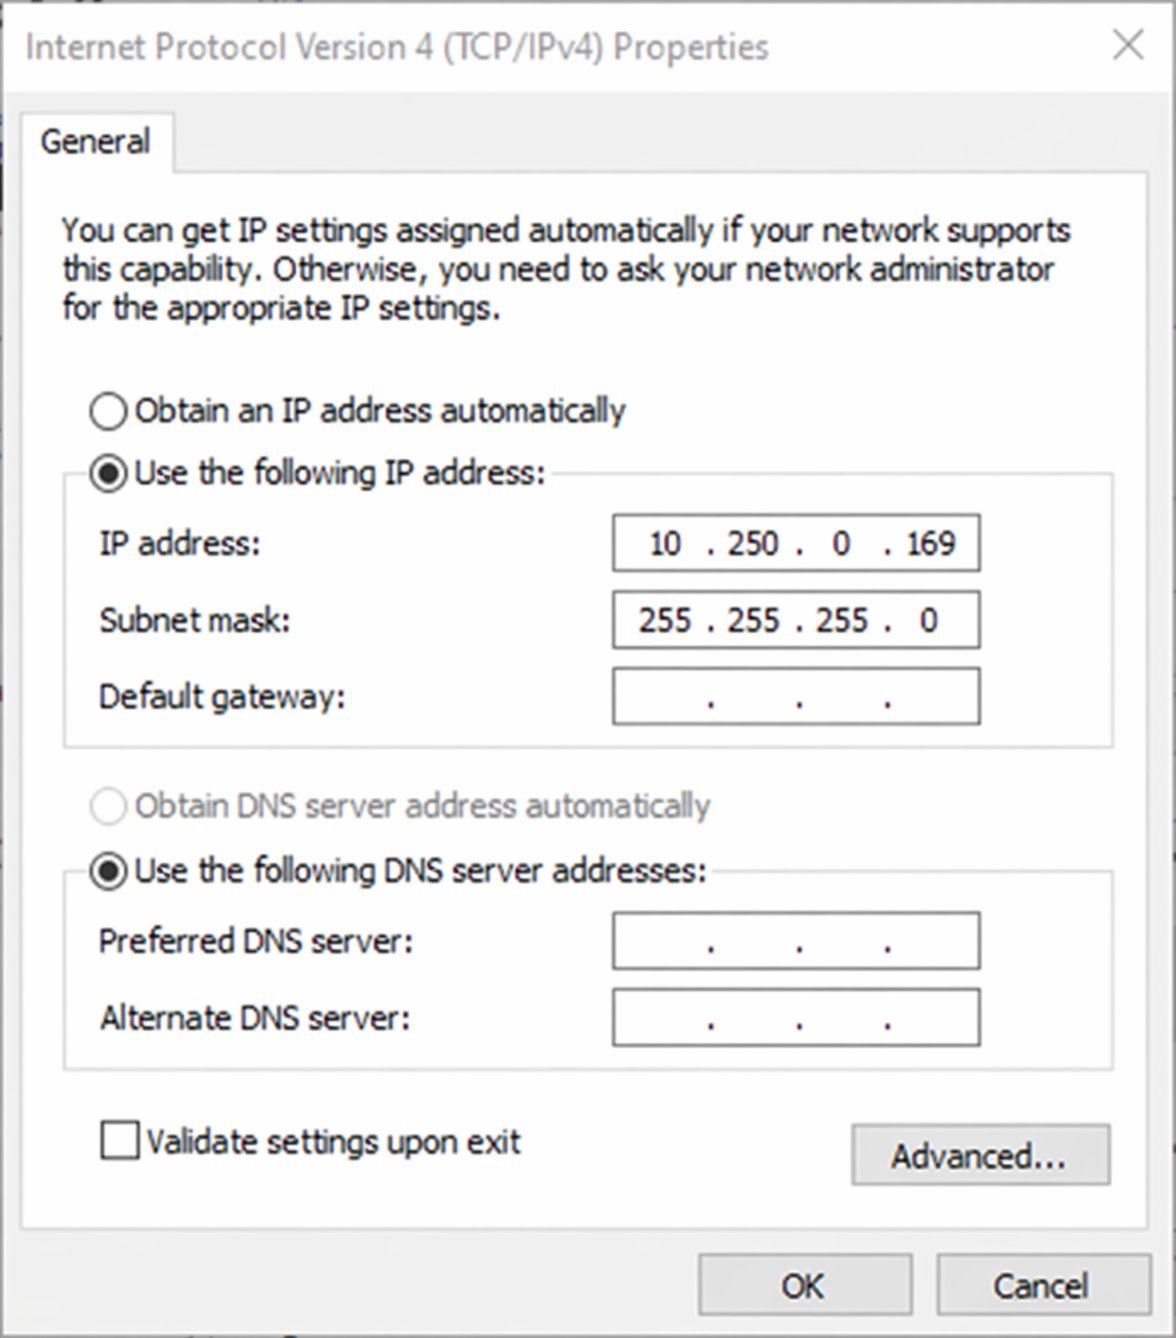
Windows: Open Network Connections, right-click your Ethernet adapter, select Properties, then set the IPv4 address:
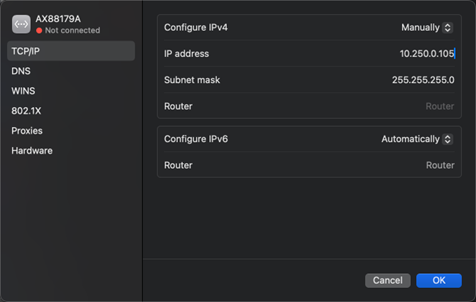
Mac: Open System Preferences > Network, select your Ethernet adapter, set Configure IPv4 to "Manually":
Option B: Through a network switch
Best when the camera is already installed on the production line, when multiple people need to access the camera at the same time, or when you want the camera to stay connected to your facility network.
- Connect both the camera and your computer to the same switch
- Make sure they're on the same subnet (10.250.0.X)
The OV80i ships with a default static IP of 10.250.0.100. If your network uses DHCP, the camera can also obtain an IP automatically, but for first-time setup, using the default static IP is easiest.
The OV80i also has an HDMI output for connecting directly to a monitor (1920x1080). This is useful for on-site verification without a networked computer. Simply connect an HDMI cable from the camera to your monitor.
Step 2: Find the camera's IP address
If you're using the default setup, the camera is at 10.250.0.100.
If the IP has changed or you're using DHCP, you can find it by:
- Checking your network's DHCP lease table
- Using a network scanner tool
- Looking at the camera's LED pattern (refer to the LED Behavior Matrix in Reference)
Step 3: Open the browser
Open Google Chrome (recommended) or Microsoft Edge and navigate to:
http://10.250.0.100
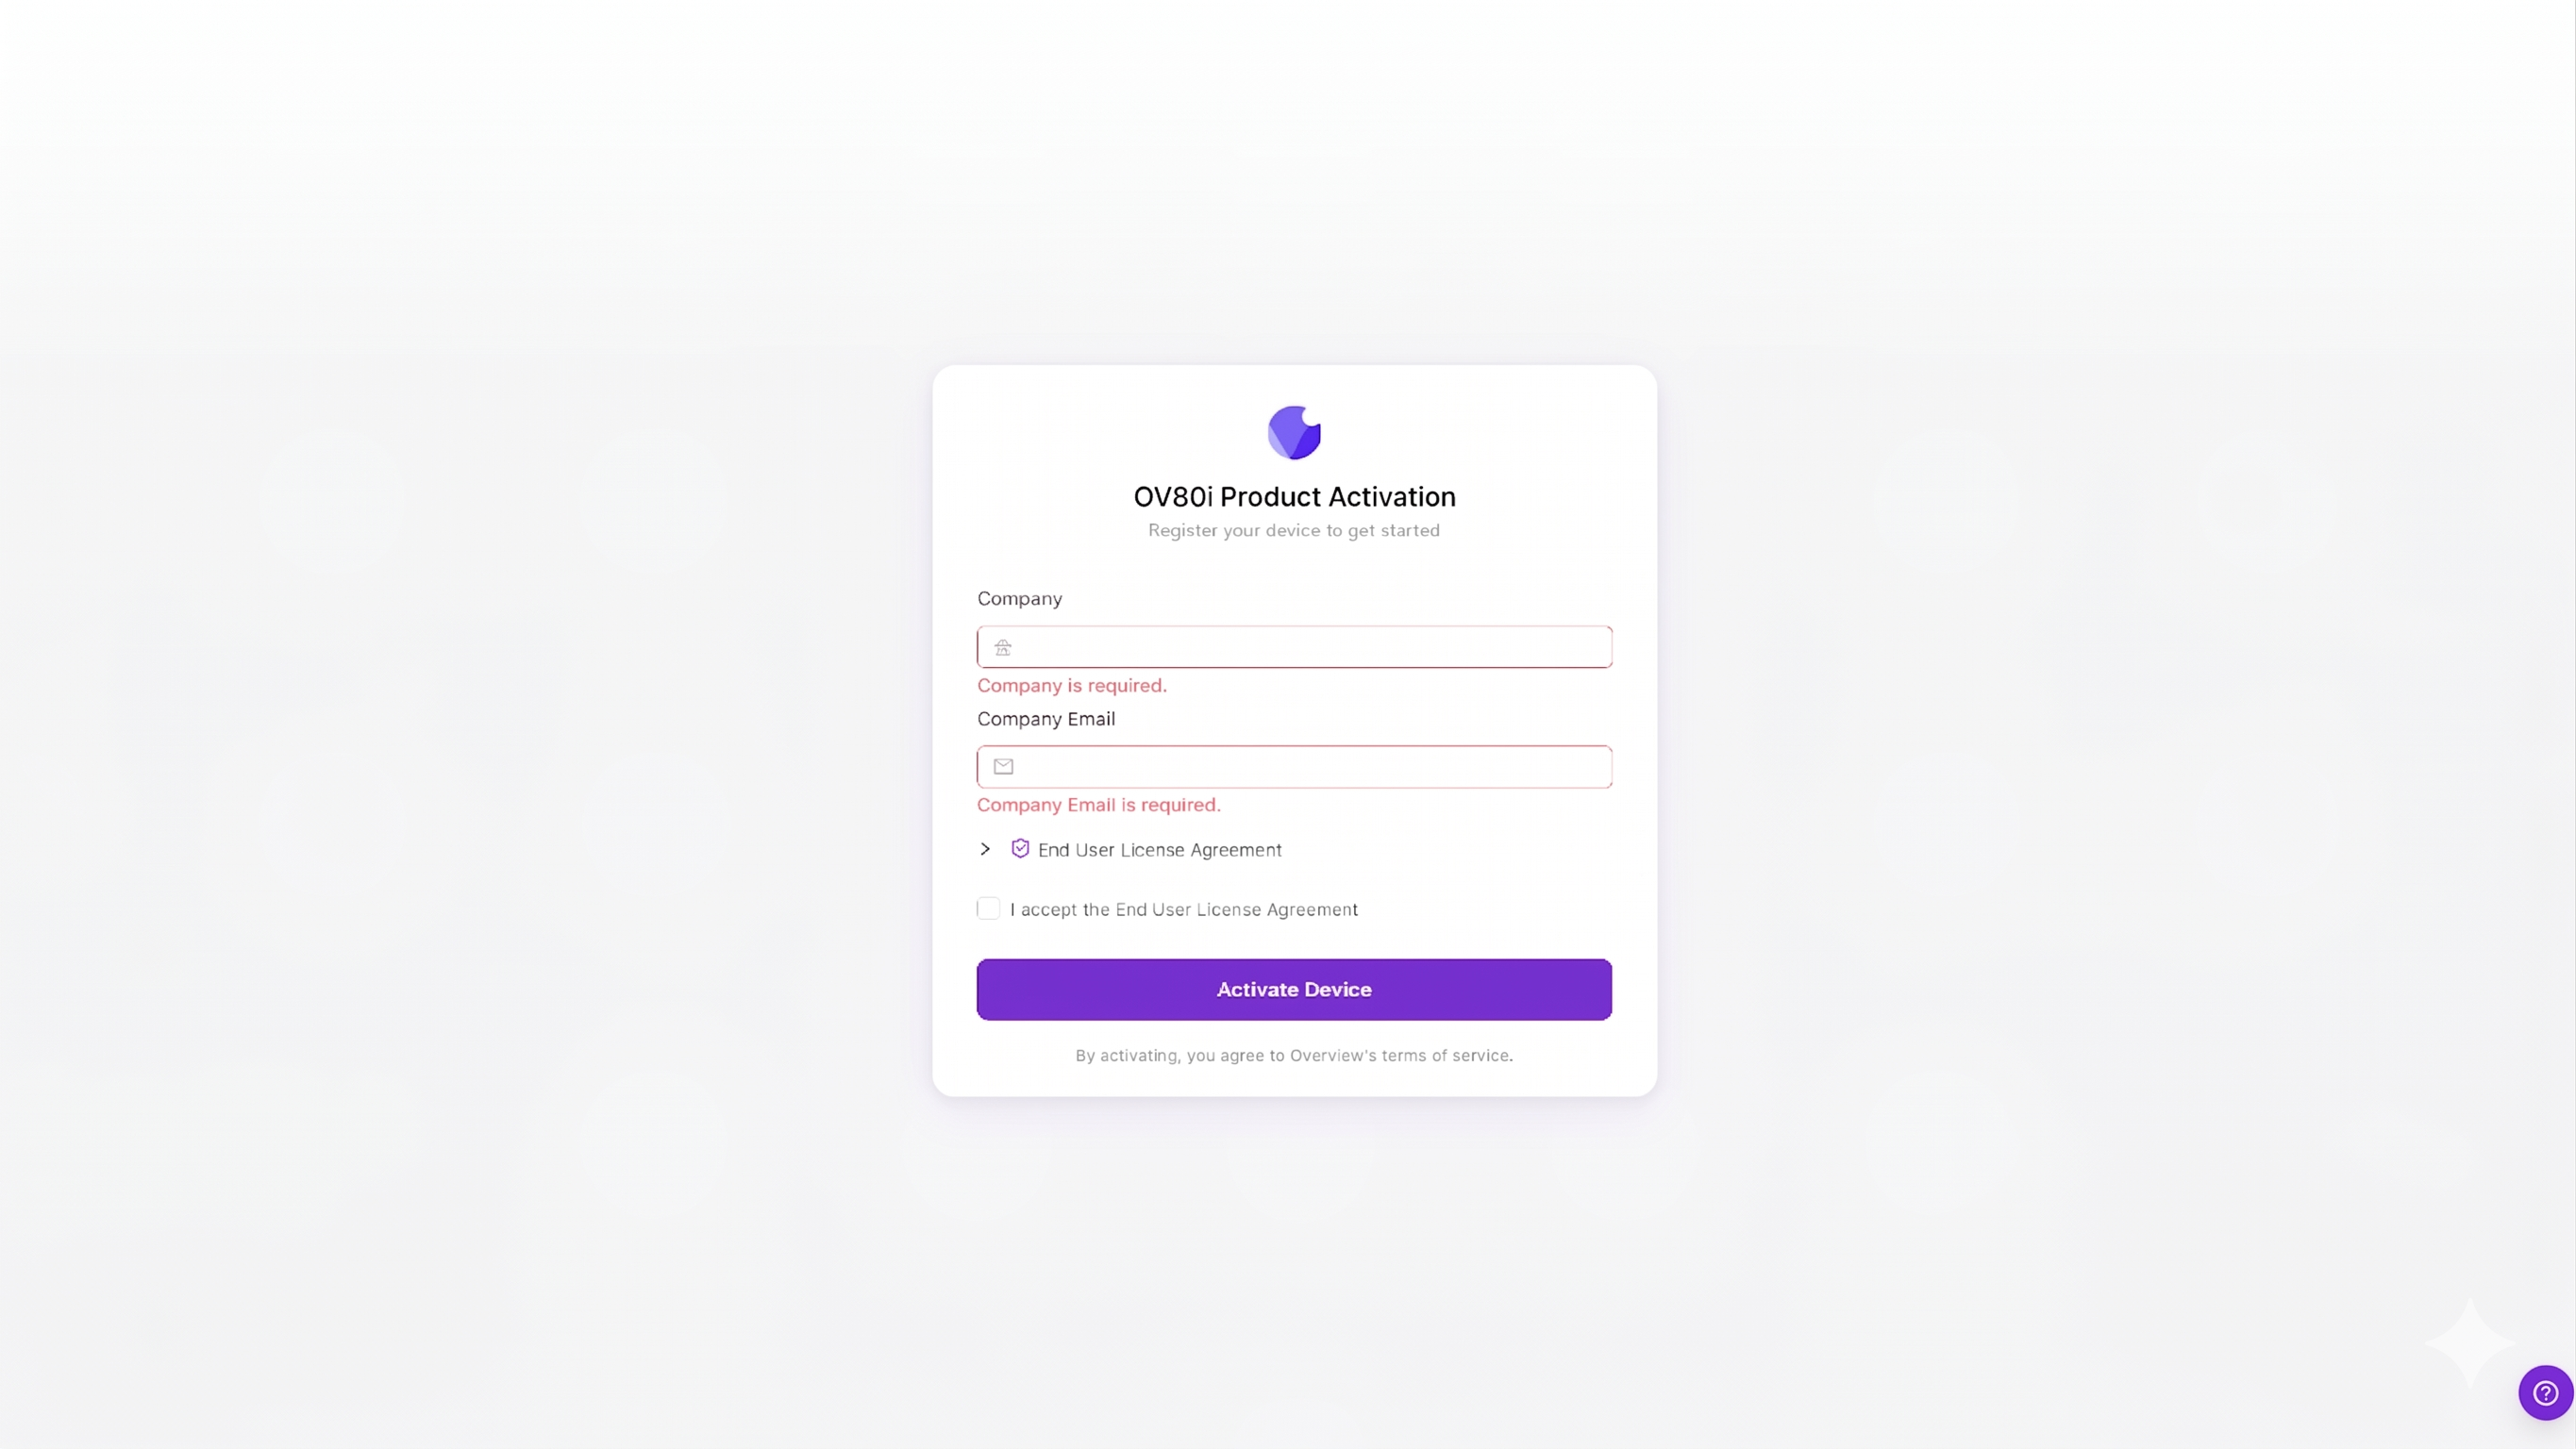
If this is a new camera, you will see the Product Activation page.
Supported browsers: Chrome (recommended), Edge, or Safari. Firefox is not supported and may cause UI or functionality issues.
Step 4: Activate the device
On first connection, the camera shows the Product Activation page. Complete the following to activate your device:
- Enter your Company name
- Enter your Company Email address
- Expand and review the End User License Agreement
- Check the box to accept the End User License Agreement
- Click Activate Device
Once activated, you will see the camera's All Recipes page with a navigation sidebar on the left.
The camera runs entirely on your local network. You don't need internet access for activation, configuration, recipe creation, or running inspections.
Step 5: Activate a recipe
To start working with the camera, you need an active recipe. If you already have one, click Activate on it. If this is a fresh camera, click + New to create your first recipe.
Once a recipe is active, click Edit to open the Recipe Editor. This is where you'll configure image settings, alignment, regions of interest (ROIs), and AI training.
Next step: Head to Step 1: Image Settings to configure your camera's live image and verify everything looks right.
Troubleshooting connection issues
Common connection problems and fixes
| Problem | What to try |
|---|---|
| Can't reach camera IP | Verify your computer is on the same subnet (10.250.0.X). Try pinging ping 10.250.0.100 |
| Page loads but no image | Camera may still be booting. Wait 30 seconds and refresh |
| Page won't load at all | Try a different browser (Chrome recommended). Clear cache |
| Image is black | Check nothing is obstructing the lens. Verify external lighting is on |
If you can't reach the camera over Ethernet, you can connect via USB. The emergency USB IP is 192.168.55.1.
For more detailed network troubleshooting, see Troubleshooting & FAQ.
Connection checklist
- Browser connects to camera IP (10.250.0.100)
- All Recipes page loads
- Recipe activated and Recipe Editor open
You're connected! Next up: Step 1: Image Settings to dial in your camera's image.