AI-POWERED DOCS
What do you want to know?
AI Aligner (Deep Learning)
The AI Aligner is a new alignment method that learns the visual features of your part directly from the template, instead of relying only on edges. It solves the same problem as the Classical Aligner, keep every downstream inspection seeing the part from the same perspective, but it works on parts the classical aligner struggles with: textured surfaces, parts that change color or lighting, and parts where edges are soft or inconsistent.
When you open the Template Image and Alignment step of the Recipe Editor, you can now pick either aligner per recipe.
The AI Aligner is the first release of a deep-learning-based alignment pipeline on the camera. The Classical (edge-based) Aligner is still available and is still the right choice for many inspections, see the decision matrix below.
Learning objectives
By the end of this page you will be able to:
- Decide when AI Aligner is the right fit versus the Classical Aligner
- Configure the AI Aligner with the correct Performance Mode, Sensitivity, and Confidence Threshold
- Set up a robust template for a textured part
- Recognize the failure modes and recover with the right configuration (or by falling back to classical)
Unlike the AI blocks further down the recipe (classification, segmentation, measurement), the AI Aligner uses a fully pre-trained, general-purpose feature matcher. You do not need to collect a dataset or label anything, just capture a template and go.
When to use AI vs Classical
| Use case | Classical | AI (Deep Learning) |
|---|---|---|
| Rich texture (text, PCB traces, keyboards, logos) | OK | Best choice |
| Flat / textureless surfaces (blank plastic, smooth metal) | Best choice | Poor, focuses on non-existent inner texture |
| Parts defined mainly by their outline / edges | Best choice | Poor |
| Parts whose color or lighting varies (painted doors, multi-color batches) | Can fail | Best choice |
| In-plane rotation | 360° supported | Up to ~45° only |
| Out-of-plane tilt / perspective shift | Best choice | Poor |
| Partial occlusion (part half-blocked by fixture) | Can fail | Robust |
| Parts at varying distance from camera | Good (scale mode) | Native, scale invariance built in |
| Specular reflections / mirror-like parts | Poor | Poor, hot spots fool the matcher |
| Repeating patterns (fabric, mesh, grids) | Varies | Poor, matcher can't disambiguate identical points |
| Cycle time | Fastest | ~70–200 ms depending on mode |
The pre-trained models behind the AI Aligner were built for landscape photography, they have never seen an upside-down office building. For your part, that means rotations beyond roughly 45° will not align. If your part can rotate 360° on the conveyor, use the Classical Aligner.
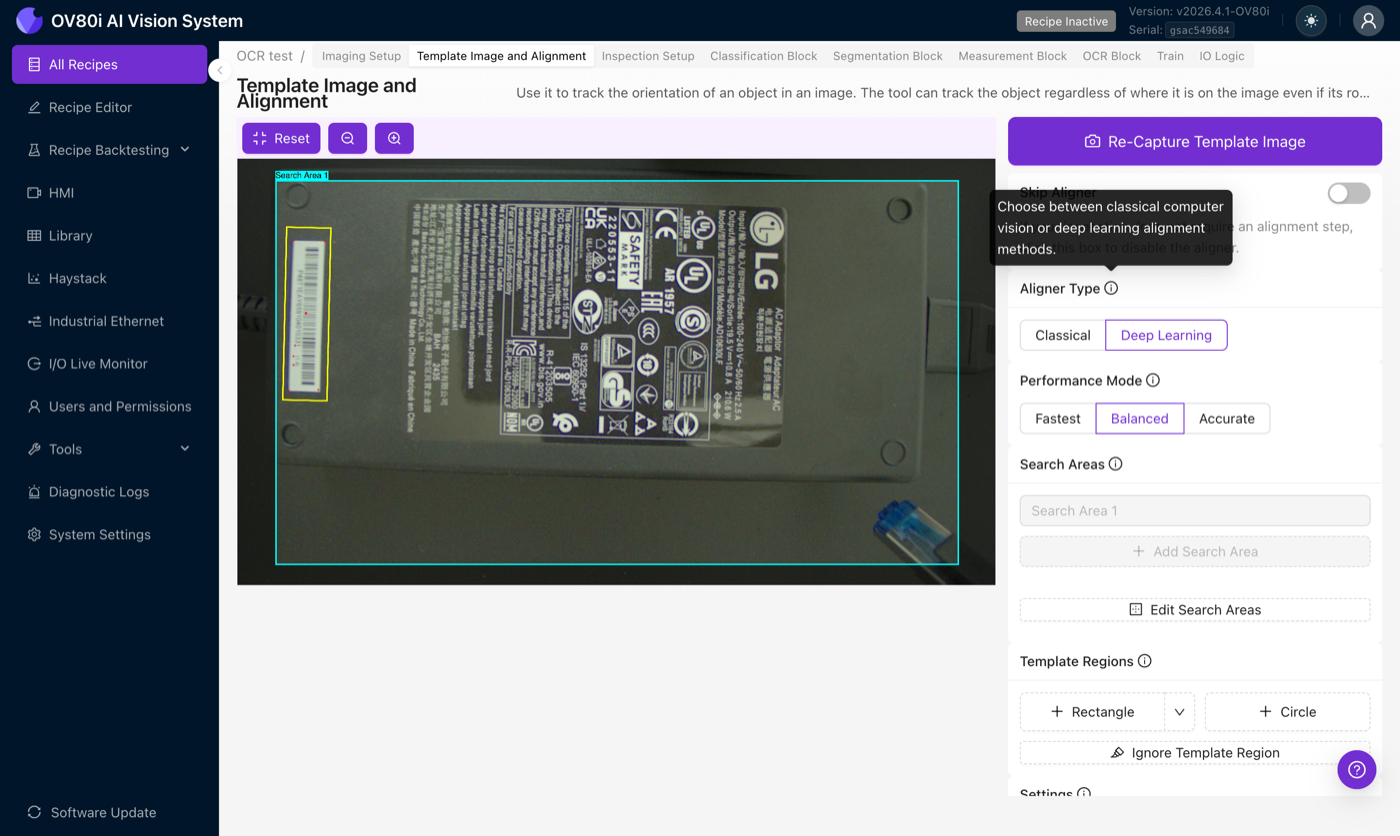
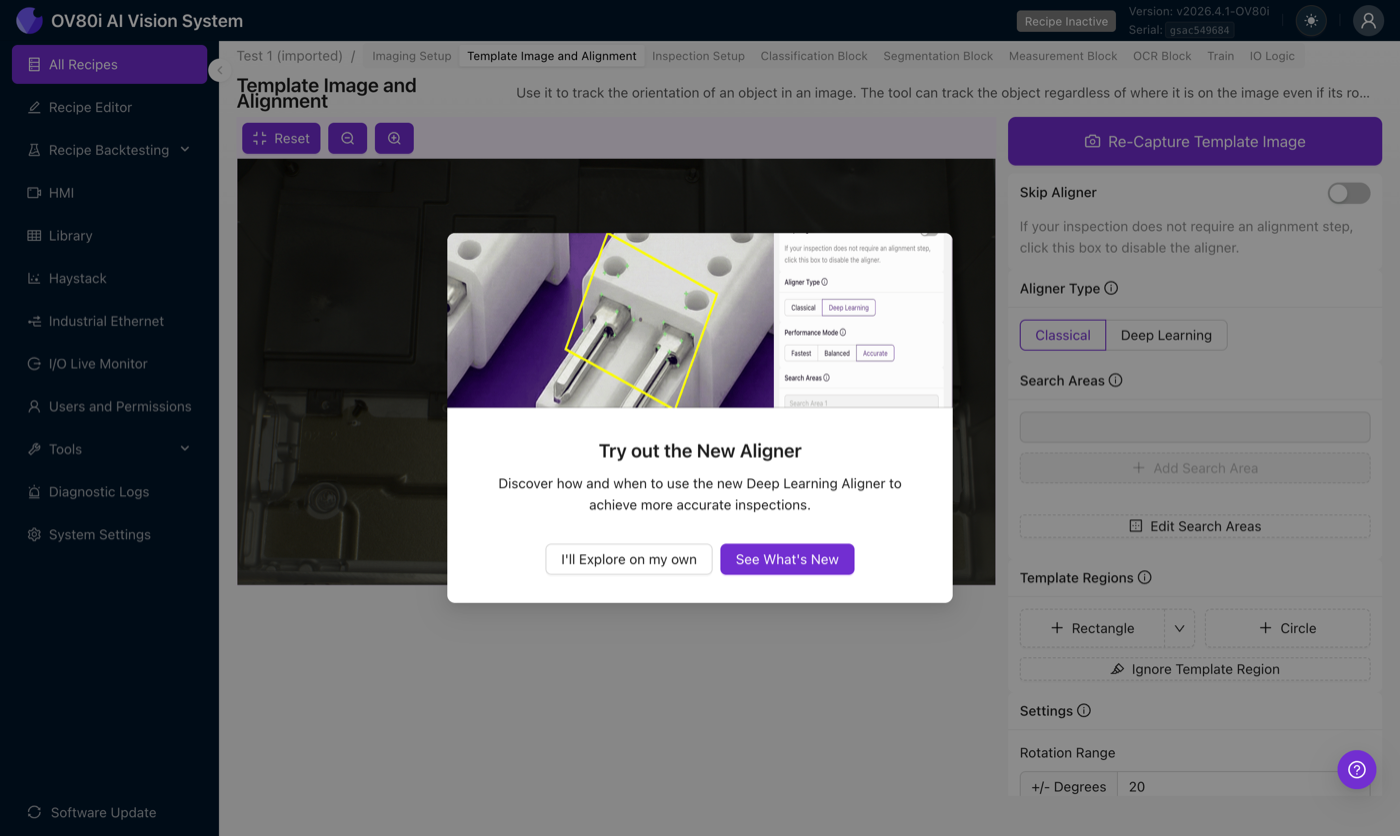
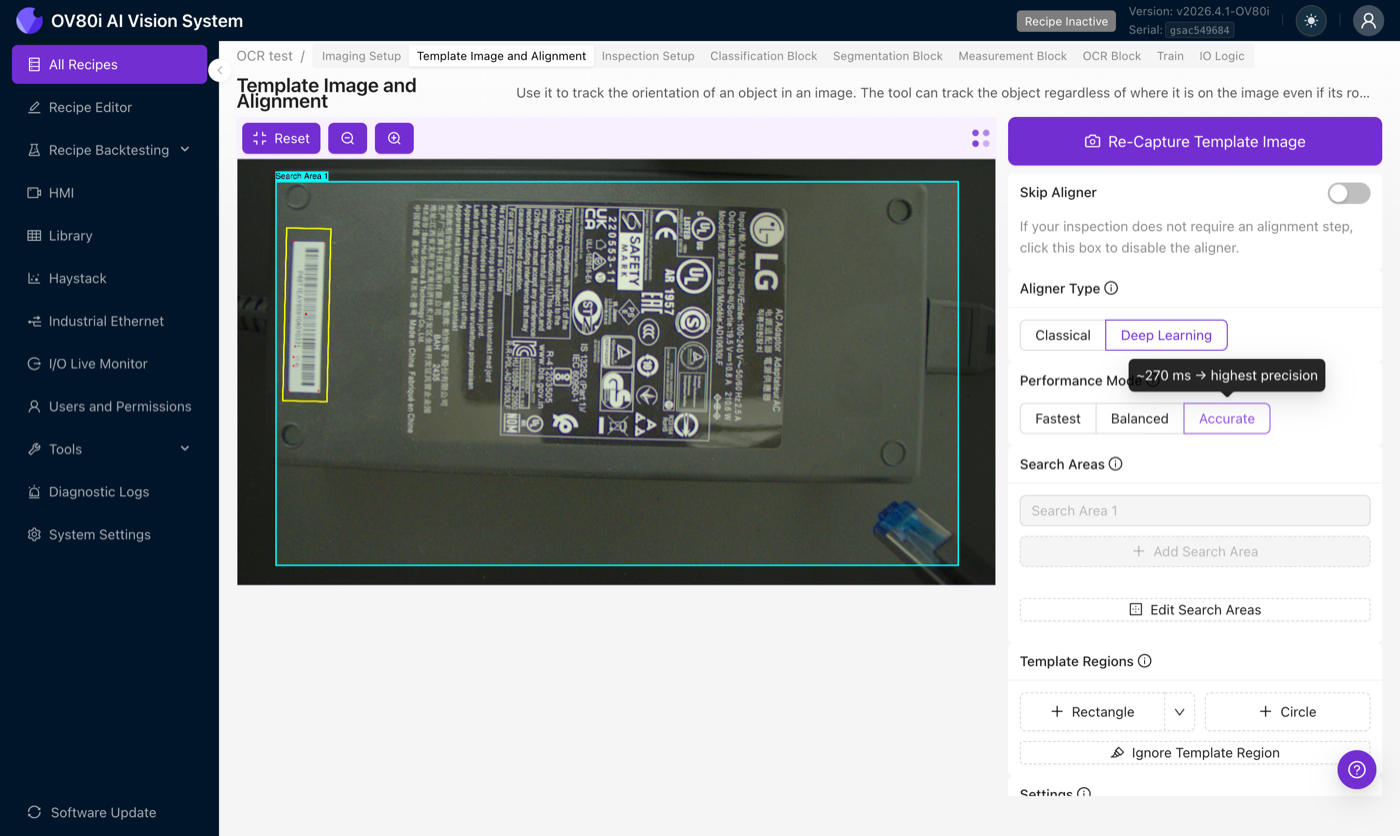
Switch to the AI Aligner
In the Template Image and Alignment step of the Recipe Editor, find the Aligner Type radio group and choose Deep Learning. The first time you open this screen you will see an onboarding tour introducing the new aligner:
As soon as Deep Learning is selected, the rotation-range numeric input is disabled and a Performance Mode selector appears. The aligner now uses its own scale-handling pipeline, so rotation and scale are no longer configured numerically on this screen.
Performance modes
The matching step (LightGlue) scales quadratically with keypoint count, doubling the number of keypoints roughly quadruples the compute. Three presets tune the number of keypoints and the processing resolution:
| Mode | Keypoints | Image resolution | LightGlue layers | Inference time |
|---|---|---|---|---|
| Fastest | 256 | 1/4 downscale | 3 | ~70 ms |
| Balanced | 256 | 1/2 downscale | 3 | ~150 ms |
| Accurate | 512 | 1/2 downscale | 3 | ~270 ms |
Inference times are measured on the Jetson Orin GPU with TensorRT. Both stages scale with keypoint count, which is why Accurate doubles the keypoints and the time.
Fastest
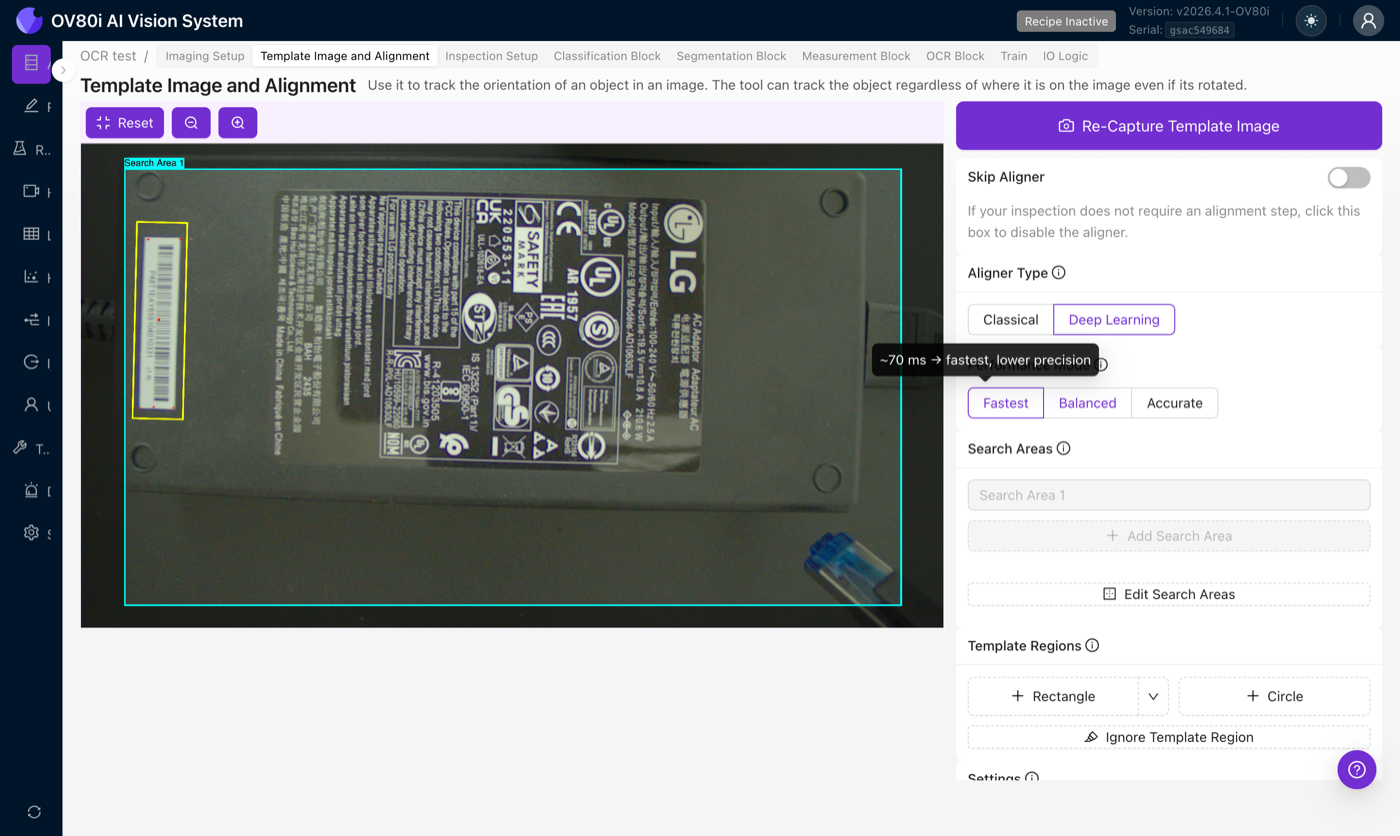
Lowest resolution and fewest keypoints. Inference time: ~70 ms. Start here. For a surprising number of recipes this is all you need, and it saves cycle time for the rest of the pipeline.
Balanced
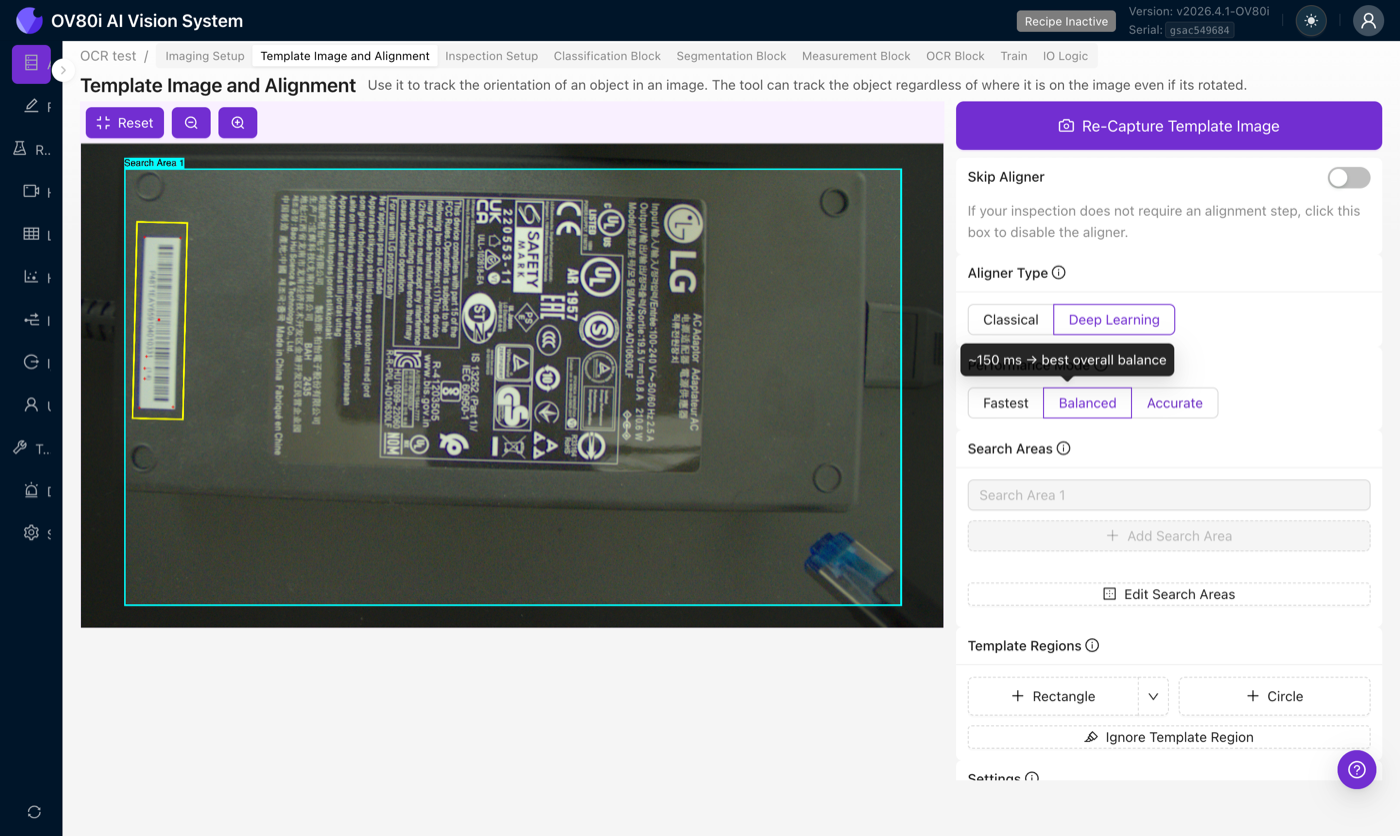
Higher resolution, modest keypoint count. Inference time: ~150 ms. The sweet spot when Fastest isn't quite locking in but you still care about cycle time.
Accurate
Highest resolution and densest keypoint distribution. Inference time: ~270 ms. Use for the trickiest alignments where you're willing to pay the latency.
Adriano's rule of thumb: start with Fastest, run Live Preview, and only bump to Balanced or Accurate if the match isn't stable. The reverse (start Accurate, hope to turn it down later) tends to hide instability that Fastest would expose immediately.
Settings
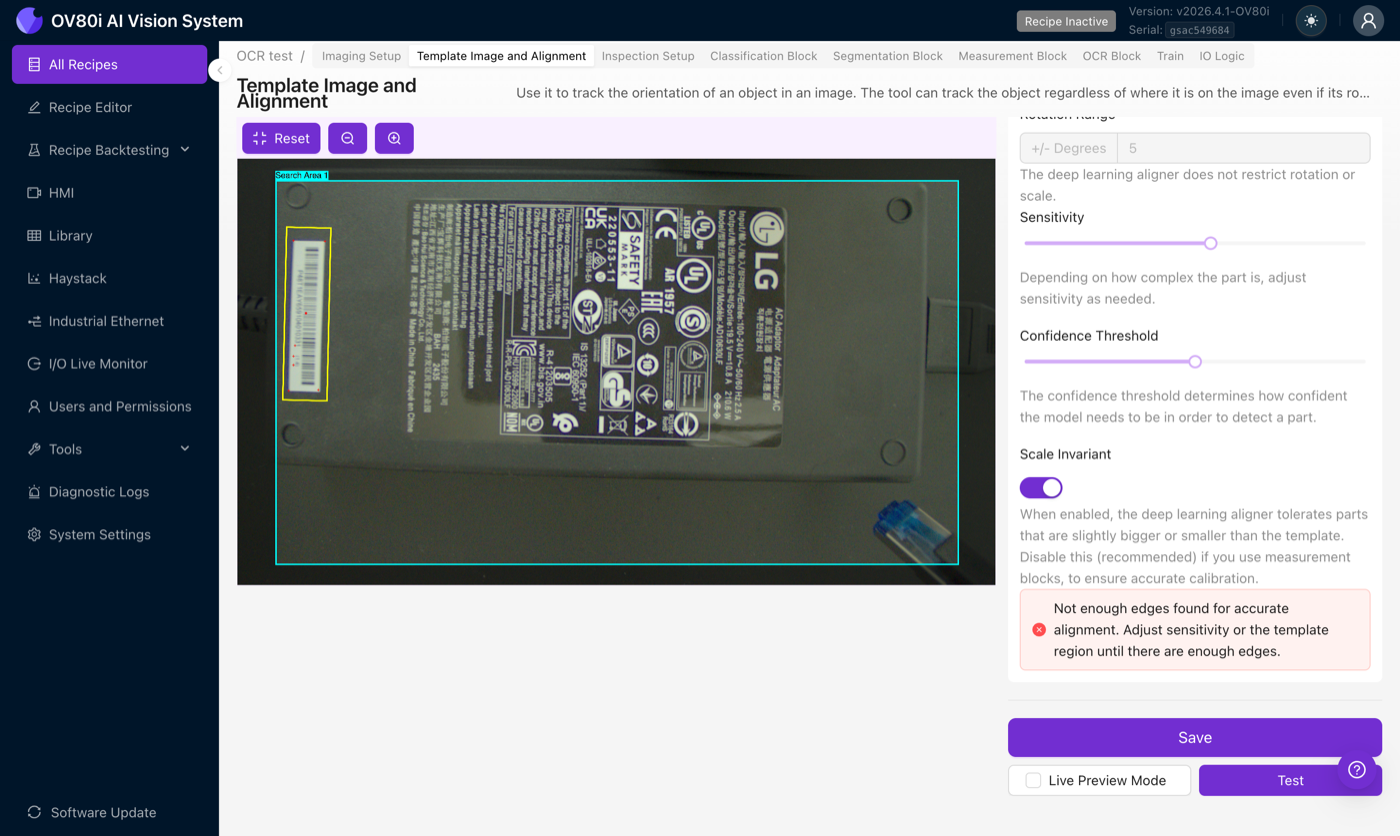
Rotation Range
Disabled when Deep Learning is selected, the AI Aligner does not restrict rotation (within its ~45° working window) or scale. The greyed-out field is a visual reminder that this setting only applies to the Classical Aligner.
Sensitivity
A 0–2 slider that controls how many keypoints the feature extractor picks up on the template. Higher sensitivity means more keypoints, including some noisy ones; lower sensitivity keeps only the strongest points.
- Raise sensitivity for parts with few distinctive features (smooth parts with a couple of markings, logos on flat backgrounds). Starting around 1.3–1.5 is common, higher than you'd use on the Classical Aligner.
- Lower sensitivity if the matcher keeps anchoring to background noise or lint/dust specks on your fixture.
Confidence Threshold
A 0–1 slider that sets the minimum match confidence required before the aligner reports a successful alignment.
The AI Aligner naturally produces lower confidence values than the Classical Aligner. An 80% confidence on Classical is a very strong match; 80% confidence on AI is rare. When switching to AI, lower your confidence threshold accordingly, a default around 0.5 is more appropriate than whatever you had on Classical. Compare confidence values only within the same aligner, on the same inspection.
Scale Invariant
When on, the aligner tolerates parts that are slightly closer or farther from the camera than the template. When off, the aligner expects the part at the same distance every time.
Measurement blocks rely on a pixel-to-physical-unit calibration. If the aligner rescales the frame, that calibration is no longer accurate. Keep Scale Invariant off on any recipe that feeds a measurement block.
Template best practices
The template decides what the matcher can and cannot recognize. Spend time here, a better template is a better aligner. Follow this four-step checklist every time you capture:
- Capture with the part well-lit and in focus. No motion blur, no hot spots. Blur destroys keypoint repeatability.
- Include distinctive features. Text, edges, joints, stamped markings, sticker patterns, anything that looks unlike the rest of the image. Avoid blank areas.
- Check the debug overlay. You want at least 10 healthy keypoints on the part. Below that and the matcher has too little to work with.
- Raise the Confidence Threshold until false positives stop. Start at the default and ratchet up until the aligner stops reporting spurious matches on empty frames or wrong parts.
Other guidance:
- Fill the frame with the part. AI Aligner performs best when the template covers most of the capture, not a tiny patch of it. A 1:1 relationship between template and incoming frame is ideal.
- Use ignore regions sparingly. The Classical Aligner is sensitive to background noise and benefits from tight ignore regions; the AI Aligner is mostly robust to stray background points. Only add ignore regions if a specific area of the background is consistently confusing the matcher (repeating patterns, glare hotspots).
If you change the lens, adjust zoom, swap lighting, or modify any imaging setting, retake the template. The keypoints are anchored to pixel-level appearance, and any of those changes will shift where features land in the frame.
When a tight template on a small landmark isn't locking in reliably, try the opposite: delete the template and draw a new one that covers the entire part (right up to where the part meets the background). Do not add ignore regions. This gives the AI Aligner the maximum number of keypoints to work with and often locks in where a small template failed. This is the opposite of Classical advice, use it deliberately for the AI path.
Failure modes and what to do
Quick field reference, the four most common failures and what to try first.
| Symptom | What's happening | First thing to try |
|---|---|---|
| No match (aligner reports failure on parts that look fine) | Debug overlay shows fewer than 5 keypoints on the part | Raise Sensitivity, or switch to Balanced / Accurate mode. If the part is textureless, switch to Classical. |
| Wrong position (alignment locks but to the wrong spot) | Part is arriving rotated beyond the angle tolerance | Widen angle tolerance, or switch to Classical if rotation can exceed ~30°. |
| Slow cycle time | Accurate mode is running but the part doesn't need that density | Drop to Fastest, or shrink the search area. |
| Intermittent failures (works sometimes, fails others) | Affine matrix shows unrealistic shear or scale in the debug view | Raise Confidence Threshold, re-capture template under controlled lighting, or look for vibration / motion blur. |
Other situations:
- Confidence is much lower than your old Classical threshold was. Expected, AI produces lower confidence values. Compare within the AI aligner, not across aligner types.
- Specular reflections on a metallic part shift the alignment. Hot spots act as stationary keypoints and pull alignment off the part. Adjust lighting to eliminate hot spots, or use Classical if lighting can't be fixed.
- Repeating pattern (fabric, mesh, pin rows), alignment is unstable. The matcher can't disambiguate look-alike points. Neither aligner is great here; Classical with tight anchors on non-repeating features is often best.
Once alignment is working, the debug overlay should show a dense cluster of confident green matches on the part, the affine matrix should have plausible translation and rotation values (no extreme shear or scale), and confidence should be stable across captures rather than spiking up and down.
Verify with Live Preview
After configuring the aligner, click Save, then turn on Live Preview Mode and trigger captures or move the part under the camera. Watch:
- Does the detected part position track the real part as it moves?
- Is the confidence value stable across captures, or does it spike and dip?
- When you occlude part of the object, does the aligner still lock in, or does it drift?
A stable match that holds under mild movement and partial occlusion is the signal you're looking for. Unstable matches are easier to diagnose now than in production.
Related articles
- Alignment, the fundamentals that apply to both aligners
- Aligner Troubleshooting
- Waterfall Principle
- Classifier vs. Segmenter