Essential System Configuration
This deep dive covers DHCP versus static IP strategies, configuration of static IP addresses, methods for locating a camera’s IP address, best practices for network architecture design in multi-camera deployments, configuration of essential production parameters (including time, security, and backups), and procedures for downloading and analyzing system logs for diagnostic purposes.
Learning Objectives
By the end of this deep dive, you will understand:
- DHCP vs Static IP strategies for different environments
- how to configure static IP addresses for production deployments
- methods to find cameras with unknown IP addresses
- how to configure critical production settings (time, security, backups)
- how to download and analyze system logs
- how to plan network architecture for multiple camera installations
DHCP vs Static IP Strategy
What is DHCP?
- Dynamic Host Configuration Protocol: Automatic IP address assignment
- How it works: Network router/server assigns IP addresses automatically
- Dynamic allocation: IP addresses can change when device restarts
- No manual configuration: Device requests IP, server provides available address
- Common in: Office networks, home networks, temporary setups
DHCP Use Cases
- Testing and temporary setups
- Quick demos and evaluations
- Networks with automatic IP management
- Office environments where network admin manages all IPs
What is Static IP?
- Fixed IP address: Manually assigned and never changes
- How it works: Administrator manually configures specific IP address on device
- Permanent assignment: IP address stays the same through restarts and power cycles
- Manual configuration required: Must set IP, subnet mask, gateway manually
- Common in: Production systems, servers, industrial equipment, PLCs
Static IP Use Cases
- Production environments (always recommended)
- PLC integration and industrial networks
- Multiple camera installations
- Systems with existing static IP schemes
- Production rule: Always use static IP to avoid network conflicts
Testing DHCP Configuration
DHCP Testing Procedure
- Change camera to DHCP mode in network settings
- Connect camera to internet switch or router with DHCP
- Restart the camera and wait for full startup
- Camera receives new IP from DHCP server automatically
Finding the New DHCP IP Address
Method 1: Micro USB Access
- Connect via micro USB (always available at
192.168.55.1) - Check network settings to see assigned DHCP IP
- No network configuration needed on your computer
Method 2: Remote Access Tools
- Tailscale or similar VPN: Access camera remotely if configured
- Router admin interface: Check DHCP client list
- Network scanning tools: Scan for new devices
What Happens If You Don't Know Camera IP Address?
Lost IP Address Scenarios
- Camera moved to different network
- DHCP assignment changed
- Static IP configuration forgotten
- Multiple cameras with unknown addresses
Solution 1: Micro USB Method (Always Works)
- Fixed IP address:
192.168.55.1(never changes) - No network adapter configuration required
- Direct USB connection to camera
- Access full interface to check network settings
- Benefit: Always have backup access method
Solution 2: Network Discovery Tools
Wireshark Network Analysis:
- Capture network traffic to identify camera communications
- Filter by MAC address (if known from label)
- Monitor DHCP requests and responses
- Professional network troubleshooting capability
IP Planning for Multiple Cameras
Network Architecture Planning
Conflict Avoidance:
- Each camera needs unique IP address
- Plan IP ranges before installation
- Document assignments in network table
Network Segmentation Benefits:
- Separate camera traffic from office network
- Improved security through isolation
- Better performance with dedicated bandwidth
- Easier troubleshooting and maintenance
Example Production Network Schemes
Scheme 1: Function-Based Segmentation
- Production cameras:
10.250.0.100-120 - Quality cameras:
10.250.0.150-170 - Control systems:
10.250.2.Xnetwork - Office network:
10.250.10.Xnetwork
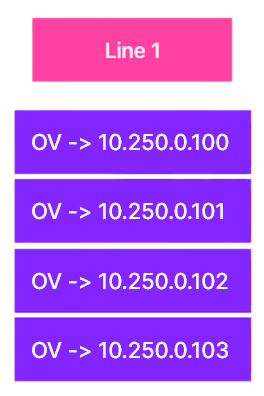
Scheme 2: Line-Based Segmentation
- Line 1 cameras:
10.250.0.100-110 - Line 2 cameras:
10.250.0.120-130 - Line 3 cameras:
10.250.0.140-150 - Infrastructure:
10.250.0.200-220
Time and Date Configuration
NTP Synchronization Setup
Network Time Protocol Benefits:
- Essential for traceability: Accurate timestamps on all inspections
- Automatic time synchronization: No manual time adjustments needed
- Timezone settings: Match production shift schedules
- Backup time source: Configure secondary NTP server for reliability
Configuration Steps:
- Primary NTP server: Use company NTP server or public servers
- Timezone selection: Set correct timezone for production location
- Sync frequency: Automatic synchronization intervals
- Time validation: Verify accurate time display
System Backup and Diagnostics
Backup Strategy and Components
Critical Backup Items:
- Recipe configurations: All AI models and inspection settings
- Node-RED flows: Custom automation logic and workflows
- System settings: Network, security, and user configurations
- Calibration data: Camera-specific settings and alignments
Backup Procedures:
- Automated exports: Schedule regular backup operations
- Version control: Track configuration changes over time
- Remote storage: Backup to network location or external systems
- Restoration testing: Verify backup integrity and restoration procedures
System Logs and Diagnostics
Log Categories:
- System events: Startup, shutdown, error conditions
- Inspection results: Pass/fail data with detailed timestamps
- Network activity: Communication logs and connectivity issues
- User actions: Configuration changes and access records
Log Management:
- Download capability: Export logs for offline analysis
- Log rotation: Automatic cleanup of old log files
- Remote monitoring: Integration with customer monitoring systems
- Troubleshooting: Use logs for systematic issue diagnosis