AI-POWERED DOCS
What do you want to know?
Classifier vs. Segmenter
This is the most common question when creating a recipe. Here's a clear framework.
For visual explanations with interactive simulators, diagrams, and a hands-on playground for each model type, see:
- Understanding Classifier — how Types, Classes, and ROIs nest; a live classifier playground
- Understanding Segmenter — pixel-level masks, palettes, counting and measurement; a paint-style segmenter playground
Classifier
A classifier looks at each ROI crop and assigns it to a category: pass, fail, present, absent, scratched, good, or whatever classes you define.
Think of it like sorting cards into piles. The AI looks at the whole crop and says "this goes in the pass pile" or "this goes in the fail pile."
Use a classifier when:
- You need pass/fail or multi-class decisions
- Your ROIs are small enough to clearly show the defect
- Labeling speed matters (classifiers are much faster to label)
- You're checking for presence/absence of a feature
- Examples: screw present/absent, connector seated/unseated, label correct/wrong
For a deeper walkthrough with the interactive playground, read Understanding Classifier.
Use the Defect Creator Studio to generate photorealistic synthetic defect images for either approach — describe the defect in plain English and get training-ready images in seconds.
Training Modes
Classification offers two distinct training approaches:
Fast Classifier
- Purpose: Quick setup and testing
- Use Case: Rapid prototyping and proof-of-concept
- Speed: Faster training time
- Accuracy: Lower precision
- Production Ready: Not recommended for production
Accurate/Production Classifier
- Purpose: Production-ready inspections
- Use Case: Final deployment and manufacturing
- Speed: Longer training time
- Accuracy: Higher precision
- Production Ready: Main training model for best results
Classification Examples from Production
Loose Nut Detection (OEM Assembly)
Task: Identify loose nuts in mechanical assemblies
Setup:
- ROI: Rectangle around nut area
- Classes:
- Good - Properly tightened nut (Pass 100%)
- Defect - Loose nut (Fail 98%)
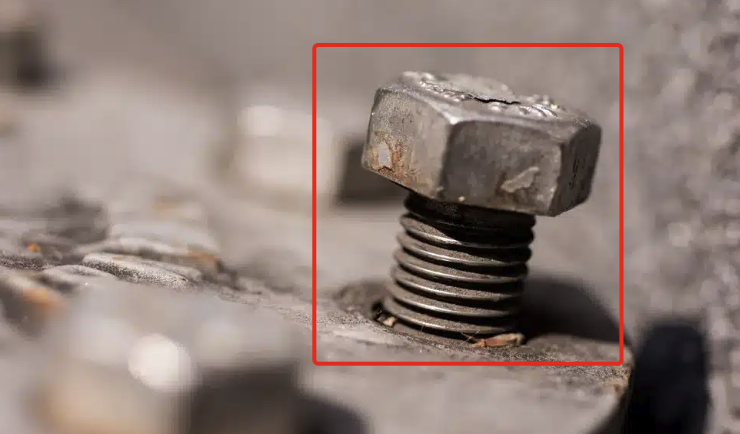
Result: Binary decision - nut is properly seated or loose
Shaft Seating Verification (OEM Assembly)
Task: Identify partially seated shafts
Setup:
- ROI: Rectangle covering shaft mounting area
- Classes:
- Good - Fully seated shaft
- Defect - Partially seated shaft
- Defect - Fully out shaft
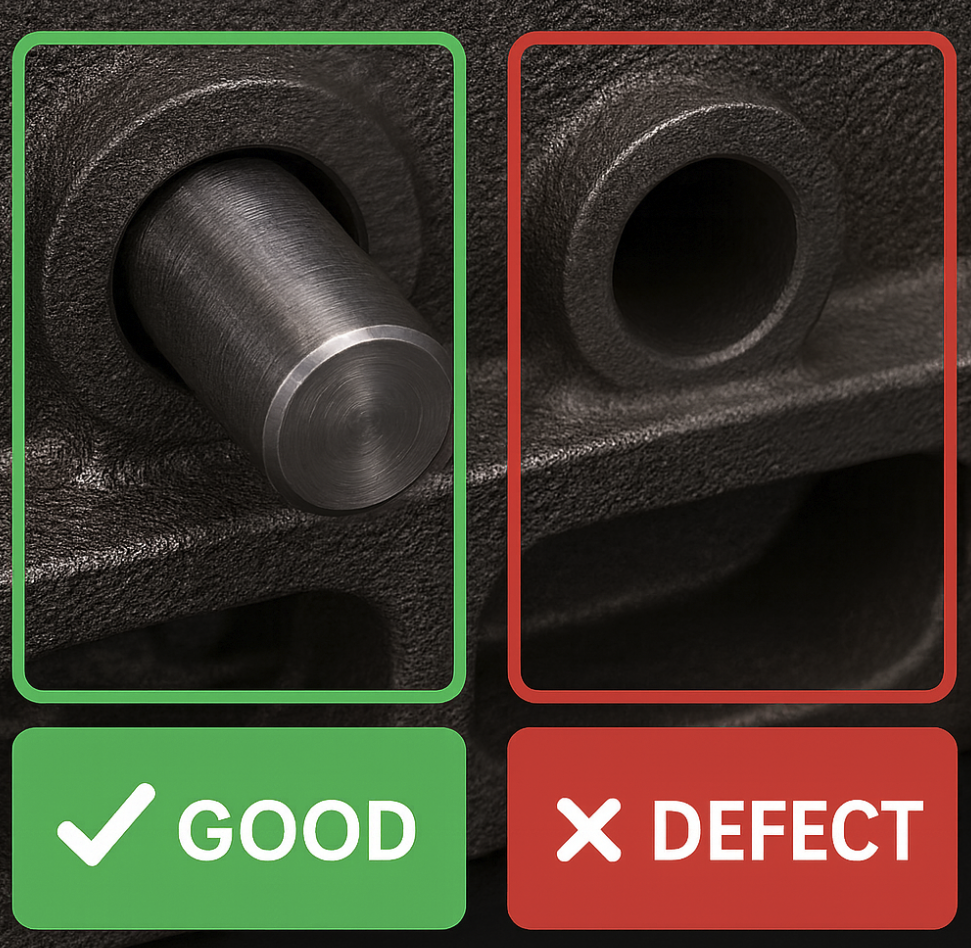
Result: Component gets categorized as properly installed or defective
Radiator Pin Inspection (T1 Supplier Fabrication)
Task: Check for dents in individual radiator pins
Setup:
- ROI: Rectangle covering radiator pin array
- Classes:
- Good - Undamaged pin (Straight)
- Defect - Bent/Damaged pins (Bent)
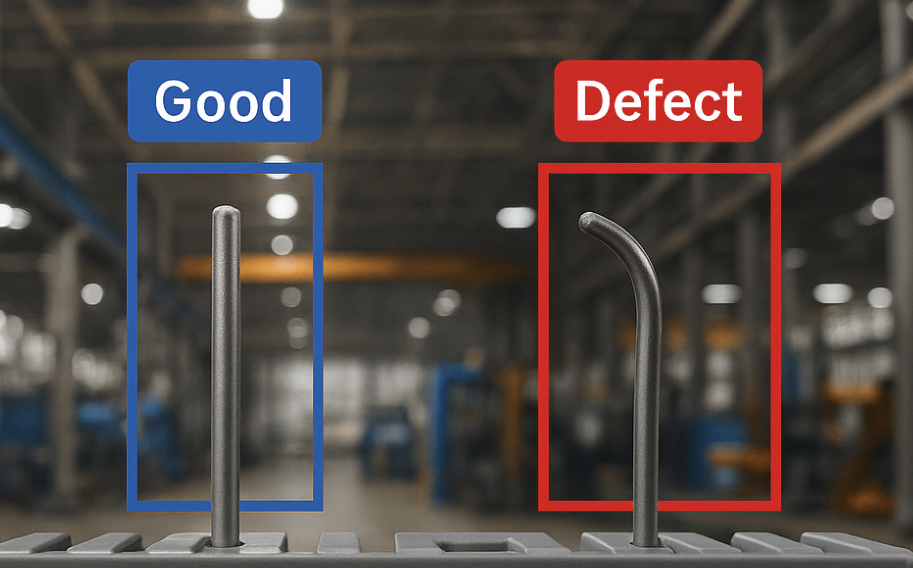
Result: Classifier differentiates a good and a bad pin
Segmenter
A segmenter examines each ROI crop at the pixel level and identifies exactly which pixels belong to a defect.
Think of it like highlighting with a marker. The AI circles exactly where the defect is, not just whether one exists.

Use a segmenter when:
- You need pixel-level defect localization (where exactly is the scratch?)
- You need to measure defect size or area
- Your ROIs need to be large but you're looking for small defects
- You need to count multiple defects in one region
- Examples: surface scratches, stains, cracks, weld quality, dimensional measurements
A segmenter only learns the size and texture of defects it was shown. Train it on small contaminants and a large piece of the same defect can come down the line with only its edges or scattered patches highlighted — the bulk of the defect goes unmasked. The fix is to include training examples that span the full range of defect sizes you expect. Don't have large-defect samples? Use the Defect Creator Studio to generate synthetic ones.
For a deeper walkthrough with the interactive playground, read Understanding Segmenter.
Training Mode
Segmentation uses a single training mode:
Accurate/Production Only
- Purpose: Production-ready pixel-level analysis
- Training: Single high-accuracy mode
- Speed: Longer training time for precise pixel classification
- Accuracy: High precision for detailed defect mapping
- Production Ready: Optimized for manufacturing environments
Segmentation Examples from Production
Surface Defect Detection (T1 Supplier Assembly)
Task: Identify glue spill
Setup:
- ROI: Rectangle around valve surface
- Pixel Classes:
- Glue (Yellow pixels)
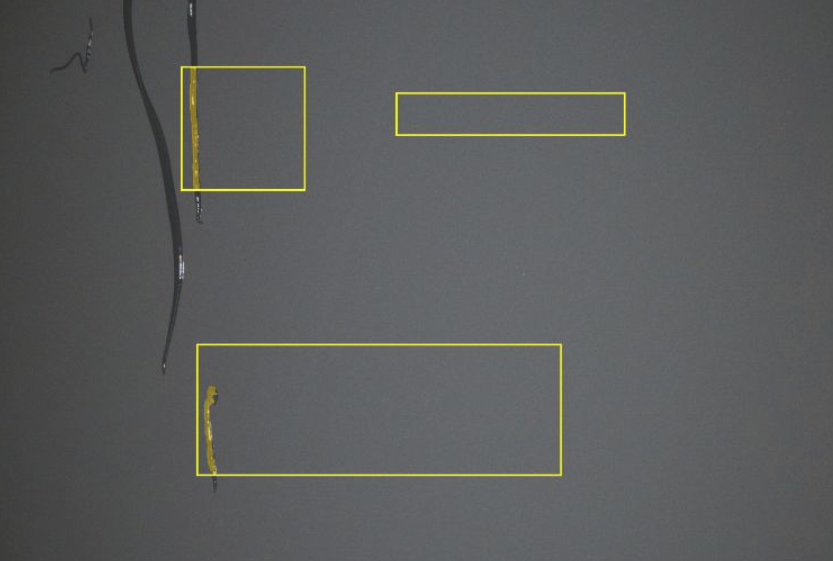
Result: Yellow highlights show exactly what the AI model detected as defects, with raw images shown for reference
Gap Size Measurement (T1 Supplier Assembly)
Task: Verify that the gap of the inspection is the right size
Setup:
- ROI: Rectangle around gap area
- Measurement Logic: Pass condition based on pixel area values
- Classes:
- Blue pixel teaching what distance looks like
- Good - Area < 100 pixels (Pass)
- Defect - Area > 100 pixels (Fail)
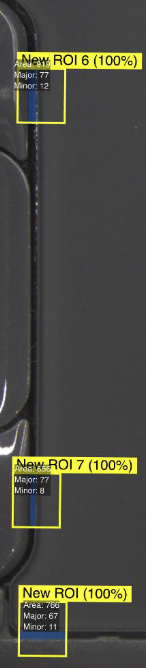
Result: Precise measurement of gap size with exact pixel count
Paint Splatter Detection
Task: Identify paint splatter on a surface
Setup:
- ROI: Rectangle around the region of interest (ROI)
- Pixel Classes:
- Yellow pixel to teach what paint looks like
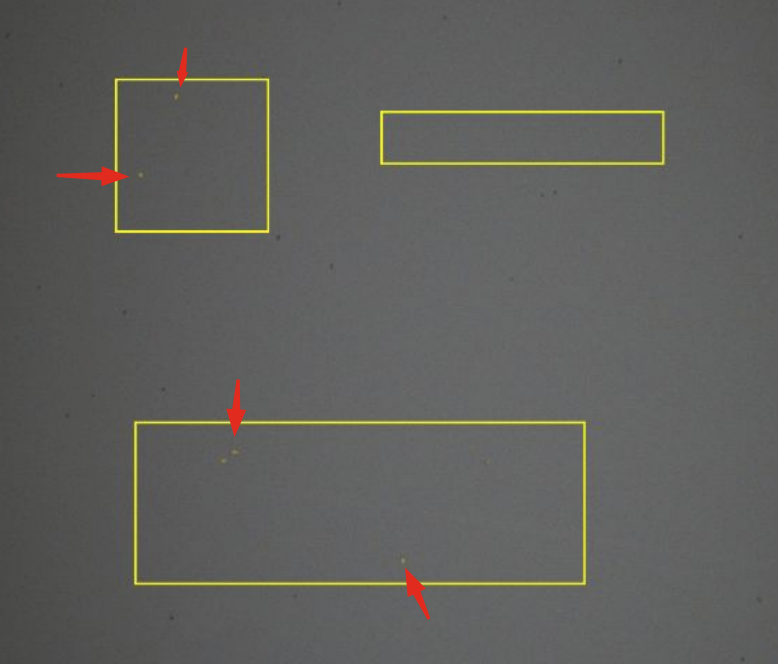
Result: Pixel-level detection of paint splatter
Inspecting Multiple Features Simultaneously
A segmenter can inspect multiple features at once by defining separate pixel classes. For example, you can train a single segmenter to detect scratches (class 1), dents (class 2), and stains (class 3) in the same ROI. Each class is trained independently by painting pixels of that defect type with a different label. The segmenter identifies all defect types in a single pass, reporting which pixels belong to which class.
This is different from classification, where the entire ROI gets a single label. With segmentation, multiple defect types can coexist in the same image and each gets its own pixel-level mask.
Comparison
| Aspect | Classifier | Segmenter |
|---|---|---|
| What it tells you | Category (pass/fail/etc.) | Exact pixels of the defect |
| Labeling effort | Low: select a class per image | High: paint defect pixels |
| Data needed | 10-15 images per class to start | Similar, but labeling takes longer |
| ROI size | Works best with small ROIs | Handles larger ROIs better |
| Best for | Presence/absence, category decisions | Scratches, stains, measurements, pixel-level detection |
Cycle Time Performance
| Model Type | Inspection Speed | Best Use Case |
|---|---|---|
| Segmentation | Fastest | High-speed production lines |
| Classification (Accurate) | Slower | Quality-critical inspections |
| Classification (Fast) | Medium | Testing and prototyping |
Segmentation models provide the fastest inspection cycle times, making them ideal for high-throughput production environments.
When to Choose Each Model
Choose Classification When:
- You need simple good/bad categorization
- The entire ROI can be labeled as one of several classes
- Overall condition assessment is sufficient
- Fixed defect locations are expected
- You want faster labeling during setup
Best for: Go/No-Go decisions, component presence/absence, overall quality assessment
Choose Segmentation When:
- Defects can appear anywhere in the inspection area
- You need to measure size or area of defects
- Multiple defect types may exist in one image
- Precise location mapping is required
- Fastest cycle times are critical for production
Best for: Surface defects, gap measurements, coverage verification, variable-location flaws
Classifiers are faster to set up, need fewer training images, and work well for most pass/fail inspections. You can always switch to a segmenter later if you need pixel-level detail. Starting simple lets you validate your setup quickly.
Segmenters need pixel-level annotation during labeling, which takes significantly longer than selecting a class for a classifier. Budget extra time for the initial setup and labeling compared to classifiers, especially if you have many training images.
Both classifiers and segmenters process ROI crops at a maximum resolution of 512x512 pixels. Any ROI larger than this gets downscaled before the AI processes it, which means small defects may become invisible. Keep your ROIs as small as possible to preserve detail, or use a segmenter with a larger ROI if you need to cover a wide area while still detecting fine defects.
The overlap zone
There's genuine overlap. Many inspections could work with either approach. If you're not sure:
- Start with a classifier. It's simpler to set up and faster to label
- If you find the classifier isn't precise enough (can't detect small defects in large areas, or you need measurement), switch to a segmenter
- Ask the AI Assistant at tools.overview.ai. Describe your application and it will recommend the best approach
Training Mode Summary
| Training Mode | Model Type | Production Ready | Notes |
|---|---|---|---|
| Fast Classifier | Classification | No | Quick setup for testing and prototyping |
| Accurate Classifier | Classification | Yes | Production-ready with higher precision |
| Accurate Segmenter | Segmentation | Yes | Single high-precision mode optimized for production |
OV20i vs OV80i
- OV20i: Choose one per recipe, either a classifier or a segmenter
- OV80i: Multi-model support. Run a classifier and a segmenter simultaneously on the same capture within a single recipe. For example, use a classifier ROI to check component presence (pass/fail) while a segmenter ROI detects surface defects on the same part. Both models run on every trigger and produce independent results.