AI-POWERED DOCS
What do you want to know?
Improving Your Model Over Time
Your inspection is deployed. Now how do you keep it performing well as conditions change, new defect types appear, or specs evolve?
The Library: Your continuous improvement tool
Every capture the camera takes gets saved in the Library, along with the AI's prediction and confidence score. This is your gold mine for improvement.
Find what the AI got wrong
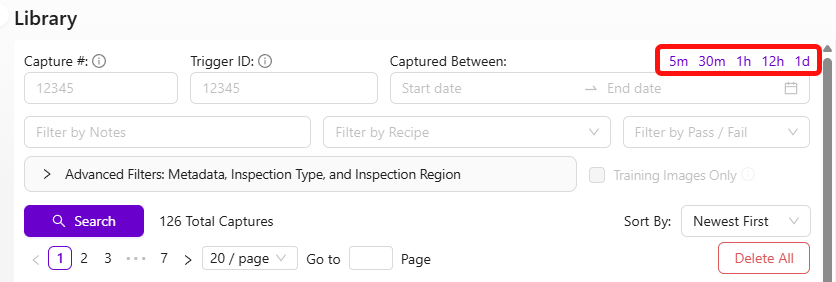
- Go to the Library
- Browse recent captures
- Look for two things:
- Misses: images where the AI's prediction is clearly wrong (checkbox in the top left of each thumbnail)
- Low-confidence predictions: scroll down on any image to see confidence values. Low confidence = the AI was unsure
In a small dataset, a single wrong label has an outsized impact. With only 5 training images, one mislabel corrupts 20% of your data. Always double-check every label before retraining, especially when your dataset is small.
Retrain with targeted data
- Select the images the AI got wrong or was unsure about
- Click "Add to Active Recipe Train Set"
- Fix the labels if needed
- Click Retrain
![]()
Focus on misses and low-confidence captures, not random new data. This is the most efficient way to improve.
If you need to see exactly what the AI predicted on a specific image, upload the saved JPEG to the Metadata Viewer. OV cameras embed prediction results, confidence scores, and camera settings directly into each captured image.
As your dataset grows, manually checking every label becomes impractical. Haystack lets you visually explore your training data, cluster similar images together, and quickly spot labels that look out of place. Run it periodically to keep your dataset clean.
Classifier improvement workflow
- Review Library images → find errors and low-confidence predictions
- Add them to the training set
- Relabel if needed
- Retrain
- Use Haystack to explore your data visually and find mislabeled images at scale
Segmenter improvement workflow
Segmenters take longer to label (pixel-level annotation), so there's a shortcut:
- Import problem images into the segmentation recipe
- Click Generate Predictions so the model pre-labels the new images as best it can
- Fix the predictions rather than labeling from scratch (much faster)
- Retrain
Reducing false positives in segmentation
If your segmenter is picking up a lot of small random blobs that shouldn't be there, you have two powerful tools at your disposal: filtering small blobs out of the pass/fail logic, and training the model to better understand what "normal" looks like.
Filter out small blobs with a minimum size threshold
The fastest fix is to tell the system to ignore blobs below a certain pixel area. Small noise blobs are almost always tiny compared to real defects, so a size filter eliminates them without affecting your actual detection.
In Basic Mode (IO Logic): Set the minimum blob area threshold in the pass/fail settings. Any blob smaller than this pixel count gets ignored entirely. Start with a value like 50 pixels and adjust upward until the noise disappears but real defects still trigger.
In Advanced Mode (Node-RED): Filter blobs by blob.pixel_count in your function node. For example, to ignore any blob under 50 pixels:
const minBlobSize = 50;
const allBlobs = msg.payload.segmentation.blobs;
const realBlobs = allBlobs.filter(blob => blob.pixel_count >= minBlobSize);
const results = realBlobs.length < 1; // Pass if no real blobs remain
msg.payload = results;
return msg;
Adjust the minBlobSize value based on your application. Look at the pixel counts of your noise blobs vs. real defects in the debug output to find the right cutoff.
Add good images to your training set
This is the single most effective way to reduce false positive detections, and it's the one people most often overlook.
The problem: if you only trained with images that contain defects, the model has never learned what a clean part looks like. It starts seeing "defects" in normal surface texture, lighting gradients, and minor variations -- all the small random blobs you're fighting.
How to fix it:
- Go to the Library and find images of good parts -- clean surfaces with no defects
- Add these images to the training set (Add to Active Recipe Train Set)
- In the labeling view, select the ROIs but do not add any defect annotations. Just include them as-is with no paint marks
- Retrain the model
By showing the model examples of what "normal" looks like, you're teaching it to stop flagging ordinary surface variation as defects. This dramatically reduces noise.
Guidelines:
- Start with 10-15 good images and retrain. Test the results
- If noise persists, add more. Aim for at least 20-30 good images mixed with your defect images
- This is especially important if your initial training set only contained images with defects on them
- Make sure the good images cover the range of normal variation you see in production (different lighting, slight color shifts, surface textures)
Nine times out of ten, when someone complains about random small blobs appearing everywhere, the root cause is that the training set has no good images in it. Add them and retrain -- the improvement is usually immediate and significant.
Other tips for reducing noise
- Improve lighting consistency. Inconsistent lighting creates shadows and highlights that the model can mistake for defects. Make sure the built-in LEDs are configured properly and external light sources aren't causing glare or shifting shadows
- Check your template alignment. If the aligner isn't working well, the ROI shifts between captures. The model sees different background areas each time, which increases noise. Verify alignment is stable
- Iterate in small steps. Add 10-15 good images, retrain, test. Repeat until results are clean. This is faster than dumping 50 images in at once and hoping for the best
The philosophy
- Never stop iterating. The AI has high learning capacity, and it keeps improving with 50, 100, even 500+ images
- Target failures specifically. Don't randomly add data. Add the cases where the AI struggles
- Check for mislabels regularly. As your dataset grows, mislabels become harder to spot but still damage accuracy
Accelerate with GenAI tools
Three AI-powered tools at tools.overview.ai can dramatically speed up your improvement cycles:
- Defect Studio -- Generate photorealistic synthetic defect images up to 10,000x faster than waiting for real defects
- Integration Builder -- Build production-ready Node-RED flows from plain English descriptions
- AI Expert Helper -- Get 24/7 expert guidance on any camera question
Together, these three tools can reduce your deployment time from days to hours. Generate synthetic training data instead of waiting for real defects, build integrations by describing what you want, and get instant expert guidance without waiting for support tickets.