AI-POWERED DOCS
What do you want to know?
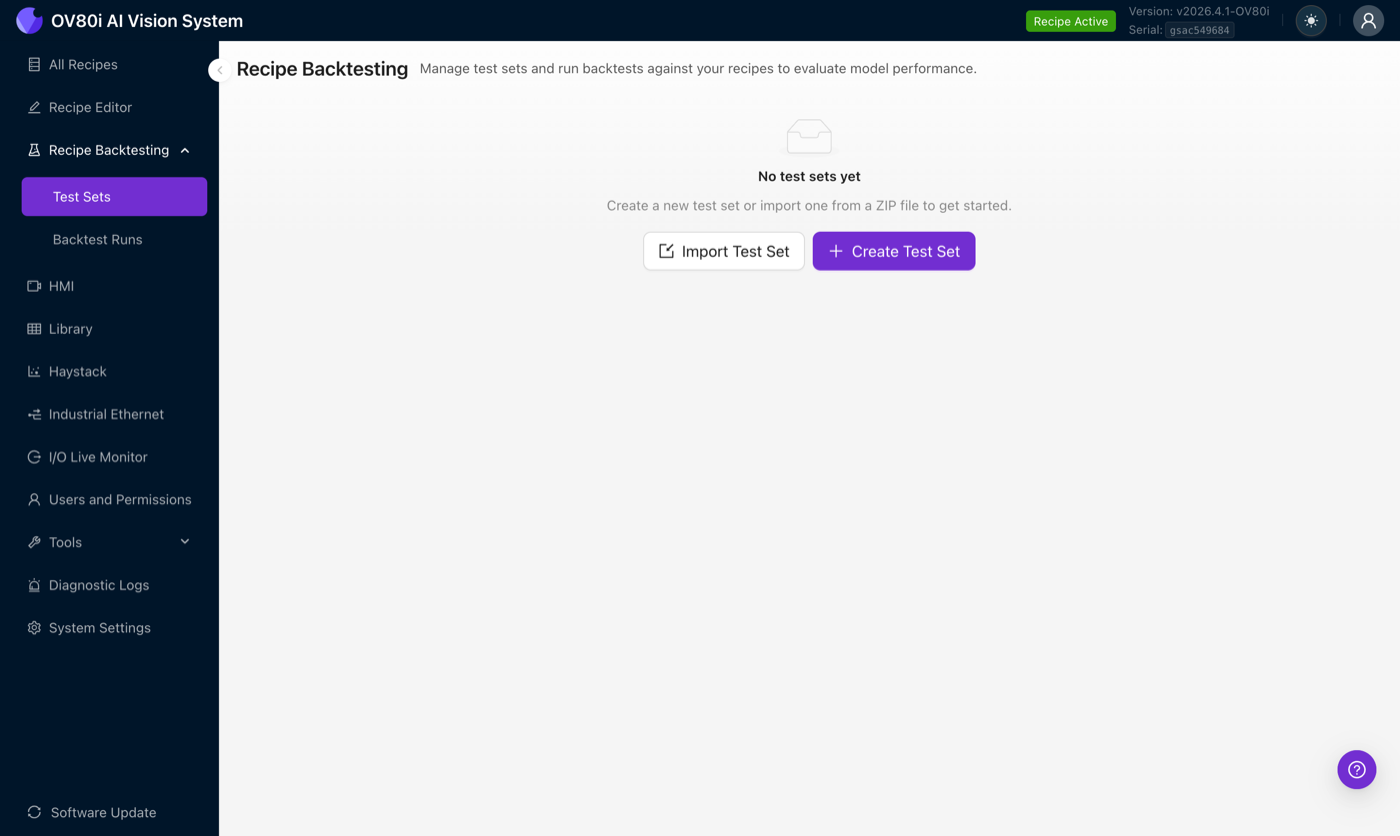
Recipe Backtesting
Recipe Backtesting lets you replay a curated set of images through the active recipe and get an objective report on how it performed, image by image. It runs the full recipe, every model, every Node-RED rule, every pass/fail threshold, so the output reflects exactly what production would have done.
Think of it as a regression test suite for your vision recipe.
Before Backtesting, the only way to verify a recipe change was to wait for new parts to roll down the line. With Backtesting, you keep a permanent library of tricky captures, run the new recipe against all of them in seconds, and compare the old run to the new run side by side. Customer buy-in becomes an objective conversation, not a gut feeling.
Learning objectives
By the end of this guide you will be able to:
- Build a test set of representative images with pass/fail ground truth
- Run a backtest against the active recipe and read the confusion matrix
- Drill into escapes and overkills to diagnose what went wrong
- Group yield results by tag, production line, or capture week to catch model drift
- Trigger backtest runs over HTTP for scheduled or CI-style automation
Core concepts
Recipe Backtesting has two building blocks. They live behind the Recipe Backtesting entry in the left navigation.
| Concept | What it is |
|---|---|
| Test Set | A reusable collection of JPEGs plus their ground truth labels. Test sets are independent of any specific recipe, the same test set can be run against different recipes or different versions of the same recipe. Test sets can be imported, exported, and shared across cameras. |
| Backtest Run | A snapshot in time of one test set executed against the currently active recipe. Runs are immutable, re-labeling the test set later does not change a previous run's results. |
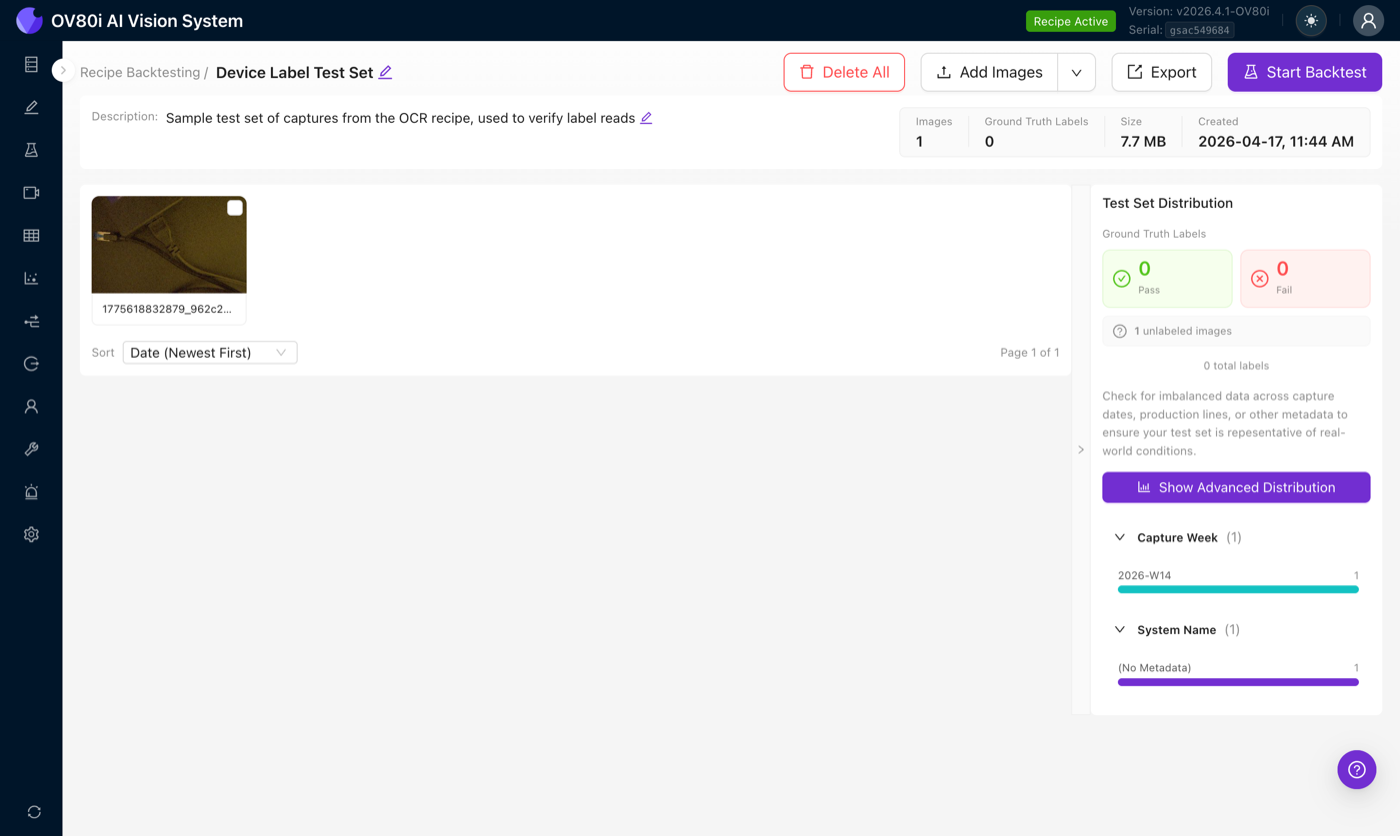
Create a test set
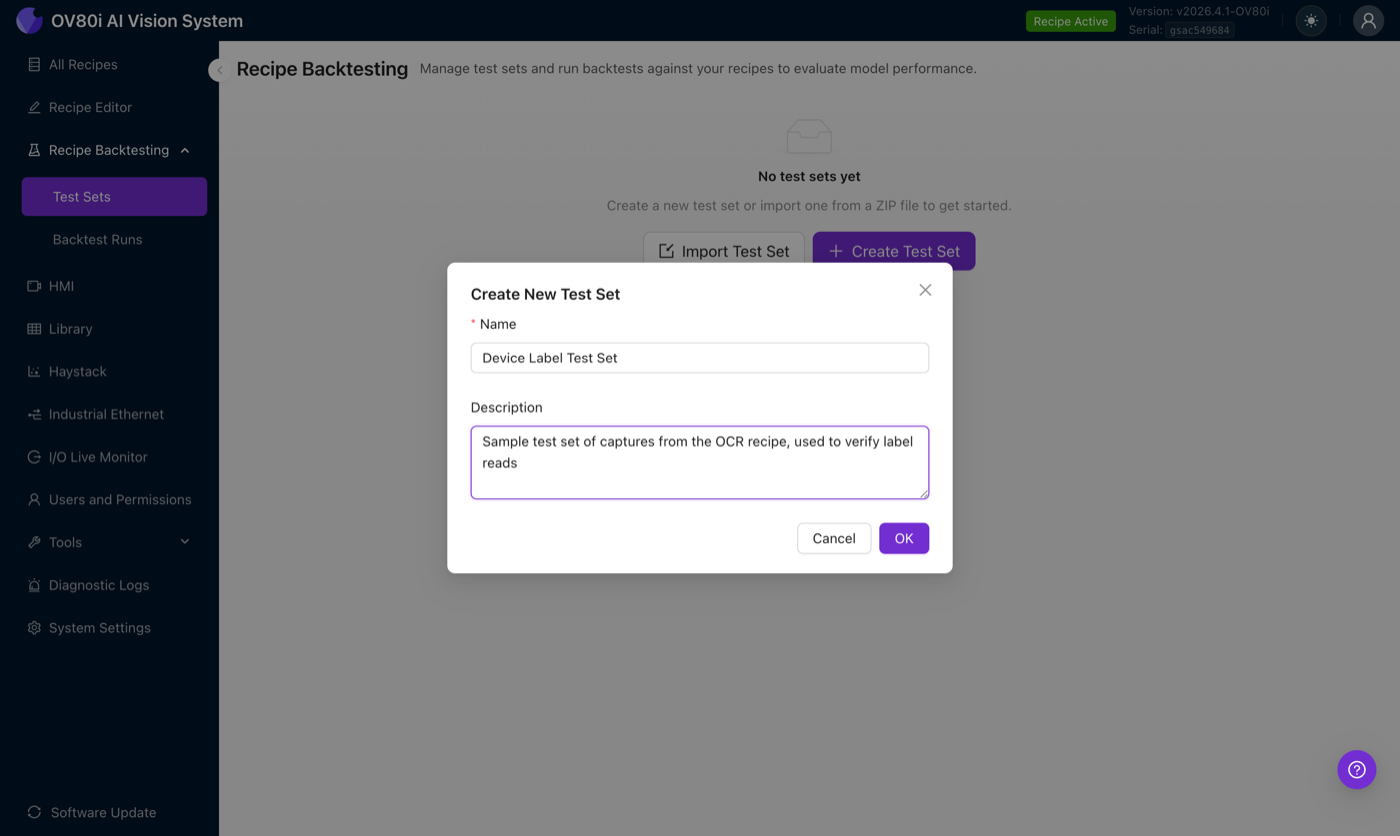
From the left navigation, open Recipe Backtesting → Test Sets, then click Create Test Set. Give it a name and a description, the description becomes searchable and shows on the run report.
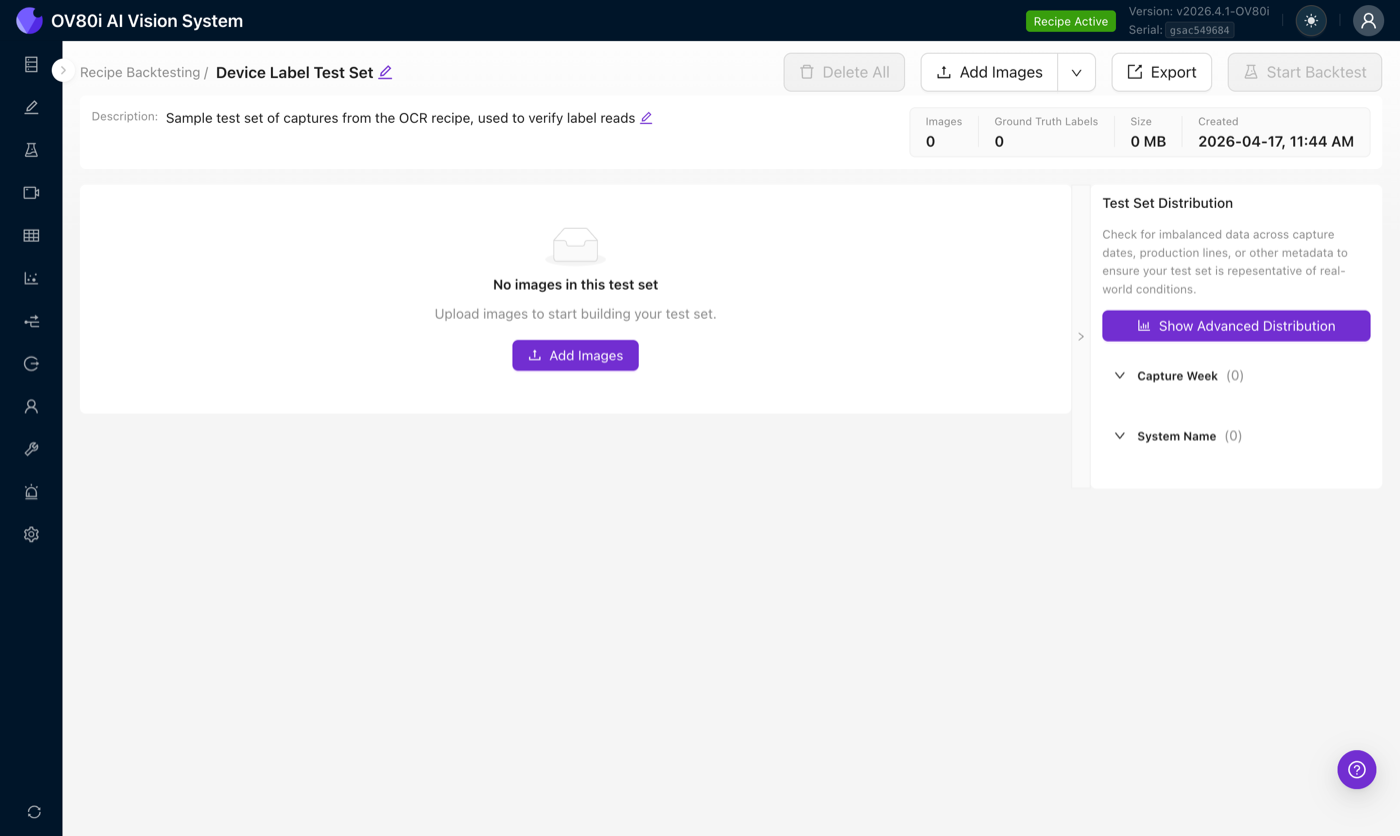
Once created, the test set opens in the editor with no images yet. The header bar has the key actions: Add Images, Import from Library (in the dropdown next to Add Images), Export, and Start Backtest (disabled until the set has images).
Add images
Two ways to populate a test set:
- Click or drag JPEG images into the upload area. Only JPEG is accepted, and every image must match the camera's capture resolution exactly.
- Import from Library, the faster option for production cameras. This pulls previous captures directly off the camera with all their embedded metadata intact (capture time, trigger ID, original pass/fail, tags, inspection target).
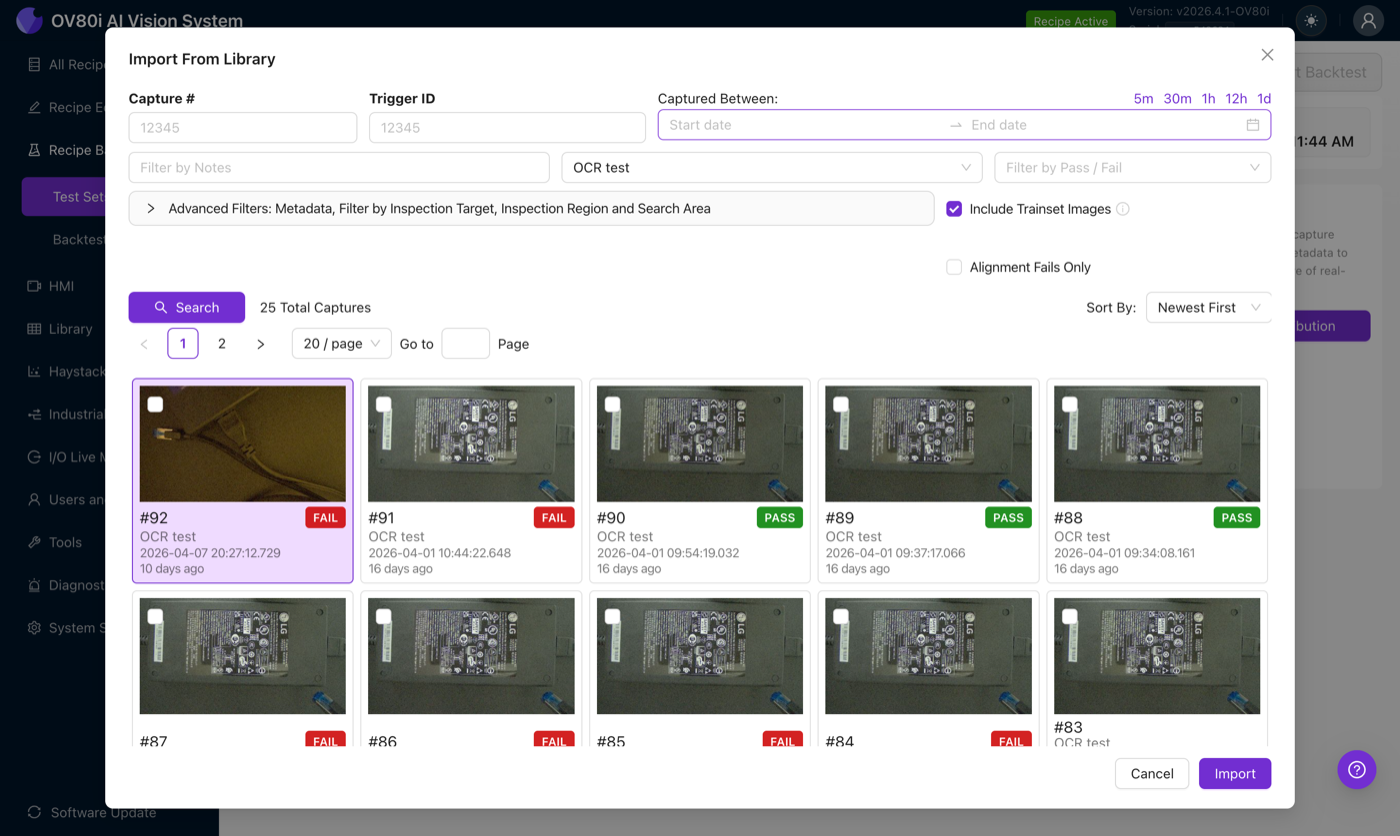
The Import from Library dialog lets you filter by capture number, trigger ID, capture date range (5m / 30m / 1h / 12h / 1d shortcuts), notes, recipe name, pass/fail, and an Advanced Filters panel for inspection target / region / search area. The Include Trainset Images toggle is on by default. The Alignment Fails Only toggle is useful when you are specifically verifying an aligner fix.
Images brought in from the Library retain the camera serial number, original capture time, the recipe version that produced them, and the full JSON metadata of the original production result. That means you can reuse the original pass/fail as the ground truth rather than re-labeling from scratch. You can also correct it if standards have changed since.
After import, the editor shows the images with a quick summary (image count, ground-truth count, total size) and a Test Set Distribution breakdown by capture week and system name.
Label ground truth
Ground truth is the real pass/fail verdict for each image, what you, the operator, believe the result should have been. Ground truth is what makes accuracy, escape, and overkill numbers possible.
Click an image to open the Image Viewer. If the image was imported from a production capture, the original search areas and pass/fail result are already available and you can re-use or correct them. If the image has no embedded metadata (e.g. an older export, a manual upload), click Set Up Labeling to link the image to the search areas of the currently active recipe.

Once the image is linked, each search area gets its own Pass / Fail / Unknown radio. Leave a search area on Unknown if you are not sure, those rows are excluded from the accuracy calculation but still contribute to the overall yield.
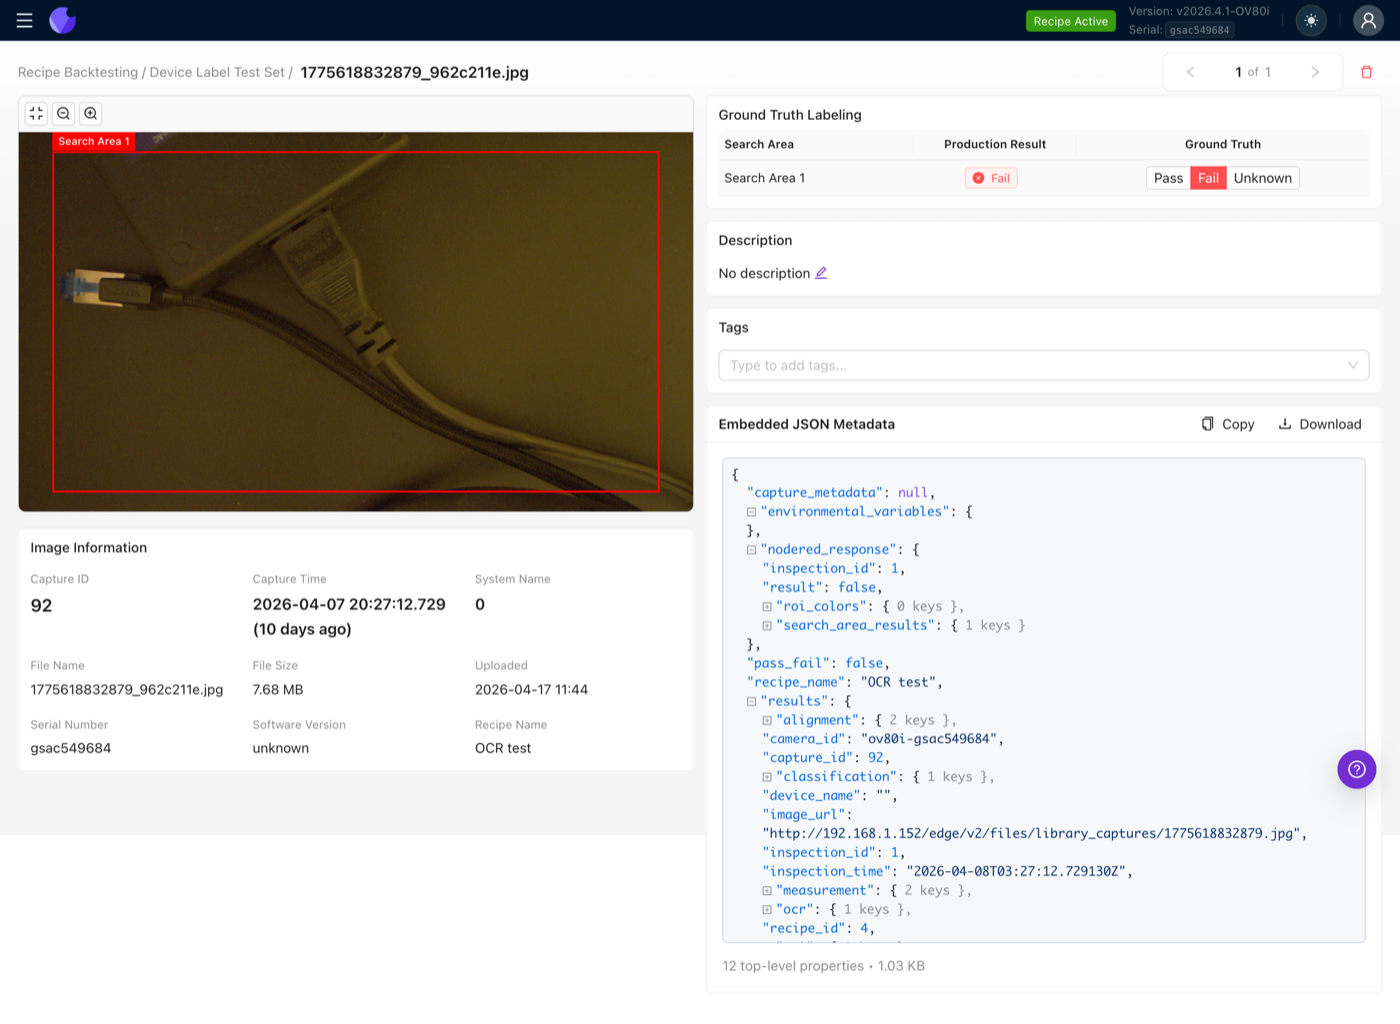
If your recipe has three search areas on one part, each image in the test set needs three ground truth labels, one per area. The right-side stats distinguish Images (count of captures) from Ground Truth Labels (count of labeled search areas).
You can also give each image a description (what is interesting about this capture) and tags (line number, shift, defect type, anything). Tags are searchable on the run report and can group the yield breakdown.
Start a backtest run
Once the test set has at least one image, click Start Backtest. Give the run a name. The camera will:
- Pause any active inspection, incoming triggers are ignored for the duration of the run.
- Loop through every image in the test set.
- Execute the entire active recipe for each image, including every Node-RED node, every pass/fail rule, and any actuation or I/O integration that the recipe would normally drive in production.
- Store each result back to the Library and Haystack, exactly as if it had been a production capture.
Because the run executes the full recipe, every Node-RED output node actually fires, Modbus writes happen, MQTT messages publish, HTTP calls go out. Do not run backtests on a camera that is wired into a live production line unless you are prepared for those side effects. Ideally, run backtests on a second camera dedicated to validation.
Read the run report
Runs are permanent. Open Recipe Backtesting → Backtest Runs to see every historical run, filter by test set, and open any of them.
The run report has three parts: the confusion matrix, the yield report, and a per-image drill-down.
Confusion matrix
| Ground Truth: Pass | Ground Truth: Fail | |
|---|---|---|
| Recipe: Pass | True Positive | Escape |
| Recipe: Fail | Overkill | Correct Reject |
- True Positive, recipe and ground truth agree on a pass. You want this.
- Correct Reject, recipe and ground truth agree on a fail. You want this.
- Escape, the recipe said pass, but the image was actually defective. This is almost always the worst failure mode, it means a bad part left the line.
- Overkill, the recipe said fail, but the image was actually good. This is false-rejection: the line is throwing away good parts.
Click any cell to filter the image list down to just those captures, then click an image to jump to its Library entry with the full Haystack trace.
Escapes usually mean the model missed a defect, or a Node-RED threshold is too permissive. Overkills usually mean a threshold is too strict, or the training set is biased toward difficult positives. The confusion matrix tells you which failure is dominant; fix that one first.
Yield and cycle time
The run header shows overall yield (total passes / total captures) and the average cycle time, measured as total run duration divided by image count. This is the most accurate cycle-time estimate the camera can produce because it runs the same Node-RED flow that production would.
Yield breakdown by tag or system
The Yield Report → Advanced Distribution view groups the yield by tag or by system (production line). This is how you catch two kinds of problems the overall number hides:
- Line bias, line 37 shows 98% yield, line 59 shows 40%. Your training set is probably over-sampled on line 37.
- Model drift, yield is fine on captures from 2 months ago but drops on captures from this week. Parts have drifted, or lighting has changed, and the recipe needs a refresh.
Filtering, tagging, and export
Tags and descriptions let you slice the run report in practical ways:
- Filter by
line-37to confirm a fix before rolling it out to the other lines - Filter by
defect:crackto verify a specific failure mode is now caught - Filter by capture week to see how the recipe performs on recent parts vs. the golden set
The full run report can be exported as a PDF for sharing with customers, very useful in buy-off meetings where objective numbers beat side-by-side screenshot comparisons.
Automate with HTTP
Every action in Recipe Backtesting is available through the camera's HTTP API. Common automation patterns:
- Node-RED interval trigger, on a weekly schedule, Node-RED adds the last 7 days of production captures to a rolling test set and kicks off a run. If yield drops below a threshold, raise an alert.
- CI gate, before a recipe version can be deployed via the import endpoint, a script triggers a backtest run and blocks the deployment if accuracy regresses below the previous version.
- PLC trigger, the PLC can raise a digital input on a specific ID, Node-RED catches it and starts a backtest. The PLC reads the pass/fail result back over Modbus or Ethernet/IP once the run completes.
See the API Reference section of the camera's Swagger UI at http://CAMERA_IP/edge/v2/docs for the POST /backtest_sets/{id}/runs endpoint and related test-set CRUD endpoints. Replace CAMERA_IP with the actual IP of your camera.
Building a good test set
The difference between a test set that catches real regressions and one that gives you false confidence comes down to balance.
- Pass/fail balance, aim for roughly equal counts of good and bad samples. A set that is 95% passes will make every recipe look great.
- Defect coverage, every failure mode the customer cares about needs at least a few examples. If you have never seen a given defect in the test set, you have no evidence the recipe catches it.
- Time balance, pull captures across weeks or months, not just today. Production lines drift (lighting shifts, parts change suppliers) and your test set should represent that drift.
- Line balance, if the recipe runs on 50 production lines, the test set should include captures from each of those lines, not just the one on your bench.
- Edge cases, the tricky captures that barely passed or barely failed are where retraining delivers real gains. Seed the test set with those.
- Volume, 10 images is enough to smoke-test a change; 100+ is enough to make statistically meaningful accuracy claims.
If the customer changes their pass criteria, you currently have to re-label images one at a time. A practical workaround: keep one stable test set that everyone agrees on and a second current test set that tracks the evolving criteria. When the current criteria settle down, they can be folded back into the stable set.
What it does and does not test today
Backtesting runs at the full recipe level and evaluates the final aggregated pass/fail output. This means:
- Works for, Classification, Segmentation, Measurement, and OCR recipes. Anything that flows through Node-RED to a single pass/fail is testable.
- Roadmap, Model-level backtesting is on the way. In future releases you will be able to label ground truth at the per-ROI level and compare the segmenter or classifier output directly, without relying on Node-RED thresholds. Numeric outputs (e.g. measurement distances, multi-class classification) will get dedicated metrics beyond pass/fail.