AI-POWERED DOCS
What do you want to know?
Step 3: Regions of Interest (ROIs)
Now that your alignment is working, it's time to tell the camera where to look. You do this by drawing Regions of Interest (ROIs): rectangles on the image that define the areas the AI will analyze.
The aligner dynamically moves your inspection boxes to track the part as it shifts and rotates. This means you don't need to add extra padding to your ROIs to account for part movement. You can draw them tight around the feature, which gives the AI a cleaner, more focused view and requires less training data. If your ROIs seem too large or your AI is struggling, go back and check your alignment setup first.
Key terminology
- Inspection Type: A category with a shared dataset and set of classes. Example: "Screws" with classes "present" and "absent"
- Region of Interest (ROI): A specific location on the part. Example: "Screw_1", "Screw_2", "Screw_3", all sharing the "Screws" inspection type
You can have multiple inspection types on one image. For example: "Screws" (10 ROIs) and "Connectors" (2 ROIs), each with their own classes and training data.
Why ROI size matters
This is the second biggest source of customer frustration (after alignment). Let's explain why.
The 512x512 pixel limit
Every ROI gets cropped out of the full image and fed to the AI model individually. The maximum size the AI model accepts is 512 x 512 pixels. If your ROI is bigger than that, the camera downsizes it to fit, and you permanently lose detail.
Think of it like taking a high-resolution photo and shrinking it into a thumbnail. Fine details disappear.
Smaller is better, and here's why
Imagine you're looking for a missing screw. You could draw a giant ROI that covers the whole board, or a small ROI that just covers the screw area.
With a small ROI:
- The screw dominates the crop, so it's obvious to the AI what you're looking for
- You need fewer training images (the signal-to-noise ratio is high)
- Processing is faster
- If the ROI is under 512x512, no information is lost
With a large ROI:
- The screw is a tiny detail in a sea of background
- The AI needs more data to learn what matters
- If the ROI exceeds 512x512, the crop gets downsized and the screw becomes even smaller
- Processing takes longer
The grid technique for full-image inspection
What if you need to inspect the entire image for small defects (like scratches across a surface)? Don't use one giant ROI. Instead, tile multiple small ROIs in a grid pattern:
Each small ROI preserves full resolution. If any single ROI fails, the whole inspection can fail. You get the best of both worlds: full coverage with full detail.
Setting up your ROIs
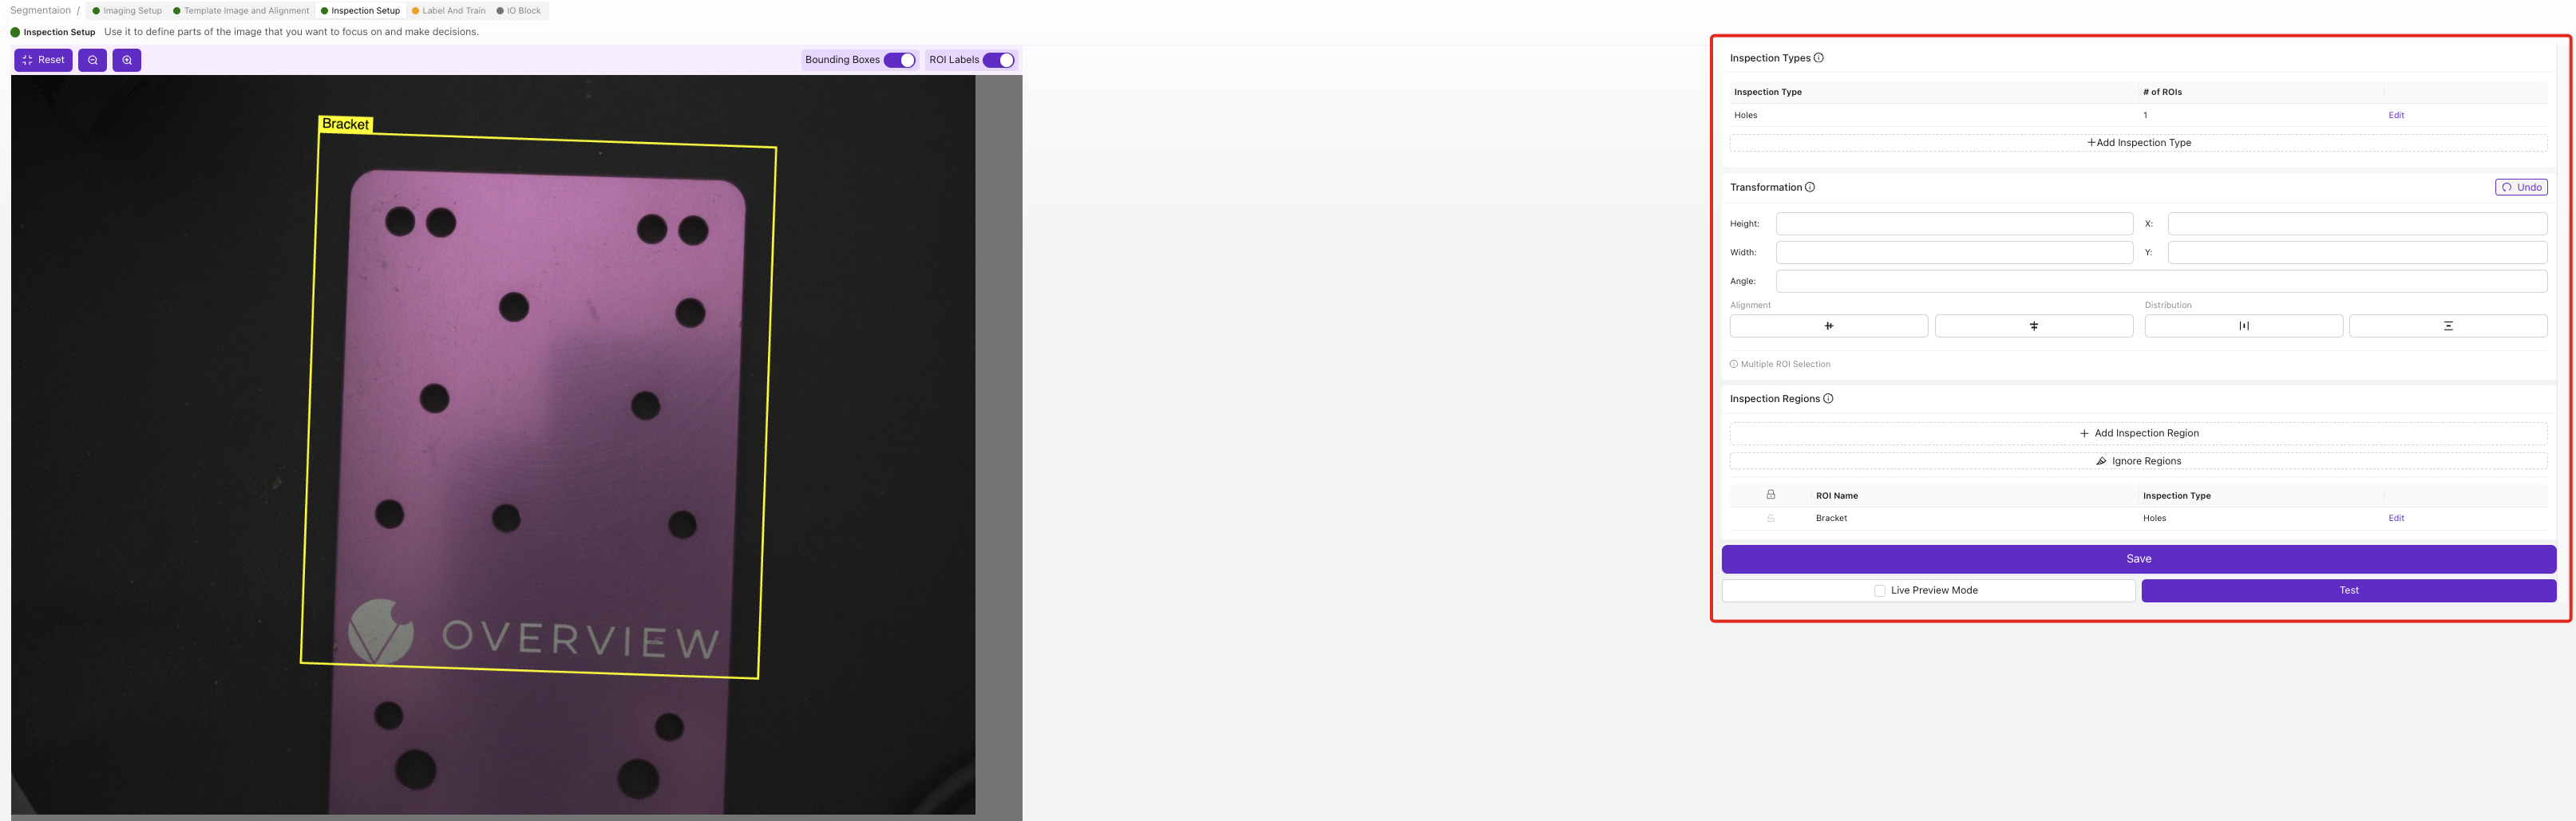
1. Create an Inspection Type
Navigate to Inspection Setup in your recipe editor.
Rename "Inspection Type 1" to something meaningful, like "Screws", "Surface_Quality", or "Connector_Check". This name matters because it appears in your output data and Node-RED flows.
2. Draw your ROIs

Click + Add Region of Interest (ROI). A yellow rectangle appears on the image.
- Drag it to the correct position
- Resize it by dragging the corners
- Make it just big enough to contain the feature you're inspecting
- Rename it from "New ROI" to something descriptive (e.g., "Screw_Top_Left")
3. Repeat for each location
If you're inspecting 10 screws, create 10 ROIs, one per screw location. They all share the same Inspection Type and dataset.
Name your first ROI "Connector 1" and click copy. It automatically creates "Connector 2", "Connector 3", etc. with auto-incrementing names. Much faster than creating each one from scratch.
Name each ROI as you add it, and make every name unique, not just descriptive: "Screw_Top_Left" and "Screw_Bottom_Right", never two regions both called "Screw". Unique names are how you tell regions apart in the results, the saved output data, and Node-RED flows, so when one ROI fails you know exactly which location to check.
4. Verify with Live Preview
Toggle Live Preview Mode and check that:
- All ROIs are positioned correctly on the part
- ROIs move with the alignment (if you're using the aligner)
- Each ROI fully contains the feature you want to inspect
- No ROIs are larger than they need to be
ROI sizing guidelines
| ROI purpose | Size recommendation |
|---|---|
| Single feature (screw, connector, label) | Just big enough to contain the feature with a small margin |
| Surface area for defects | Grid of small tiles, each under 512x512 pixels |
| Large feature that needs detail | Use a segmenter instead of a classifier (OV20i/OV80i only) |
| Presence/absence check | Small; the feature is either there or not |
When to use many ROIs
Don't be afraid to use lots of ROIs. You can use dozens or even hundreds. Benefits:
- Shared training data. All ROIs of the same inspection type share one dataset. 10 screw ROIs means 10x the training data per capture.
- Faster processing. Many small crops process faster than one large one.
- Better accuracy. Each small crop has high signal-to-noise ratio.
- Granular reporting. You can see exactly which ROI failed.
When ROIs need to be large
If you truly need a large ROI to find small defects (like tiny scratches across a big surface), consider using a segmenter instead of a classifier. Segmenters are designed for pixel-level detection and handle large areas better. (The OV10i supports classifiers only. Segmentation requires an OV20i or OV80i.)
Regions of Interest (ROIs) checklist
Before moving on, confirm:
- Inspection types created with meaningful names
- ROIs drawn, just big enough to contain the feature
- ROIs named descriptively (e.g., "Screw_Top_Left")
- All ROIs move correctly with alignment in Live Preview
- No ROI exceeds 512×512 pixels (check for downscale warnings)
Ready to teach the AI? Move to Step 4: Train Your AI.