AI-POWERED DOCS
What do you want to know?
Create Your First Recipe (OV10i)
This is where your camera becomes an AI inspector. A recipe is a complete package (image settings, alignment, regions of interest (ROIs), AI model, and output rules) bundled together for one specific inspection task.
You can have as many recipes as you want on a camera. Each one can be saved, backed up, transferred to other cameras, and version controlled.
Before you start: remember the waterfall
Everything in this section follows the Waterfall Principle. You'll go through six steps in order. Don't skip ahead. Verify each step works before moving to the next.
Image Settings
Exposure, Gain, LEDs
Template & Aligner
Capture, Align
Regions of Interest (ROIs)
Draw ROIs
AI Training
Label, Train
Output Rules
Pass/Fail, IO
Deploy!
Activate, Verify
Create a new recipe
- Go to All Recipes in the left sidebar (this is also the landing page when you open the camera)
- Click + New
- Give it a name (e.g., "Screw Presence Check")
- The OV10i uses classification recipes:
What does this recipe look like?
The OV10i runs classifier models, one label per region. Pick the model type when you create a recipe in the camera UI; the option is locked to classification on this camera.
Decide whether each part, or each region of interest, belongs to a category.
Best for: verdicts and known categories, where the answer is one label per region.
Classification, in 60 seconds
Read Understanding Classifier →A classifier looks at each region you draw and assigns one label from a list you define. The model returns one verdict per ROI: this region is a "pass", or "missing", or "scratched". Most OV10i recipes start here.
Example, missing fastener
Four ROIs over four screw locations. Two classes: present and missing. The model returns one label per ROI.
Example, surface pass / fail
One ROI over the panel surface. Two classes: clean and blemished. The model returns one label for the panel.
For the full mental model and a hands-on demo, read Understanding Classifier.
- Click Activate to enter the recipe editor
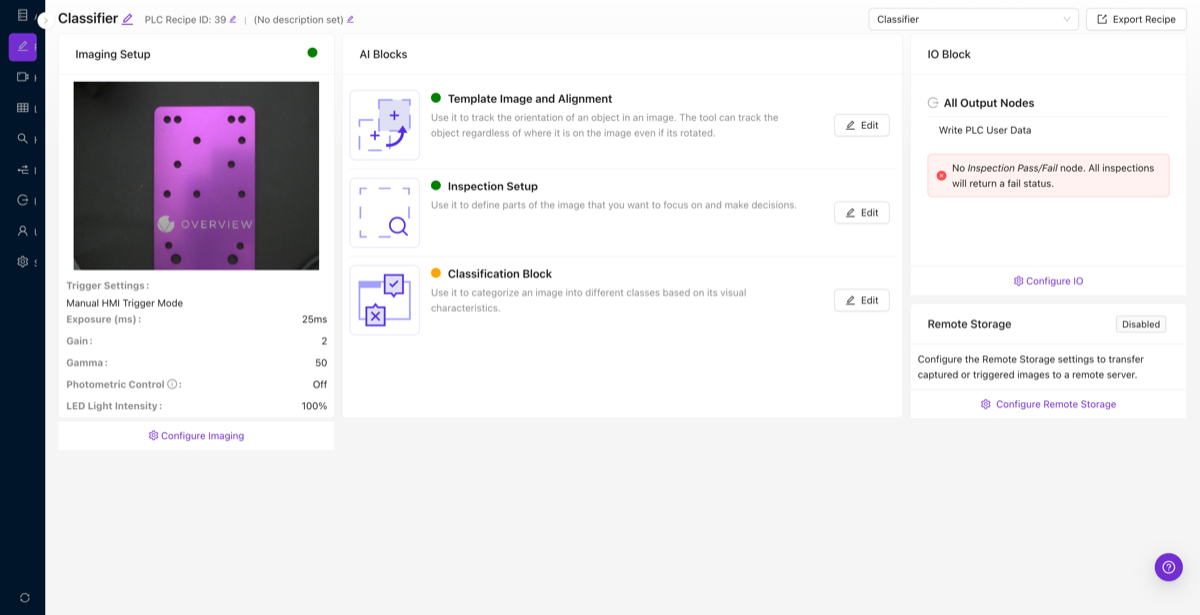
![]()
Here is what the Recipe Editor looks like. The three main sections (Imaging Setup, AI Blocks, IO Block) map directly to the waterfall steps:
The OV10i supports classifiers only. For pixel-level defect detection (segmentation), you need an OV20i or OV80i. New to classifier models? Read Understanding Classifier for the full mental model and a hands-on demo.
If your inspection requires pixel-level defect detection (segmentation), where the AI highlights the exact shape and location of each defect, you will need an OV20i or OV80i. The OV10i is designed for classification tasks: pass/fail, presence/absence, and multi-category decisions. Plan your camera selection accordingly before investing time in recipe setup.
Now follow the six steps:
Step 1: Image Settings
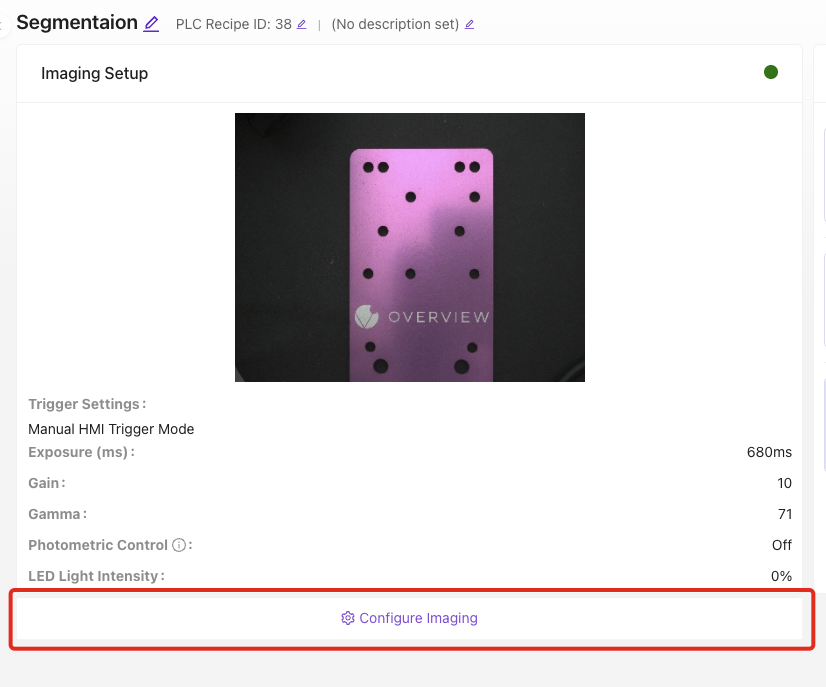
Get your camera image looking clean and consistent. Adjust exposure, gain, white balance, and, critically, enable lens distortion correction if you're using a wide-angle lens.
Key settings:
- Exposure: How long the sensor captures light. Higher = brighter but more motion blur
- Gain: Digital brightness boost. Higher = brighter but noisier
- Lens Correction: Fixes barrel distortion from wide-angle lenses. Enable this now if applicable. Don't skip it
- LED settings (OV10i): Adjust intensity and pattern to reduce glare
Verify before moving on: Click Live Preview. The image should be sharp, well-lit, and consistent shot to shot.
Step 2: Template Image & Alignment
Full guide: Alignment Explained
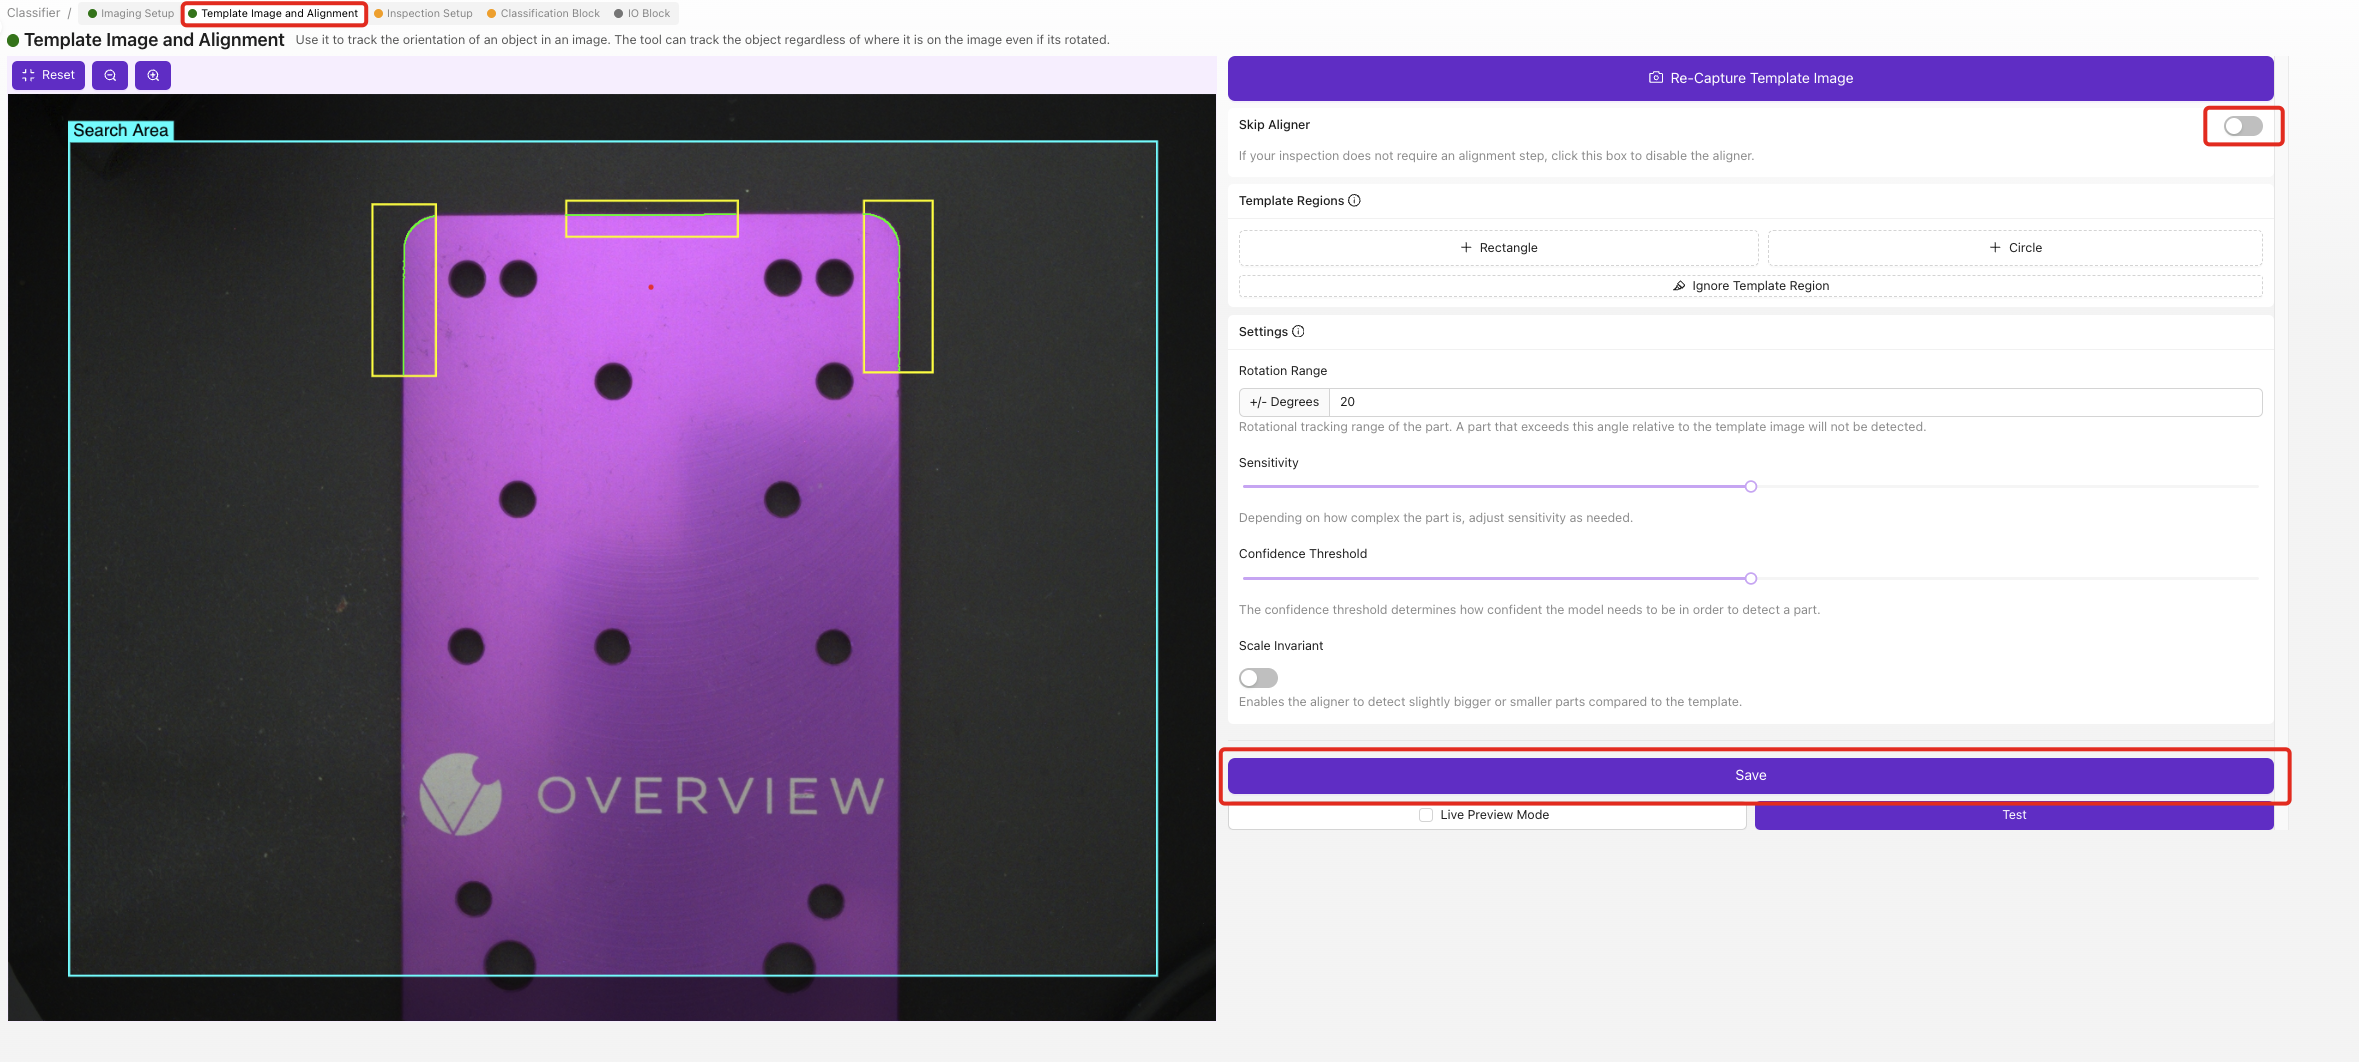
This is the step most customers find challenging, and the one that makes the biggest difference. The aligner is the foundation of your entire inspection. It dynamically moves your inspection boxes to track the part as it shifts and rotates on the conveyor. Good alignment lets you draw smaller ROIs, which means less training data and more accurate AI. Aligner → ROIs → Classifier: if the first link is weak, everything downstream breaks.
The short version:
- Capture a template image of a good part
- Place 2-3 small template regions on features that never change (strong edges, corners, holes)
- Place them as far apart as possible on the part
- Clean up noisy edges with the Ignore tool
- Save, then test with Live Preview. Move the part around and verify the alignment tracks it
Never anchor the aligner to defects, labels, stickers, or anything that can move independently of the part. Only align to permanent, rigid features (machined edges, drilled holes, PCB outlines). If you align to a barcode sticker and someone places it crooked, the camera shifts all your inspection boxes to the wrong position.
Try it yourself: Use the simulator below to see what happens when a part shifts on the conveyor. Toggle the aligner off, then move the sliders to watch the inspection boxes lose tracking.
Camera Settings
Simulate Real World
Move the part coming down the line.
Legend
Read Alignment Explained for the full walkthrough. This is the most important page in this documentation.
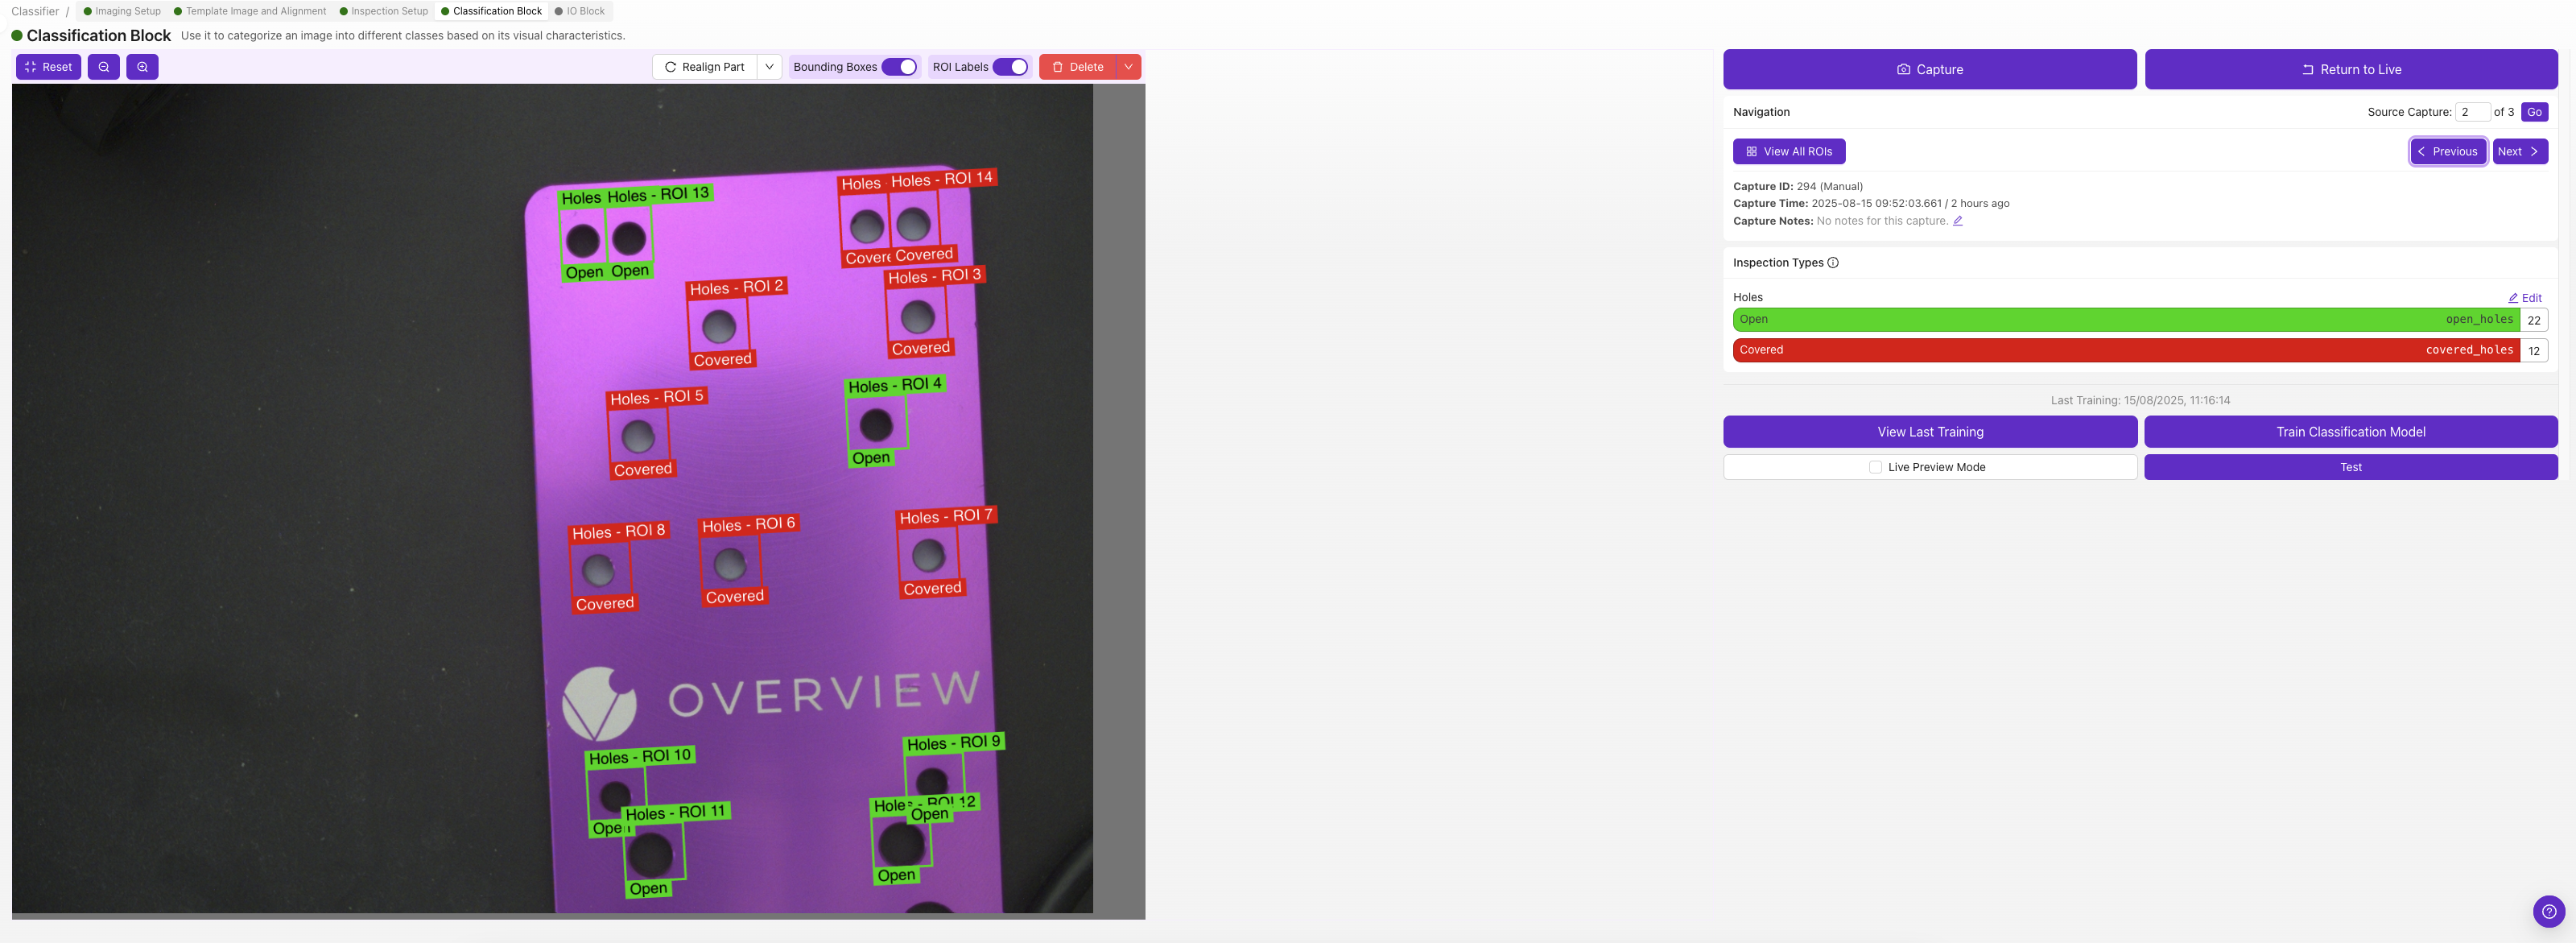
Step 3: Regions of Interest (ROIs)
Full guide: Regions of Interest (ROIs)
Now draw the areas where the AI will actually inspect. These are your Regions of Interest (ROIs).
The critical rule: Keep ROIs as small as possible. This is the second biggest source of customer issues. Read Why ROI Size Matters to understand why.
The short version:
- Create an Inspection Type (e.g., "Screws") with your expected classes (e.g., "present", "absent")
- Draw rectangular ROIs on each location you want to inspect
- Make them just big enough to contain the feature, no bigger
- Name them descriptively (e.g., "Screw_Top_Left")
Step 4: Train Your AI Model
Label a few images and train your first model.
The short version:
- Start with 10-15 images per class. Don't over-collect
- Double-check every label before training (one mislabel can ruin your model)
- Train (~30 seconds) to check the signal
- Test with Live Preview. Try to break it
- Add targeted data where it fails, retrain
Step 5: Output Rules (IO Block)
Full guide: Setting Up Outputs
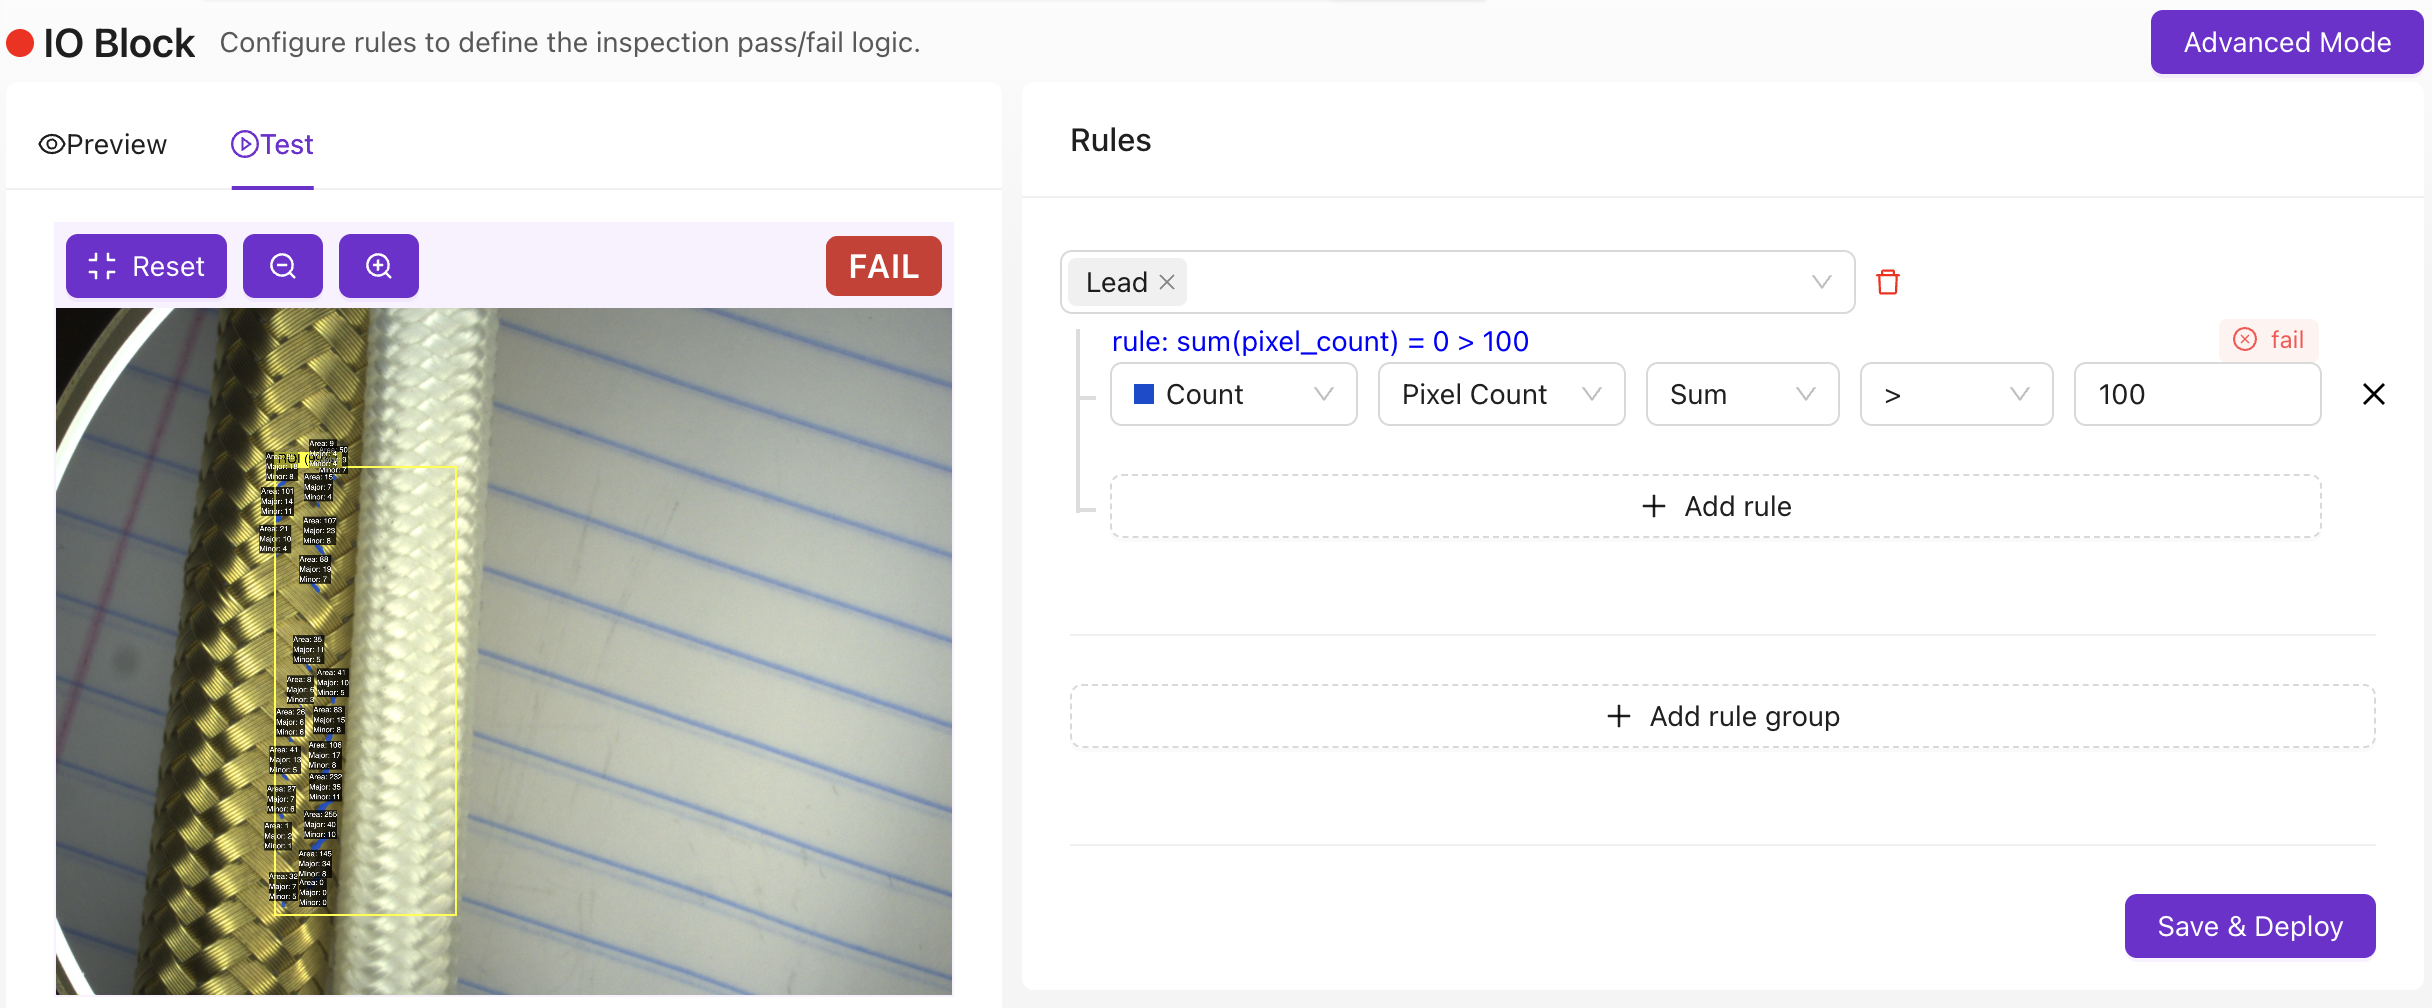
Define what happens when the AI makes its decision.
Basic Mode: Set rules for pass/fail. The simplest setup: all ROIs must pass for a global pass. That single binary result gets sent to your PLC, HMI, or output.
Advanced Mode (Node-RED): For anything beyond simple pass/fail: custom dashboards, time-series logic, data routing to MES systems, barcode scanner integration (external reader required), and more. Use tools.overview.ai to generate Node-RED flows from plain English descriptions.
Step 6: Deploy and verify

- Activate your recipe
- Set your trigger mode (manual, hardware sensor, PLC, or interval)
- Run test parts through the system
- Verify the pass/fail output matches your expectations
- Check edge cases, the parts that are hardest to classify
Congratulations! You now have a running AI inspection.
Recipe checklist
Before moving on, confirm:
- New recipe created and named
- Image settings configured: sharp, well-lit, consistent
- Alignment set up and tracking reliably
- Regions of Interest (ROIs) drawn: small, well-positioned, named
- AI model trained and tested with Live Preview
- Output rules configured: pass/fail matches expectations
- Recipe activated and deployed with correct trigger mode
What's next?
- Improving Your Model: How to keep your AI getting better over time
- Troubleshooting & FAQ: Common issues and quick fixes