AI 驱动文档
您想了解什么?
创建您的第一个程序 (OV10i)
这是您的相机成为 AI 检测器的地方。程序(recipe)是一个完整的包(图像设置、对齐、感兴趣区域 (ROI)、AI 模型和输出规则),针对一项特定的检测任务捆绑在一起。
您可以在一台相机上拥有任意数量的程序。每个程序都可以保存、备份、传输到其他相机,并进行版本控制。
开始之前:记住瀑布原则
本节中的所有内容都遵循瀑布原则。您将按顺序完成六个步骤。请勿跳步。 在进入下一步之前,请验证每一步是否正常工作。
图像设置
曝光、增益、LED
模板与对齐器
捕获、对齐
感兴趣区域 (ROI)
绘制 ROI
AI 训练
标注、训练
输出规则
通过/失败、IO
部署!
激活、验证
创建新程序
- 在左侧边栏中转到 All Recipes(这也是打开摄像头时的登录页面)
- 点击 + New
- 命名(例如,"Screw Presence Check")
- OV10i 使用分类程序:
此配方是什么样的?
OV10i 运行分类器模型,每个区域一个标签。在相机界面中创建配方时选择模型类型;此相机的该选项已锁定为分类。
判定每个零件或每个感兴趣区域 (ROI) 属于哪个类别。
最适合: 判定结果和已知类别,答案是每个区域一个标签的场景。
60 秒了解分类
阅读《了解分类器》 →分类器查看你绘制的每个区域,并从你定义的列表中为其分配一个标签。模型为每个 ROI 返回一个判定结果:该区域为"合格"、"缺失"或"划伤"。大多数 OV10i 配方都从这里开始。
示例:缺失紧固件
在四个螺钉位置上设置四个 ROI。两个类别:存在和缺失。模型为每个 ROI 返回一个标签。
示例:表面合格 / 不合格
在面板表面上设置一个 ROI。两个类别:干净和有瑕疵。模型为该面板返回一个标签。
有关完整的概念模型和实践演示,请阅读 Understanding Classifier。
- 点击 激活 进入程序编辑器
![]()
下面是程序编辑器的样子。三个主要部分(图像设置、AI模块、IO模块)直接对应瀑布式步骤:
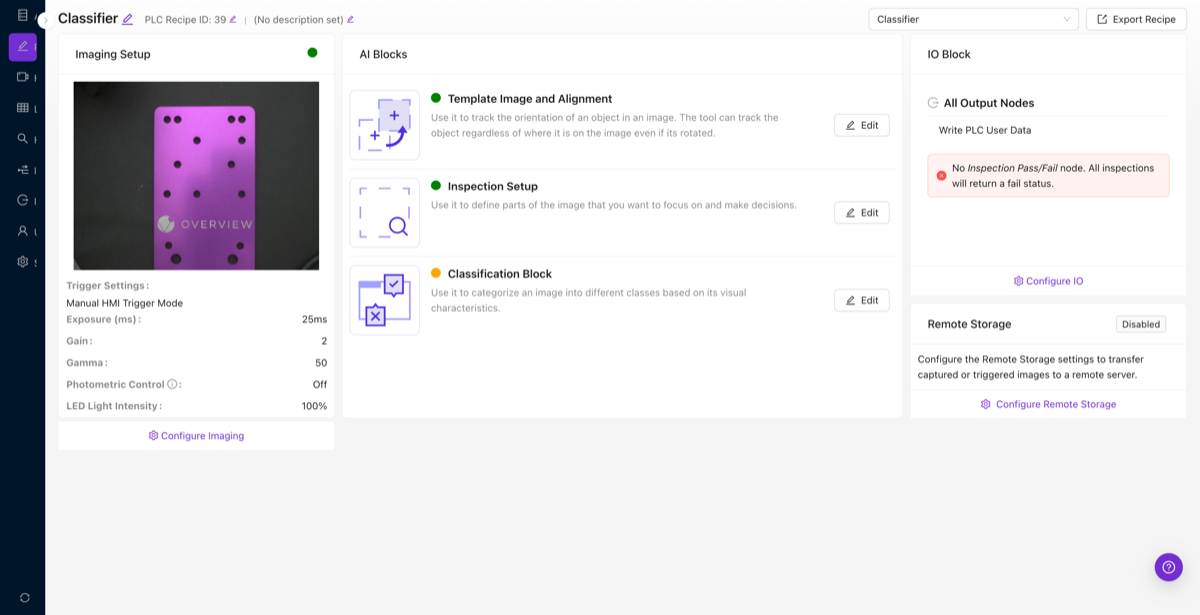
OV10i 仅支持分类器。如需像素级缺陷检测(分割),您需要 OV20i 或 OV80i。初次接触分类器模型?请阅读 Understanding Classifier 以获取完整的概念模型和实践演示。
如果您的检测需要像素级缺陷检测(分割),即 AI 高亮显示每个缺陷的精确形状和位置,则需要 OV20i 或 OV80i。OV10i 专为分类任务设计:通过/失败、有/无以及多类别判断。在投入时间设置程序之前,请相应地规划您的摄像头选型。
现在请按以下六个步骤操作:
第一步:图像设置
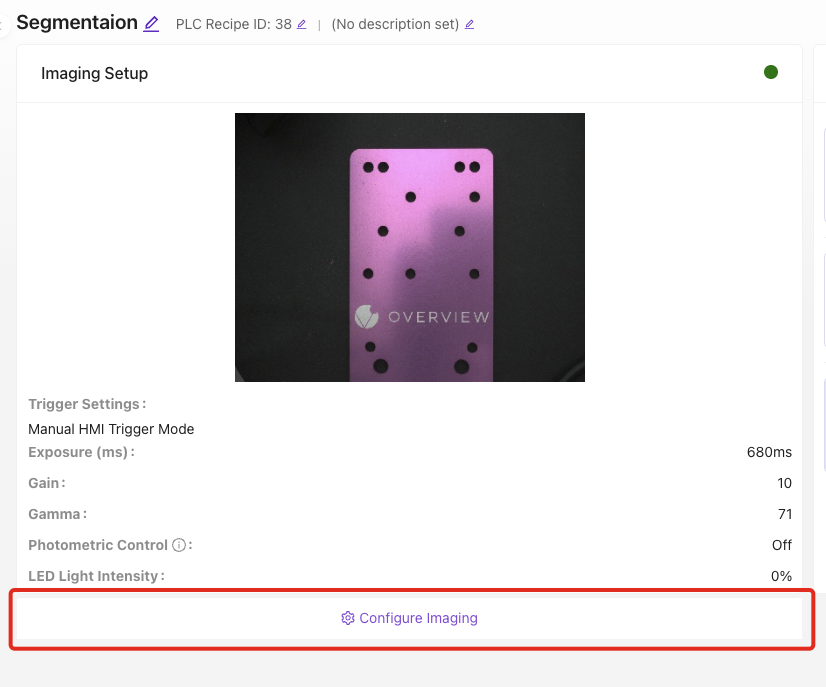
让您的摄像头图像看起来干净且一致。调整曝光、增益、白平衡,并且关键的是,如果您使用广角镜头,请启用镜头畸变校正。
关键设置:
- 曝光: 传感器捕获光线的时长。越高 = 越亮,但运动模糊越多
- 增益: 数字亮度增强。越高 = 越亮,但噪点越多
- 镜头校正: 修正广角镜头产生的桶形畸变。如适用,请立即启用此项。 不要跳过
- LED 设置 (OV10i): 调整强度和图案以减少眩光
继续前请验证: 点击实时预览。图像应清晰、光照充足,并且每次拍摄一致。
第二步:模板图像与对齐
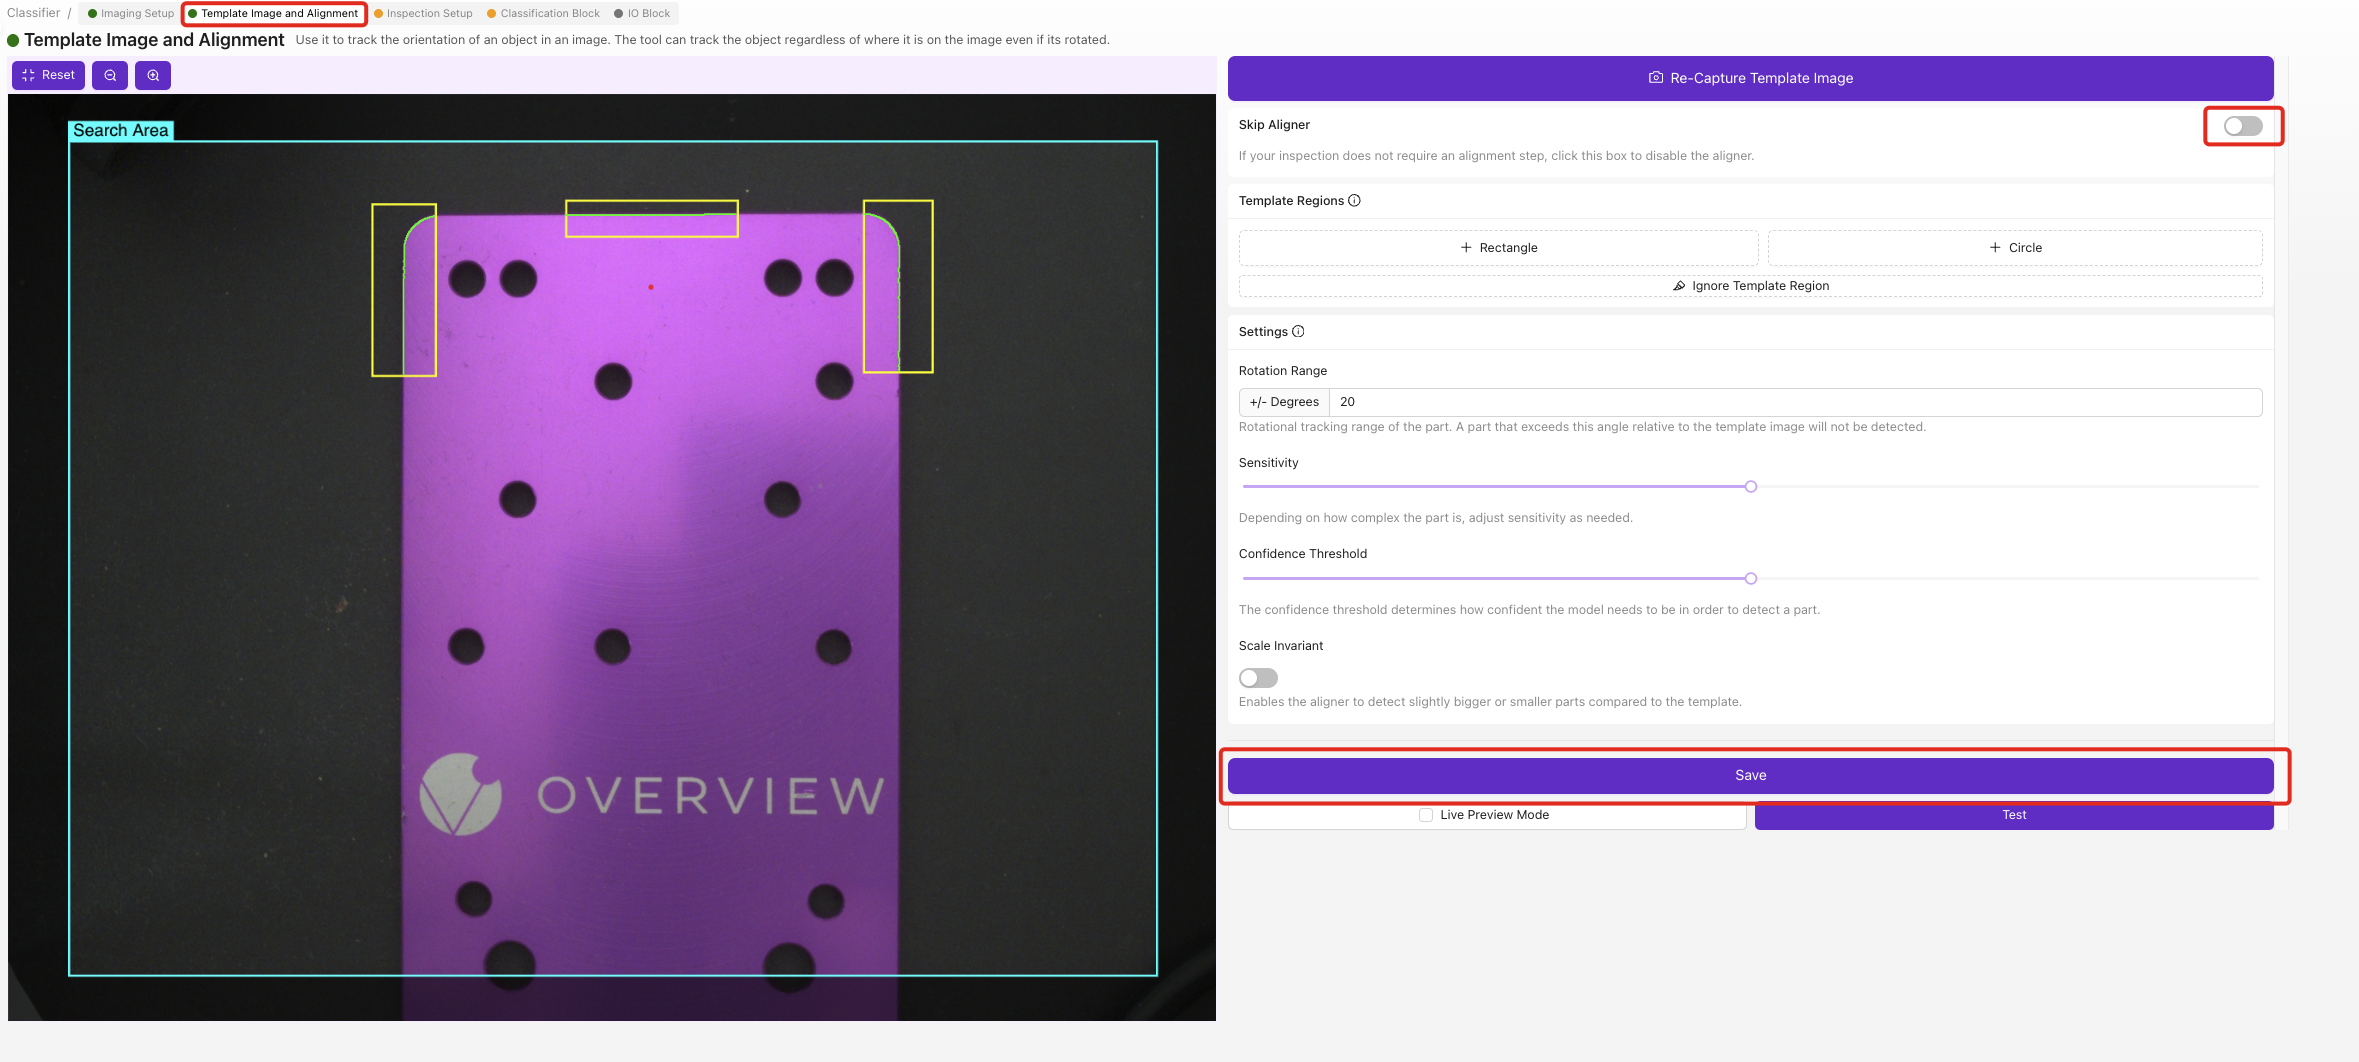
这是大多数客户觉得有挑战性的一步,也是带来最大差异的一步。对齐器是整个检测的基础。它动态地移动您的检测框,以追踪在传送带上发生位移和旋转的零件。良好的对齐让您可以绘制更小的 ROI,这意味着更少的训练数据和更准确的 AI。对齐器 → ROI → 分类器:如果第一个环节薄弱,下游的一切都会崩溃。
简短版本:
- 捕获一张良品的模板图像
- 在永不变化的特征上(强边缘、角点、孔)放置 2-3 个小型模板区域
- 将它们放置在零件上尽可能远的位置
- 使用忽略工具清理噪点边缘
- 保存,然后用实时预览测试。移动零件并验证对齐是否能跟踪它
切勿将对齐器锚定到缺陷、标签、贴纸或任何可独立于零件移动的东西上。只对齐到永久的、刚性的特征(机加工边缘、钻孔、PCB 轮廓)。如果您对齐到一个条形码贴纸上,而有人把它贴歪了,摄像头会把您所有的检测框移到错误的位置。
亲自试试: 使用下方的模拟器,看看零件在传送带上发生位移时会发生什么。关闭对齐器,然后移动滑块观察检测框如何丢失跟踪。
相机设置
模拟真实环境
移动生产线上的零件。
Legend
阅读 Alignment Explained 获取完整的演练。 这是本文档中最重要的页面。
第三步:感兴趣区域 (ROI)
现在绘制 AI 实际检查的区域。这些就是您的感兴趣区域 (ROI)。
关键规则:ROI 尽可能小。 这是客户问题的第二大来源。阅读 为什么 ROI 大小很重要 以了解原因。
简要版本:
- 创建一个检查类型(例如 "Screws"),并设定预期的类别(例如 "present"、"absent")
- 在每个要检查的位置绘制矩形 ROI
- 将它们做得刚好能容纳特征,不要更大
- 使用描述性名称(例如 "Screw_Top_Left")
第四步:训练您的 AI 模型
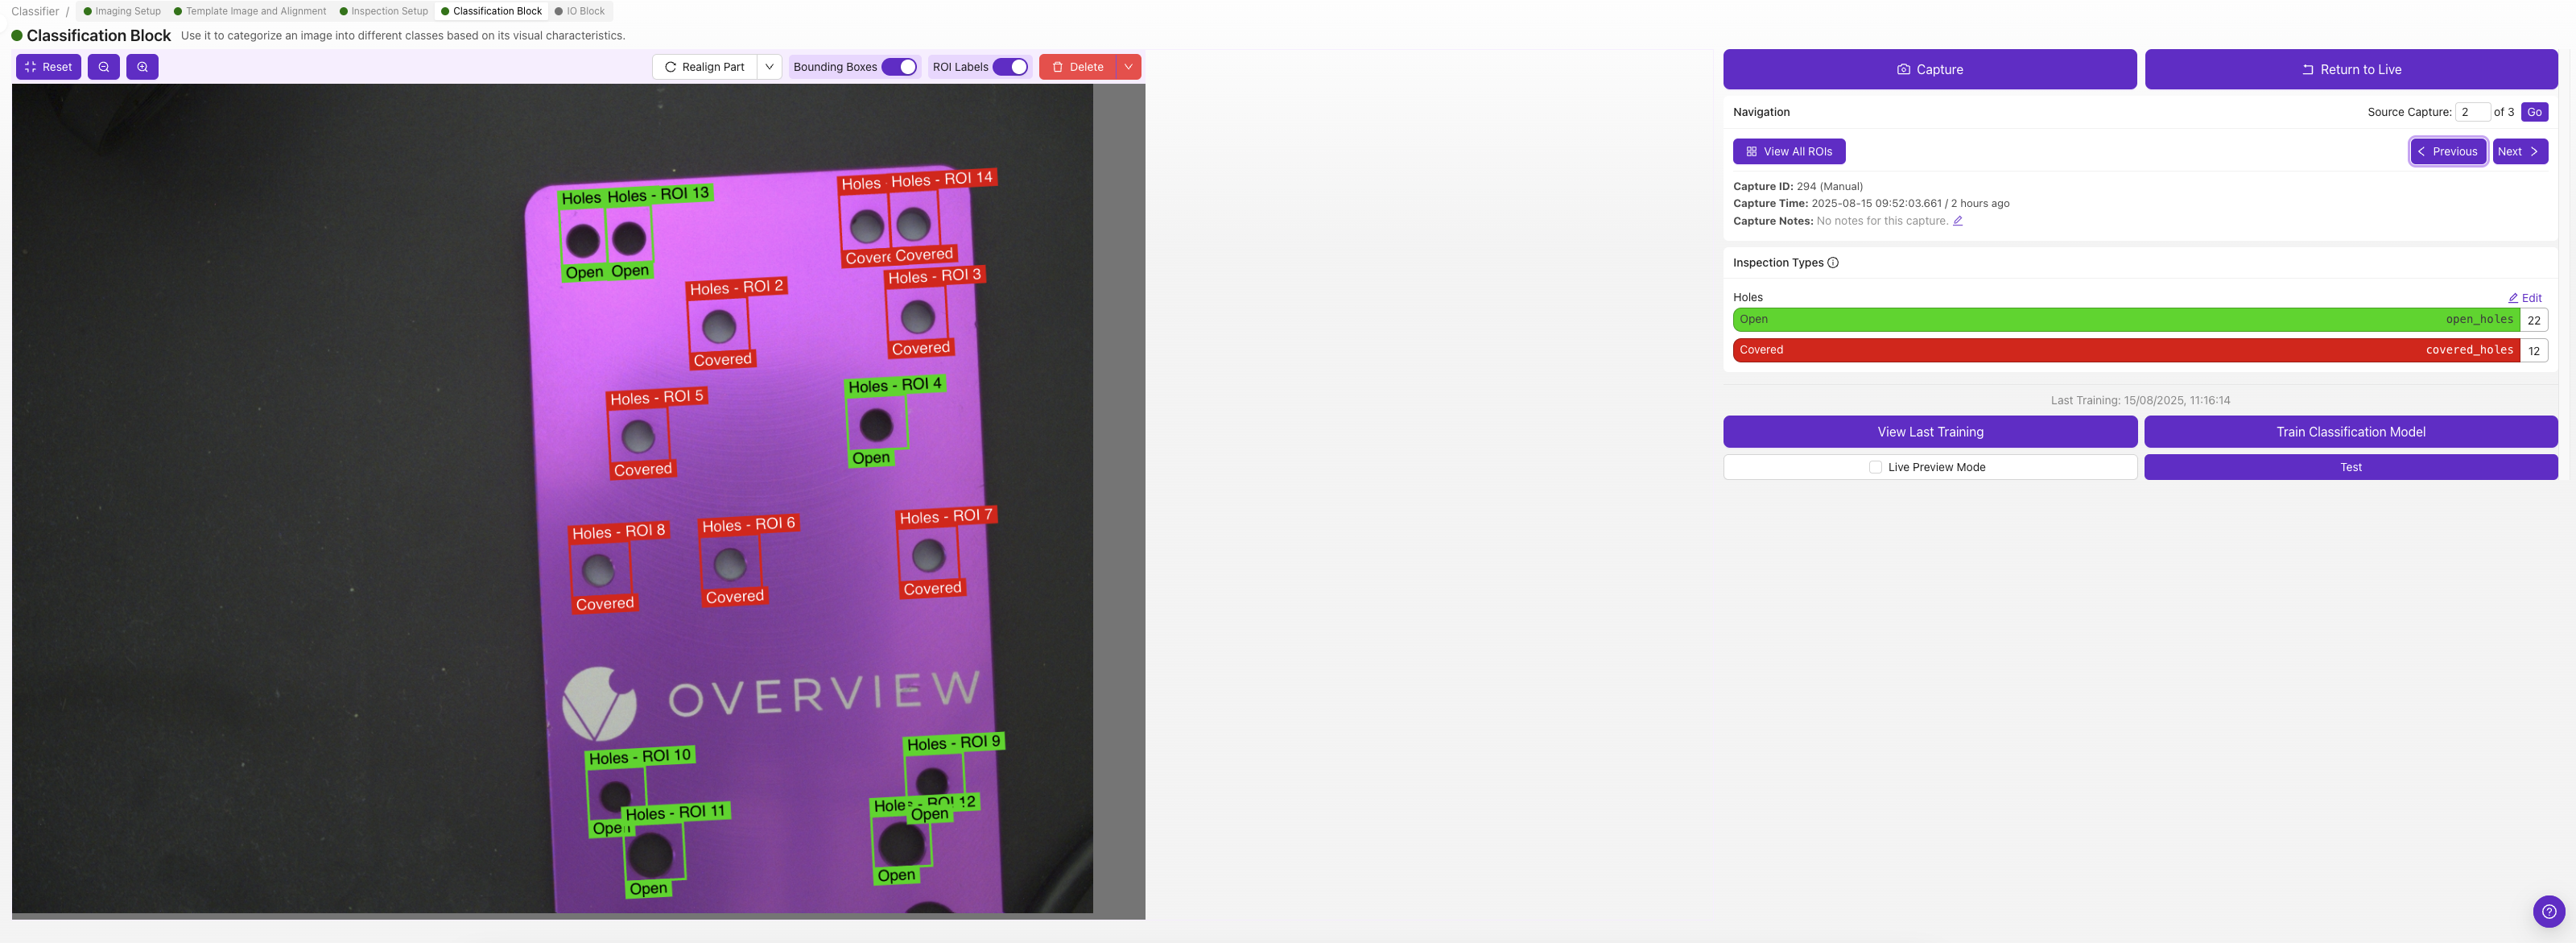
标注几张图像并训练您的第一个模型。
简要版本:
- 从每个类别 10-15 张图像开始。不要过度收集
- 训练前仔细检查每个标签(一个错误标签可能会毁掉您的模型)
- 训练(约 30 秒)以检查信号
- 使用实时预览进行测试。尝试找出它的不足之处
- 在失败的地方添加针对性数据,重新训练
第五步:输出规则 (IO模块)
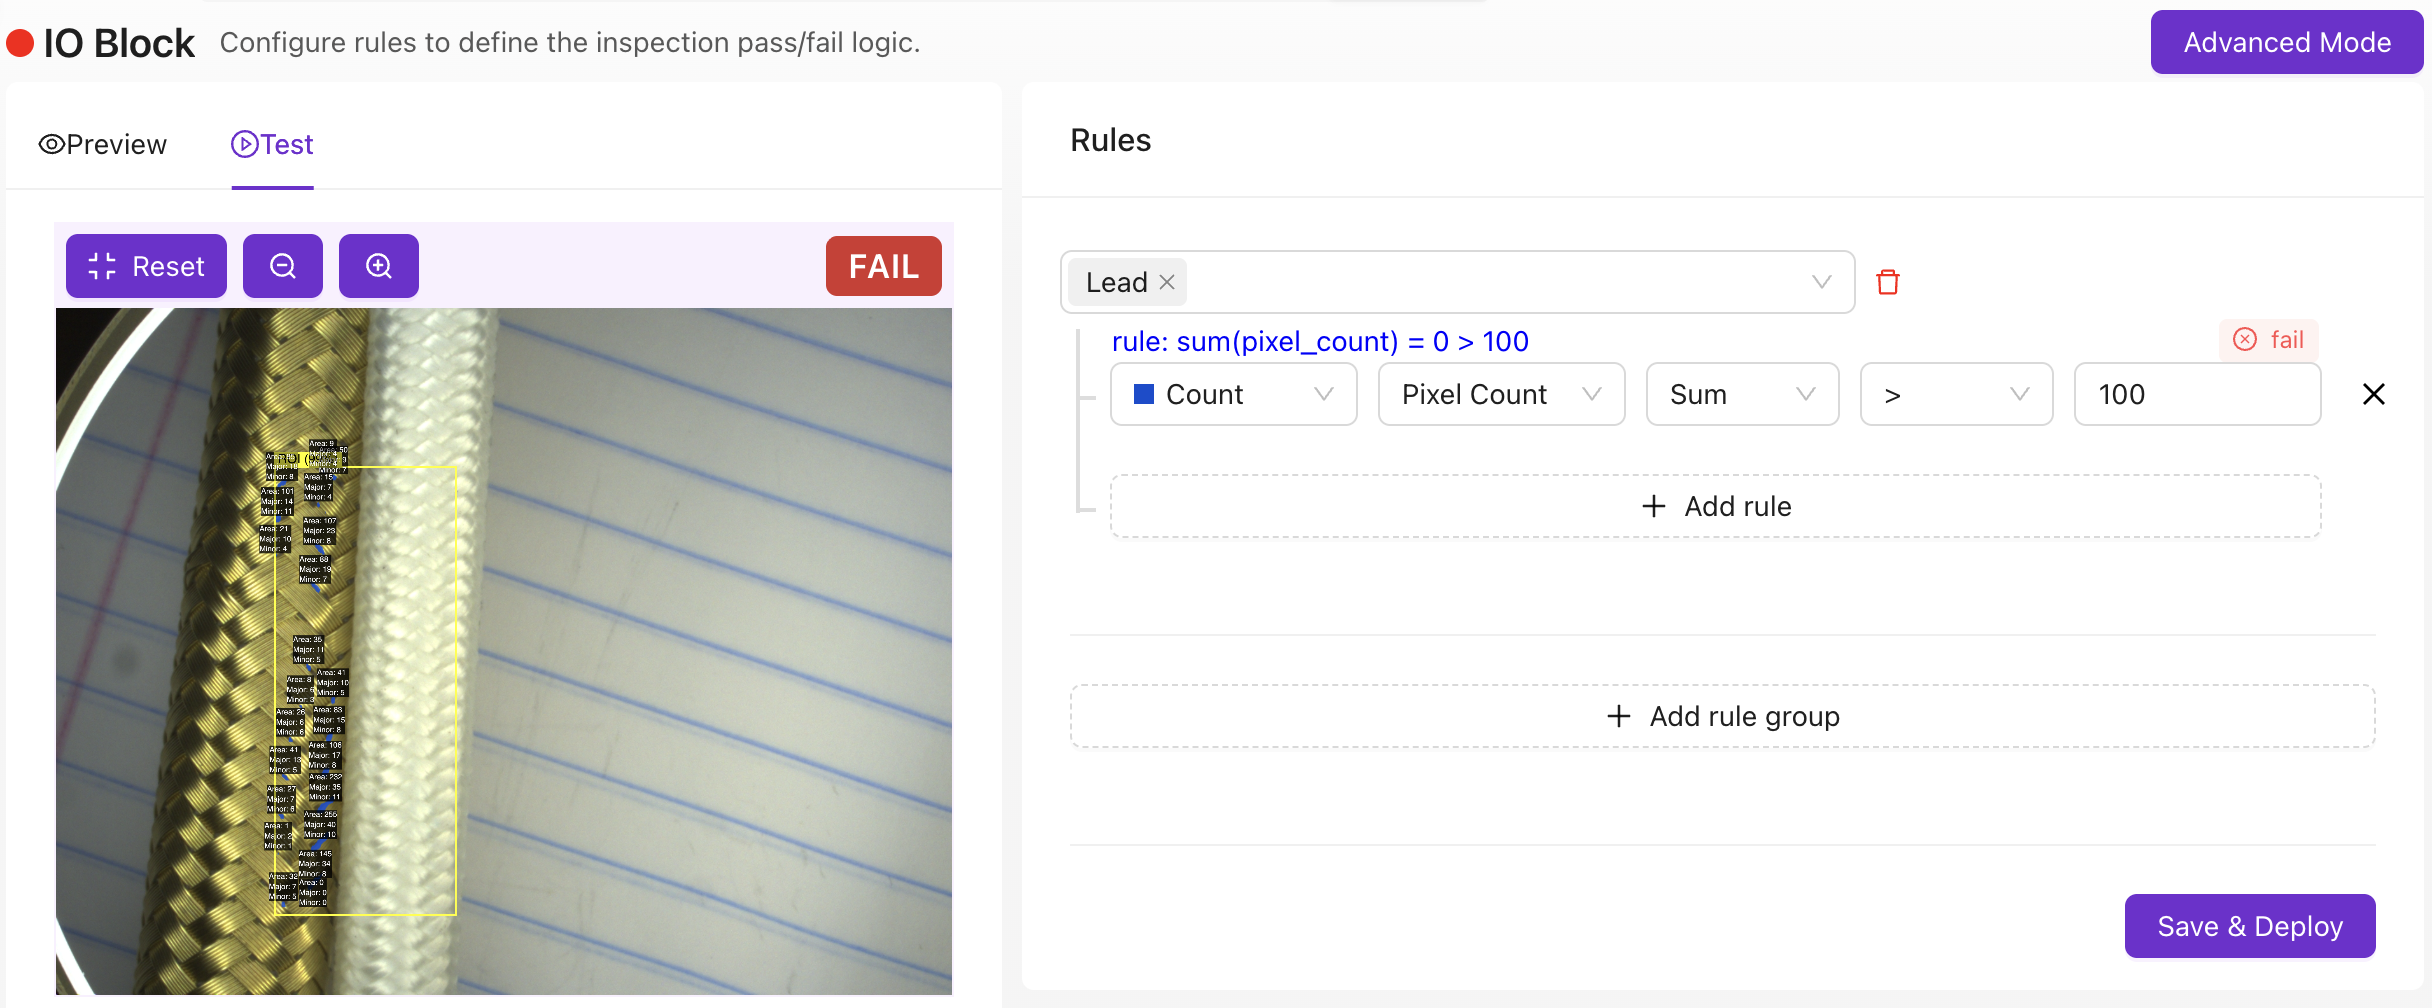
定义 AI 做出决策时会发生什么。
基本模式: 设置通过/失败规则。最简单的设置:所有 ROI 都必须通过才能全局通过。这个单一的二元结果将发送到您的 PLC、HMI 或输出。
高级模式 (Node-RED): 适用于简单通过/失败之外的任何场景:自定义仪表板、时序逻辑、数据路由到 MES 系统、条码扫描器集成(需要外部读取器)等。使用 tools.overview.ai 从普通英语描述生成 Node-RED 流程。
第六步:部署与验证

- 激活您的程序
- 设置触发模式(手动、硬件传感器、PLC 或定时间隔)
- 让测试部件通过系统
- 验证通过/失败输出是否符合您的预期
- 检查边缘情况,即最难分类的部件
恭喜!您现在已经拥有一个运行中的 AI 检查。
程序检查清单
在继续之前,请确认:
- 已创建并命名新程序
- 已配置图像设置:清晰、光照良好、一致
- 已设置对齐并可靠跟踪
- 已绘制感兴趣区域 (ROI):小、位置合适、已命名
- 已训练 AI 模型并使用实时预览测试
- 已配置输出规则:通过/失败符合预期
- 已激活并使用正确触发模式部署程序