AI-POWERED DOCS
What do you want to know?
Environment Variables
You can define environment variables for each camera in System Settings. These variables are made available in Node-RED, letting you set parameters like PLC IP, line number, Modbus IP, timezone, FTP server, and so on in one centralized place. This makes it easy to reuse the same Node-RED flow across different lines while customizing behavior per camera. Environment variable sets can also be exported to or imported from a .txt file, simplifying deployment and backup.
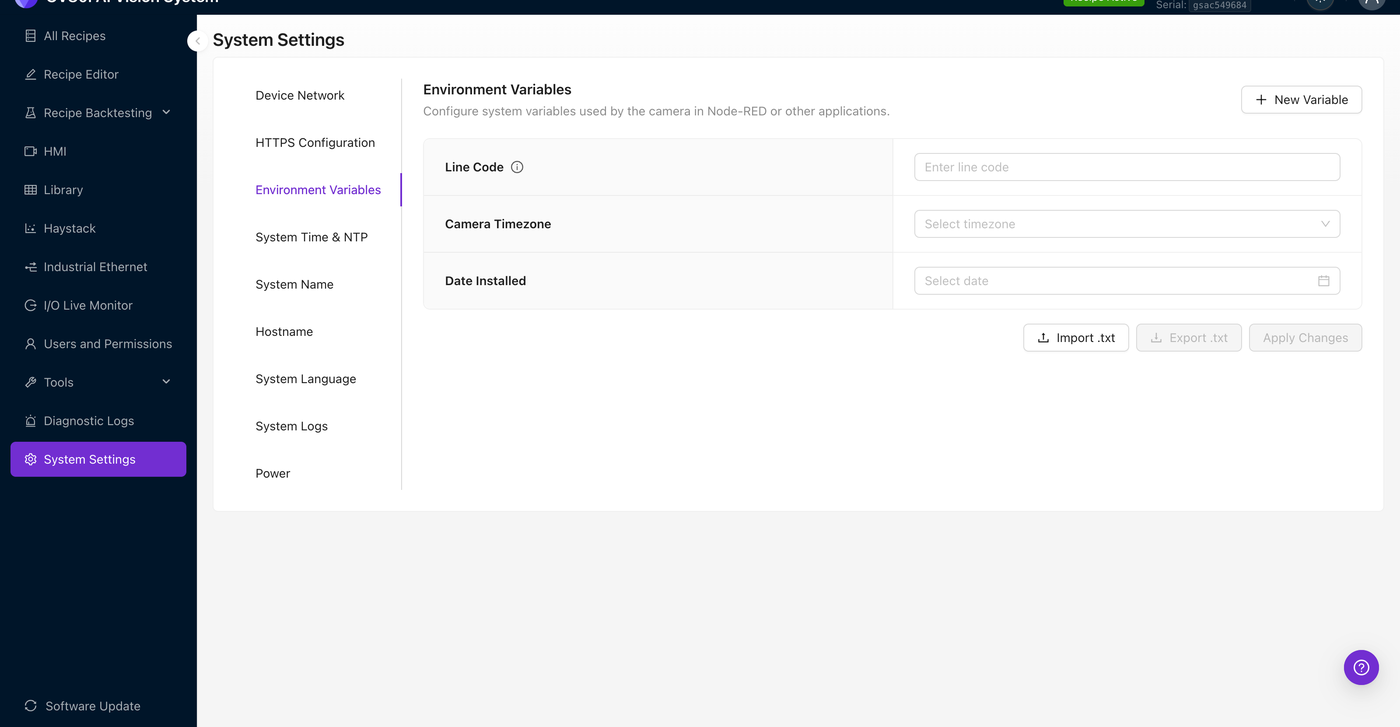
The OV20i ships with three built-in variables — Line Code, Camera Timezone, and Date Installed — and you can add as many Custom Variables as you need.
When to use environment variables
Reach for environment variables when:
- The same value (PLC IP, MES URL, Modbus host, license key, threshold, line ID) is referenced from more than one Node-RED node.
- A value differs between deployments and you want one flow that works everywhere — set the variable once on each camera instead of editing the flow.
- You want to share a flow between cameras (export/import) without leaking deployment-specific config into the JSON.
- You need IT or operators to change a value (e.g., a new FTP server) without opening Node-RED.
Defining variables in System Settings
- From the camera UI's left sidebar, click System Settings.
- Open the Environment Variables tab (third tab in the sub-navigation).
- Fill in any of the built-in variables:
- Line Code — production line identifier or code (free-text).
- Camera Timezone — pick a timezone from the dropdown.
- Date Installed — date picker.
- To add a custom variable, click + New Variable in the top right. A new Custom Variables row appears with a key/value input pair. Type a key (no spaces — letters, digits, and underscores only) and a value, then Apply Changes.
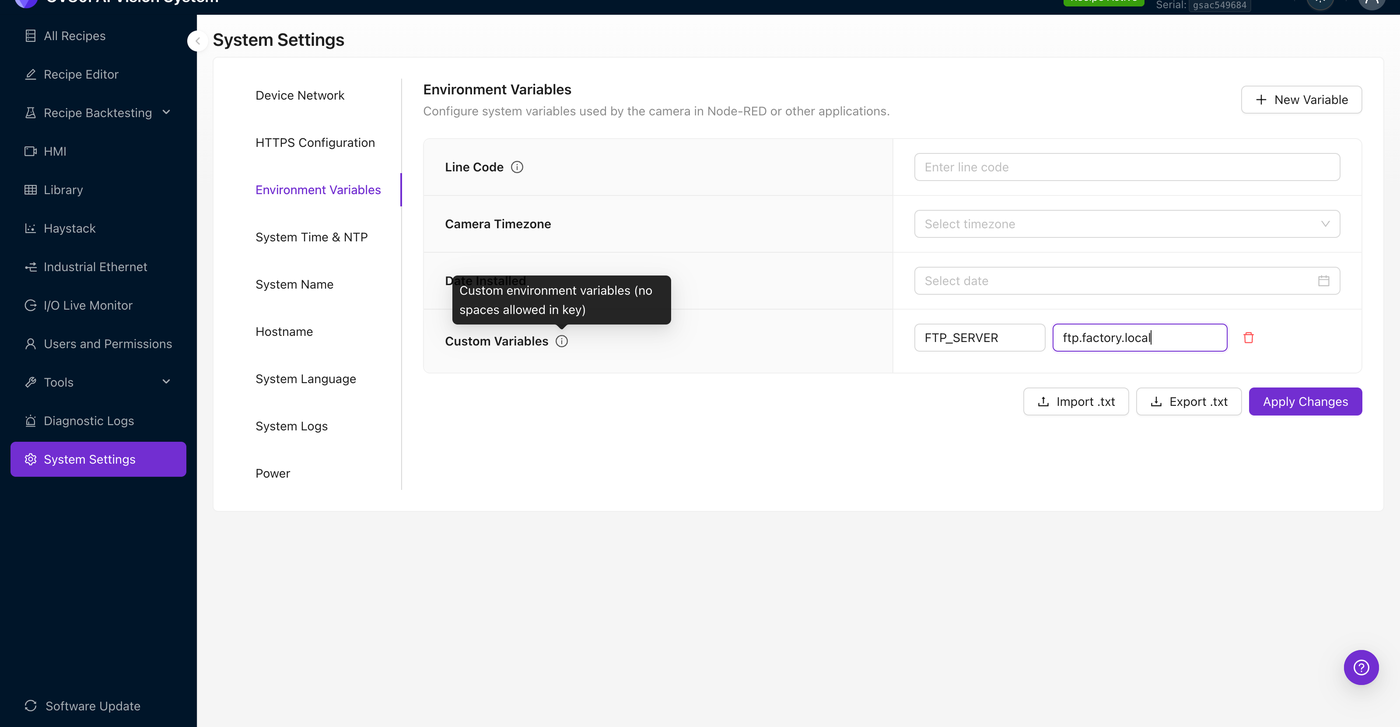
The key is the name you'll use to read the variable from Node-RED. Convention is upper-snake-case (e.g., PLC_IP, MODBUS_IP, FTP_SERVER, LINE_NUMBER, ALERT_THRESHOLD) — no spaces are allowed by the UI.
- The camera prompts you to confirm before saving. Node-RED is restarted on apply so the new value is available to flows immediately.
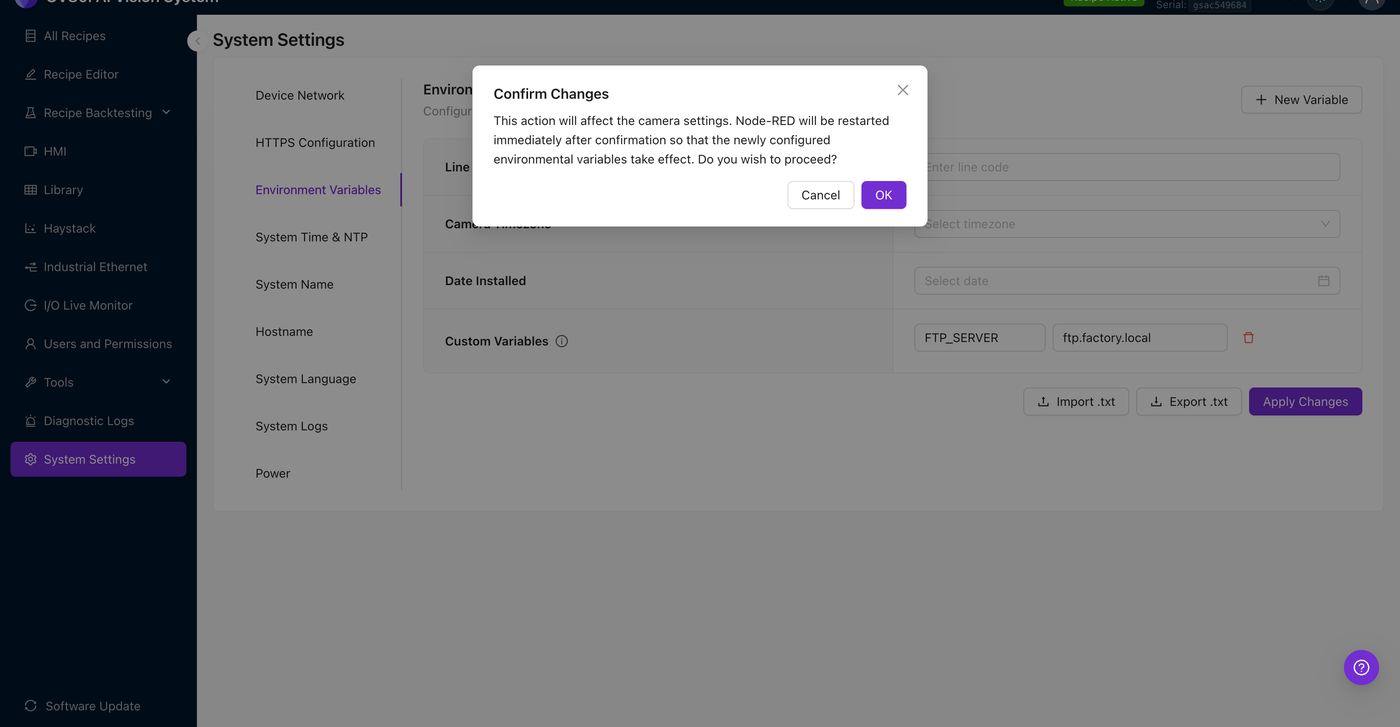
Saving any change to environment variables — adding, editing, or deleting a custom variable, or changing one of the built-in fields — restarts the Node-RED runtime so the values take effect. Active inspections continue running, but any in-flight flow execution is interrupted. Schedule changes during planned downtime, not mid-shift.
Backup and restore
The Export .txt button downloads the current variable set as a plain text file (KEY=VALUE lines). Import .txt restores from a previously exported file. Use this to clone a known-good config across multiple cameras of the same line, or to back up before re-imaging.
Reading variables from Node-RED
Open the IO Block on any recipe and click Advanced Mode to enter Node-RED. Camera environment variables are exposed to flows in three ways — pick whichever matches your use case.
1. Inject node with payload type env (simplest)
The fastest way to read a variable is an inject node configured with payload type env and payload <VAR_NAME>. When triggered, the inject node sends msg.payload = <value of the env var> downstream — no code, no function block.
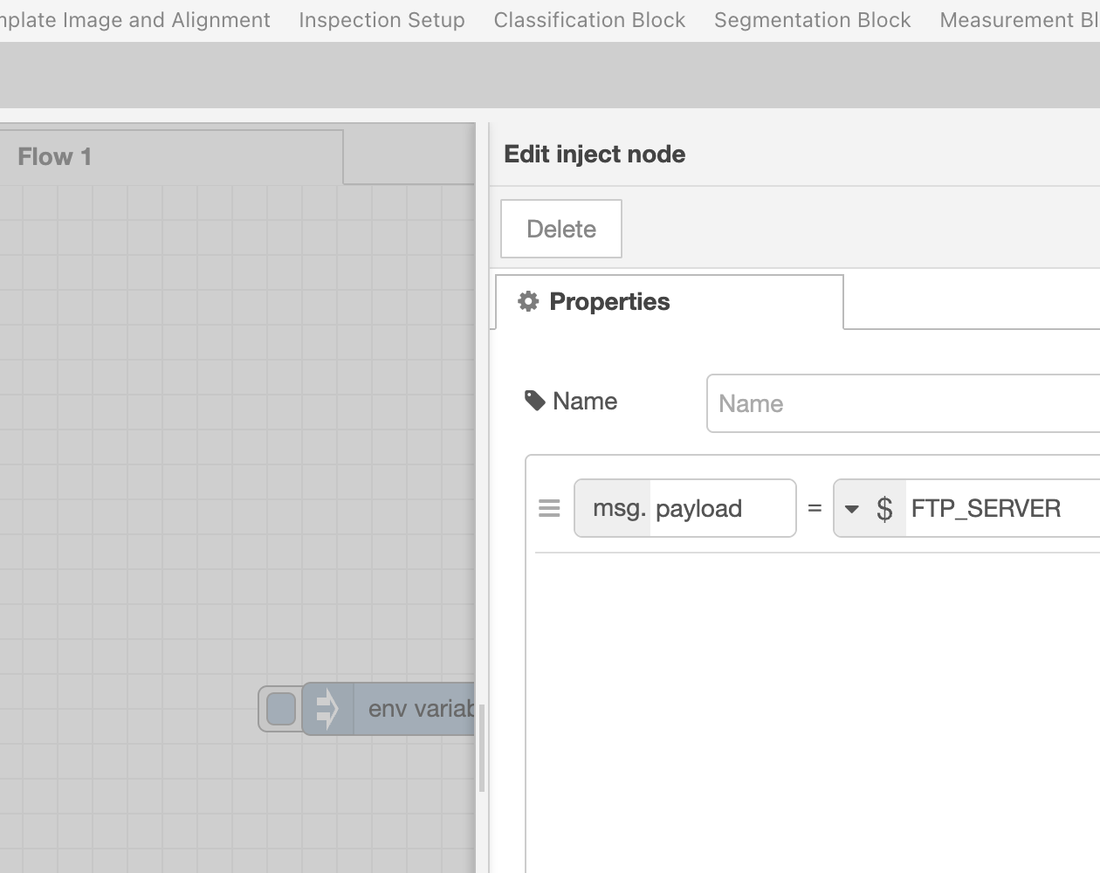
Wire that to a debug node and trigger the inject — the debug sidebar shows the resolved value.
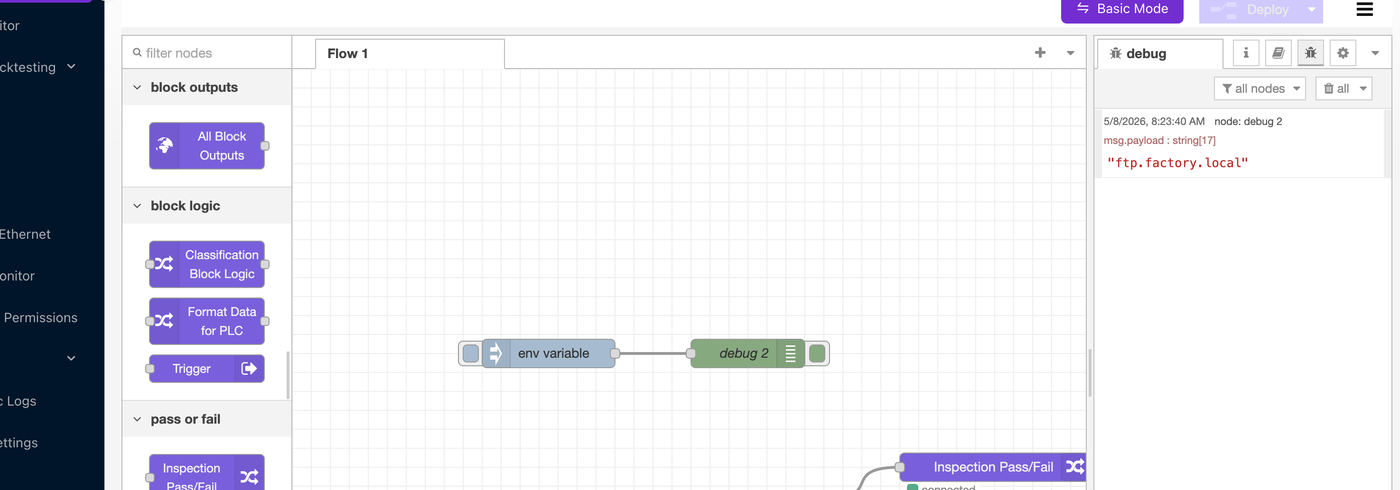
This pattern is ideal for sanity-checking that a variable is defined and being read correctly. It's also the pattern to use when a downstream node (HTTP request, MQTT publish, FTP) just needs the raw value as the payload.
2. Function node with env.get() (programmatic)
When you need to combine multiple variables, build a structured message, or branch on a value, use a function node and the standard Node-RED env.get() API:
// Read a built-in variable
const lineCode = env.get("LINE_CODE");

// Read custom variables
const plcIp = env.get("PLC_IP");
const ftpServer = env.get("FTP_SERVER");

// Build a structured message for downstream nodes
msg.payload = {
  line: lineCode,
  plc: plcIp,
  ftp: ftpServer,
  capturedAt: new Date().toISOString(),
};
return msg;
Wire it to an mqtt out, http request, ftp, or email node and the structured payload travels along.
3. ${VAR_NAME} substitution in any node's property
Most node configuration fields support ${VAR_NAME} substitution. For example, in an http request node you can set the URL to:
${MES_ENDPOINT}/api/v1/inspections
…and Node-RED substitutes the variable's current value at runtime. Same for ftp server fields, mqtt broker URLs, email recipient lists, and so on. This lets you set deployment-specific config in one place (System Settings) without touching the flow.
Common patterns
| Pattern | Variable name | How it's read |
|---|---|---|
| PLC connection | PLC_IP, PLC_PORT | Inject + env, or ${PLC_IP} in PLC config |
| FTP image export | FTP_SERVER, FTP_USERNAME | FTP node host/credential fields with ${...} substitution, or env.get() in a Function node |
| MES / data-historian endpoint | MES_ENDPOINT | HTTP request node URL: ${MES_ENDPOINT}/api/... |
| MQTT broker | MQTT_BROKER | MQTT broker config: ${MQTT_BROKER} |
| Modbus host | MODBUS_IP | Modbus node IP field |
| Line identifier (per-camera) | LINE_NUMBER, LINE_CODE (built-in) | Stamped onto every published message for traceability |
| Alert escalation threshold | ALERT_THRESHOLD | Function node that counts recent failures |
| Operator notification list | ALERT_EMAILS | Email node "to" field |
The Environment Variables page is plaintext and visible to any user with System Settings access. For secrets that need stronger protection (PLC passwords, signed tokens, certs), use Node-RED's credentials store on individual nodes instead.
What's next
- Node-RED Basics — orientation if you're new to Node-RED on the camera.
- Overview Node-RED Custom Blocks — reference for the OV-specific blocks that show up alongside the standard Node-RED palette.
- Setting Up Outputs (Step 5) — where Node-RED fits into the broader pass/fail and integration flow.