AI-POWERED DOCS
What do you want to know?
HTTPS Configuration
By default, the OV20i serves its web interface over plain HTTP. If your network security policy requires encrypted connections, you can enable HTTPS (SSL/TLS) to secure all browser-to-camera communication. This guide walks you through creating a certificate, enabling HTTPS, and handling browser trust warnings.
Most factory-floor setups work fine with HTTP since the camera sits on an isolated local network. HTTPS is primarily needed when:
- Your IT or security team requires encrypted traffic on all devices
- The camera is accessible across network segments or over a VPN
- You need to meet compliance requirements (e.g., IEC 62443)
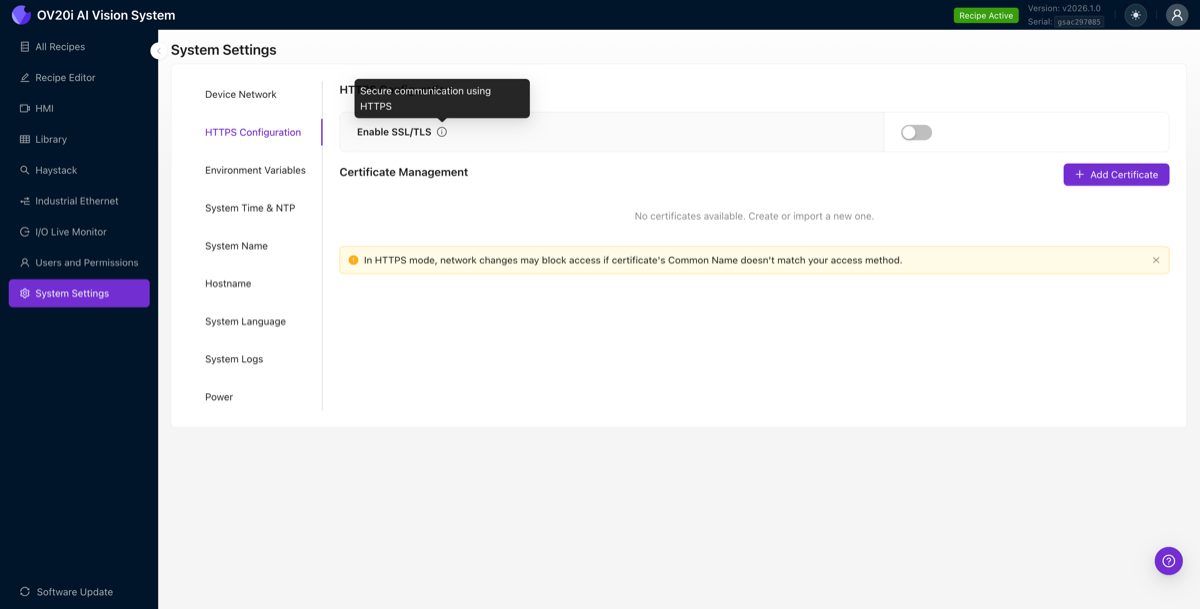
Step 1: Open HTTPS Configuration
Navigate to System Settings in the left sidebar, then click the HTTPS Configuration tab.
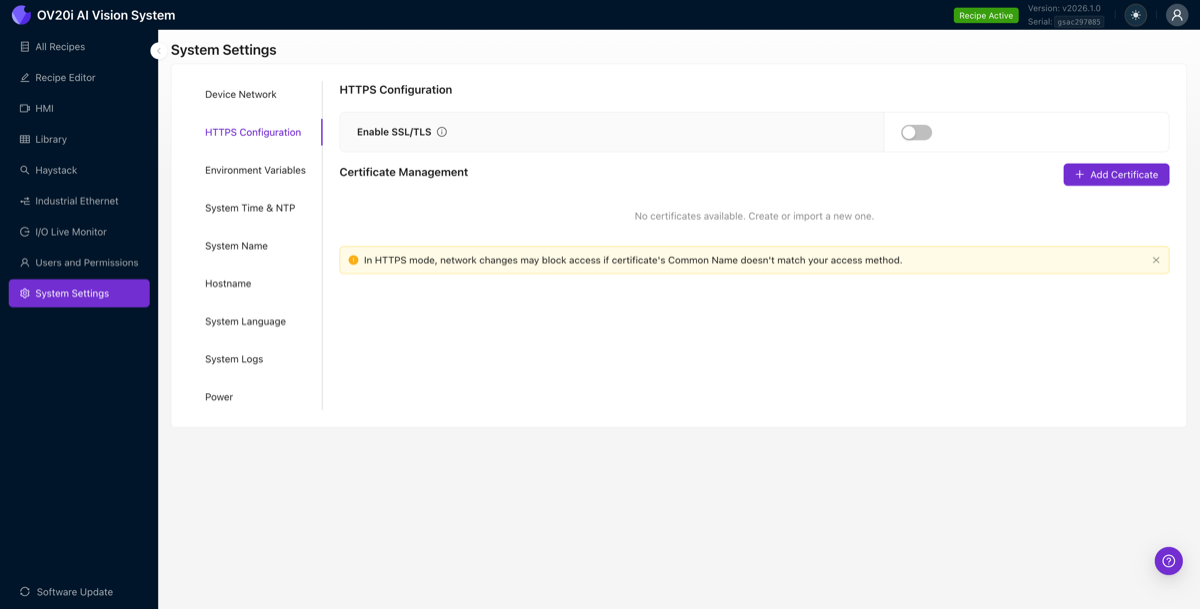
You'll see two main sections:
| Section | Purpose |
|---|---|
| Enable SSL/TLS | Master toggle to turn HTTPS on or off |
| Certificate Management | Create, import, or manage SSL certificates |
You must create or import a certificate before enabling HTTPS. The toggle requires at least one active certificate to work.
Step 2: Add a certificate
Click + Add Certificate to open the certificate wizard. The wizard has three steps: Select Type, Details, and Confirm.
Choose your certificate type
The camera supports three certificate types:
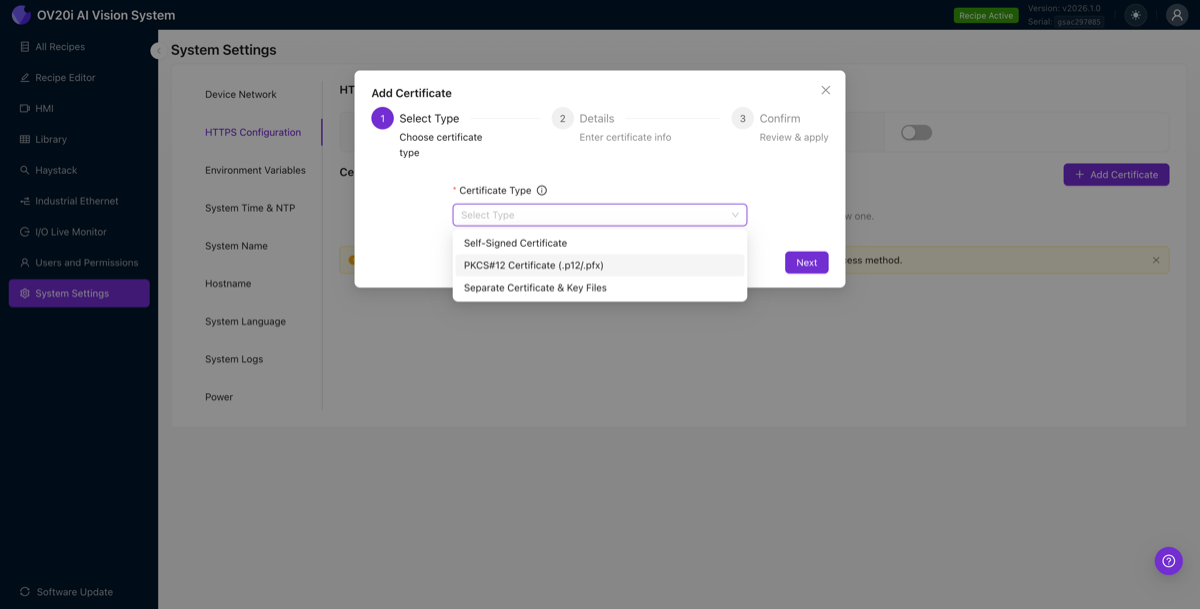
| Type | Best for | What you need |
|---|---|---|
| Self-Signed Certificate | Quick setup, testing, isolated networks | Nothing, the camera generates everything |
| PKCS#12 Certificate (.p12/.pfx) | Enterprise environments with a CA-issued cert bundled in a single file | A .p12 or .pfx file and its password |
| Separate Certificate & Key Files | Enterprise environments where your CA provides separate files | A certificate file (.crt/.pem) and a private key file (.key/.pem) |
Option A: Self-Signed Certificate (recommended for most users)
Select Self-Signed Certificate from the dropdown and click Next.
Fill in the certificate details:
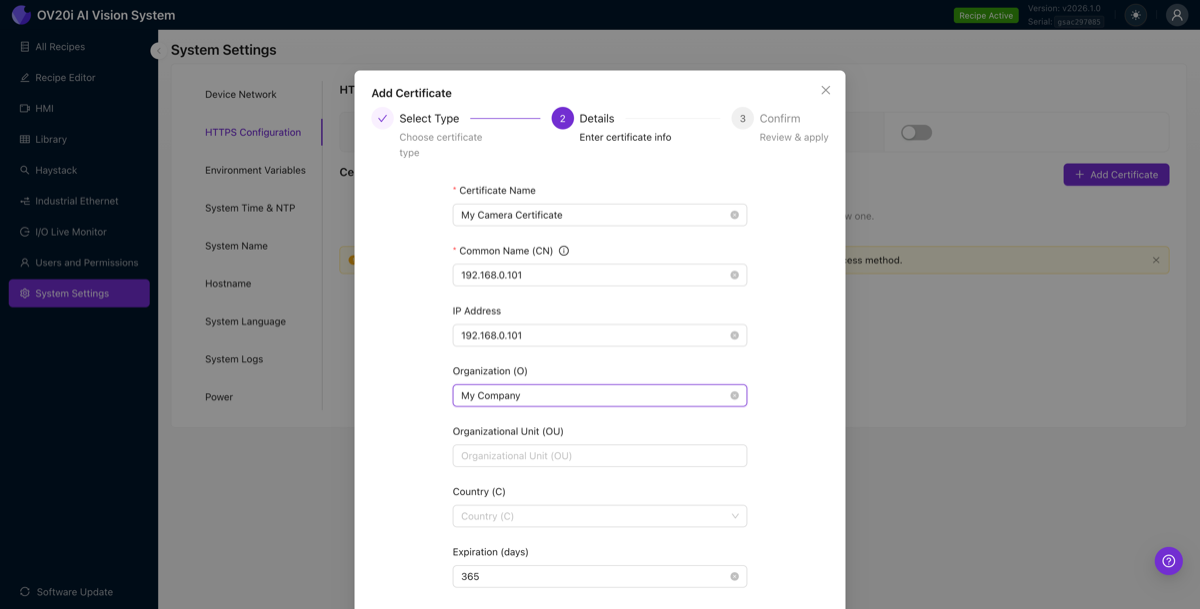
| Field | What to enter | Required |
|---|---|---|
| Certificate Name | A friendly label (e.g., "My Camera Certificate") | Yes |
| Common Name (CN) | The IP address or hostname you use to access the camera (e.g., 192.168.0.101) | Yes |
| IP Address | The camera's IP address (e.g., 192.168.0.101) | No |
| Organization (O) | Your company name | No |
| Organizational Unit (OU) | Department or team name | No |
| Country (C) | Your country code | No |
| Expiration (days) | How long the certificate is valid. Default is 365 | No |
The Common Name must match exactly how you access the camera in your browser. If you browse to 192.168.0.101, set the CN to 192.168.0.101. If you browse to a hostname like ov20i-line4.factory.local, use that as the CN instead. A mismatch will cause browser security warnings even after trusting the certificate.
Click Next to review the confirmation screen:
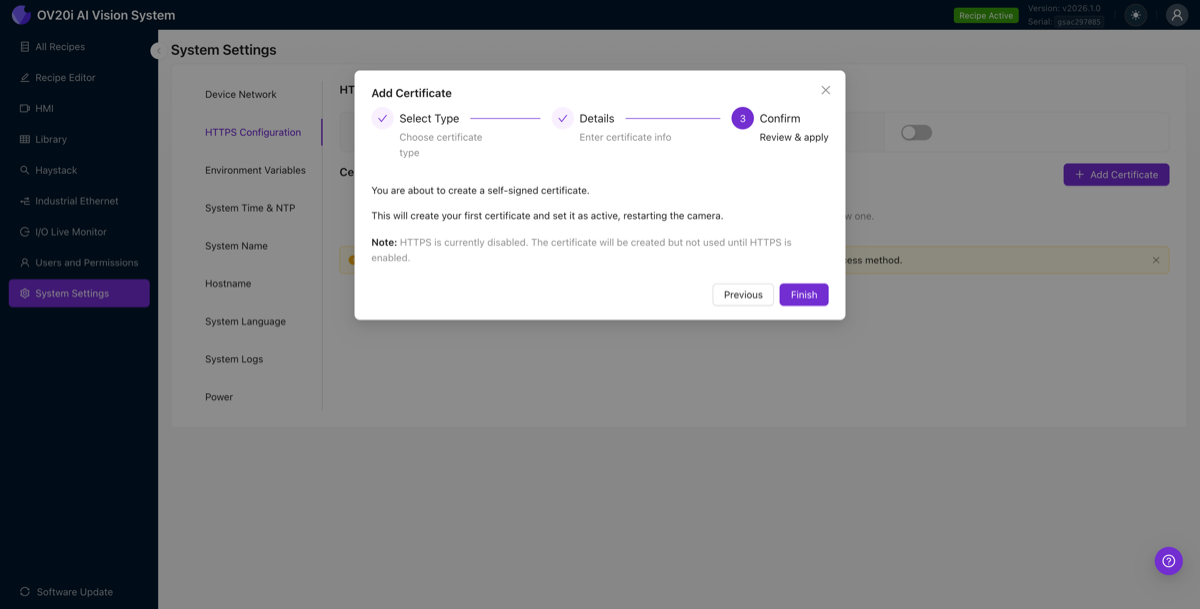
The confirmation tells you:
- The certificate will be created and set as active
- If HTTPS is currently disabled, the certificate is created but not used until you enable HTTPS
Click Finish to create the certificate.
If this is your first certificate, creating it will restart the camera's web server. You may briefly lose your browser connection. Wait a few seconds, then refresh the page.
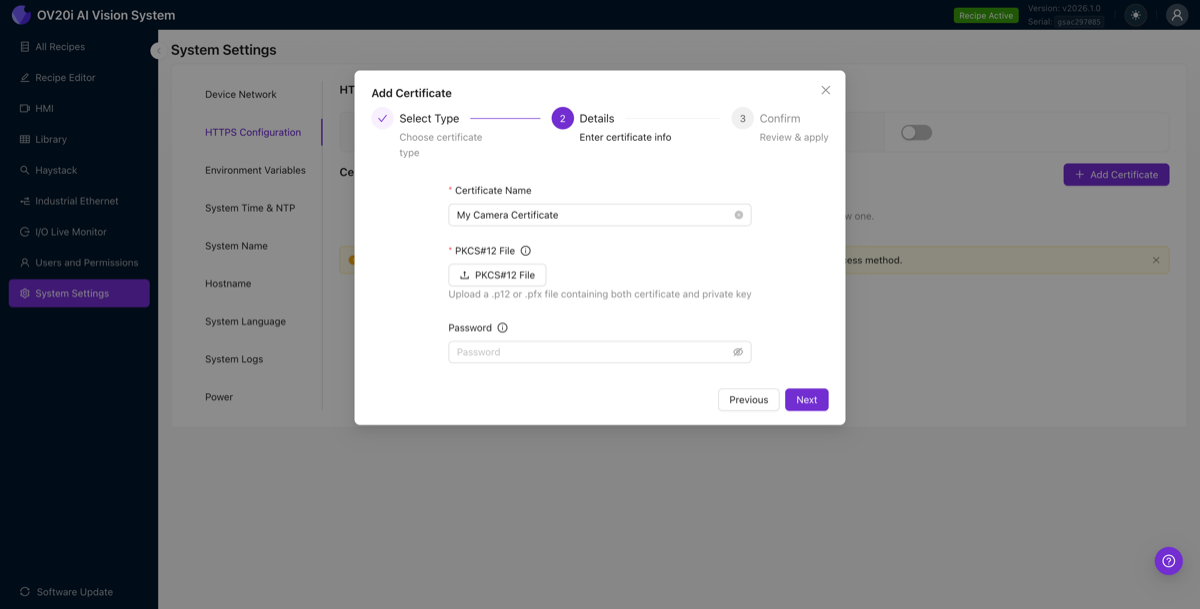
Option B: PKCS#12 Certificate (.p12/.pfx)
If your organization's Certificate Authority (CA) has issued you a PKCS#12 bundle:
- Select PKCS#12 Certificate (.p12/.pfx) and click Next
- Enter a Certificate Name (friendly label)
- Click Upload PKCS#12 File and select your
.p12or.pfxfile - Enter the Password that protects the PKCS#12 file
- Click Next, then Finish
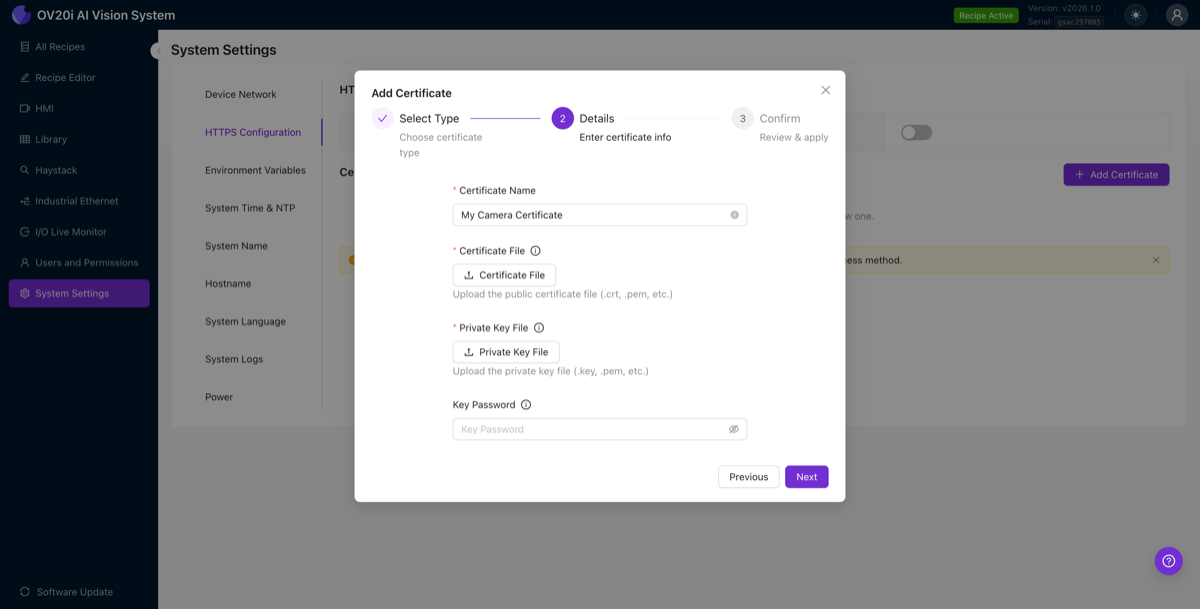
Option C: Separate Certificate & Key Files
If your CA provided separate certificate and key files:
- Select Separate Certificate & Key Files and click Next
- Enter a Certificate Name
- Click Upload Certificate File and select your public certificate (
.crt,.pem) - Click Upload Private Key File and select your private key (
.key,.pem) - If the private key is password-protected, enter the Key Password
- Click Next, then Finish
Step 3: Enable HTTPS
Once you have at least one certificate, toggle Enable SSL/TLS to on.
After enabling:
- The camera will begin serving pages over HTTPS (port 443)
- HTTP (port 80) remains available by default, so you won't lose access
- Your browser address bar will change from
http://tohttps://
Navigate to the camera using HTTPS:
https://192.168.0.101
Step 4: Handle browser trust warnings
Self-signed certificates
When you first access the camera over HTTPS with a self-signed certificate, your browser will show a security warning. This is normal and expected since the certificate was not issued by a publicly trusted CA.
In Chrome:
- Click Advanced
- Click Proceed to 192.168.0.101 (unsafe)
In Firefox:
- Click Advanced...
- Click Accept the Risk and Continue
In Edge:
- Click Advanced
- Click Continue to 192.168.0.101 (unsafe)
To avoid seeing the warning every time, you can add the camera's self-signed certificate to your operating system's trusted certificate store:
Windows: Open the camera URL in Chrome, click the padlock/warning icon in the address bar, export the certificate, then import it into "Trusted Root Certification Authorities" using certmgr.msc.
macOS: Open the camera URL in Safari or Chrome, click the padlock/warning icon, export the certificate, then double-click the .cer file to add it to Keychain Access. Set it to "Always Trust".
Linux: Copy the certificate to /usr/local/share/ca-certificates/ and run sudo update-ca-certificates.
CA-signed certificates
If you imported a certificate from a trusted CA (via PKCS#12 or separate files), your browser should trust it automatically with no warnings, as long as:
- The certificate chain is complete (includes intermediate certificates)
- The Common Name or Subject Alternative Name (SAN) matches the URL you're using
- The certificate has not expired
Troubleshooting
Common HTTPS issues and fixes
| Problem | What to try |
|---|---|
| Can't reach camera after enabling HTTPS | Try both http:// and https:// in your browser. HTTP should still be available as a fallback |
| Browser shows "NET::ERR_CERT_COMMON_NAME_INVALID" | The Common Name on the certificate doesn't match the URL. Create a new certificate with the correct CN |
| Browser shows "NET::ERR_CERT_DATE_INVALID" | The certificate has expired. Create a new certificate or import an updated one |
| Lost access after changing the camera's IP | If the new IP doesn't match the certificate's CN, you'll get warnings. Create a new certificate matching the new IP, or access via HTTP to make changes |
| PKCS#12 upload fails | Verify the file is a valid .p12 or .pfx and the password is correct |
If you change the camera's IP address or hostname while HTTPS is enabled, you may lose access if the new address doesn't match the certificate's Common Name. Always ensure your certificate CN matches your planned access method, or keep HTTP enabled as a fallback while making network changes.
API Reference
The camera exposes two REST endpoints for programmatic HTTPS management:
Incorrect API calls to the protocols endpoint can disable both HTTP and HTTPS, locking you out of the camera's web interface entirely. Always keep at least one protocol enabled. If you are unsure about any API setting, contact support@overview.ai before making changes.
Get protocol status
curl http://192.168.0.101/edge/web_server/protocols
Response:
{
  "http": true,
  "https": false
}
List certificates
curl http://192.168.0.101/edge/certificates
Response (when no certificates exist):
[]
Connection checklist
- Certificate created or imported in System Settings > HTTPS Configuration
- Enable SSL/TLS toggle is on
- Browser navigates to
https://<camera-ip>successfully - Browser trust warning handled (self-signed) or absent (CA-signed)
Your camera is now secured with HTTPS. For network configuration details, see Network Configuration.