AI-POWERED DOCS
What do you want to know?
Network Access and Activation
This deep dive covers the camera’s default network settings, methods for checking and configuring local network parameters, performing ping tests from the command line, accessing the camera’s web interface, and activating the camera. It also includes guidance on network troubleshooting.
Learning Objectives
By the end of this deep dive, you will understand:
- how to check your computer's current IP configuration
- how to configure your network adapter to communicate with cameras
- how to successfully ping cameras from the command line
- how to access the camera web interface through a browser
- how to activate a camera
- default IP addresses for your camera model
Here is the Device Network page in the camera's System Settings, showing the active and fallback network configuration:
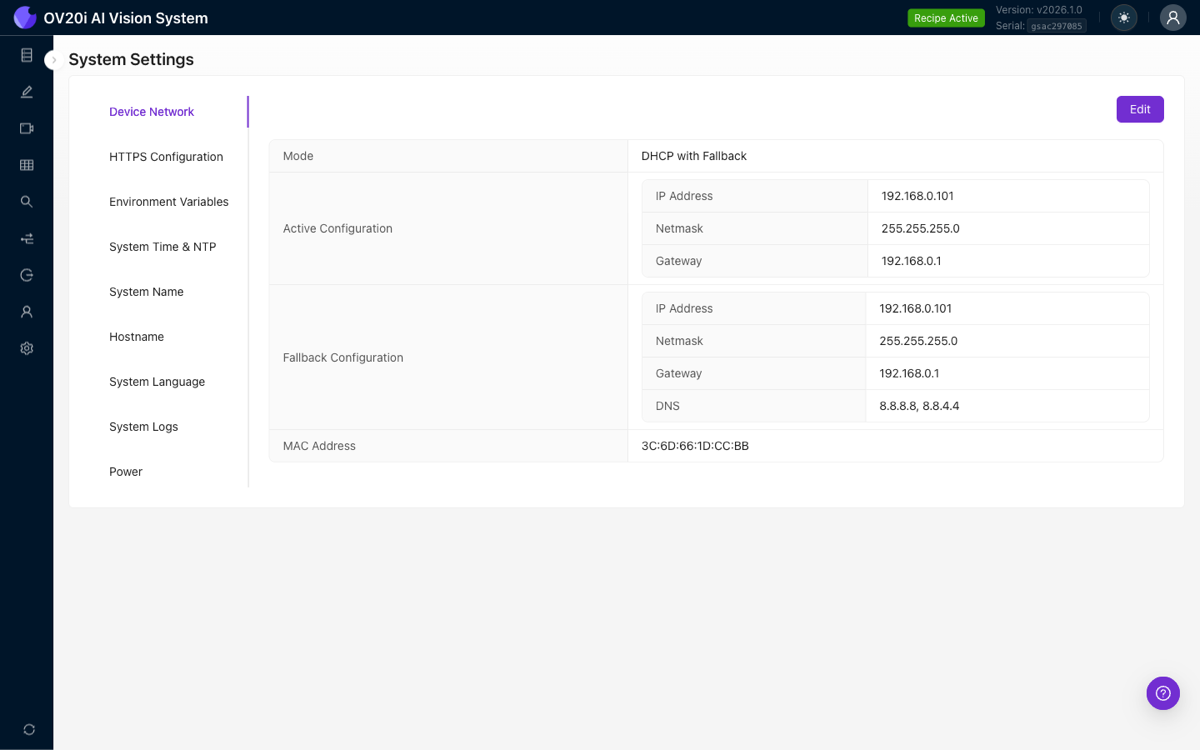
Camera Default IP Address
- Ethernet IP Address:
10.250.0.100 - Subnet Mask:
255.255.255.0 - Network Range:
10.250.0.X
Your computer must be on the same network.
- Set your computer to
10.250.0.Xrange (example:10.250.0.105) - Subnet mask: Always
255.255.255.0
Check Your Current Network Configuration
Windows - Check Current IP
Method 1: Command Prompt
ipconfig
Method 2: Settings
Settings → Network & Internet → Ethernet → Properties
Mac - Check Current IP
Method 1: Terminal
ifconfig
Method 2: System Preferences
System Preferences → Network → Ethernet
What to Look For
- Current IP address of your computer
- Subnet mask (usually
255.255.255.0) - Default gateway (if connected to corporate network)
You may need to disconnect from your corporate network.
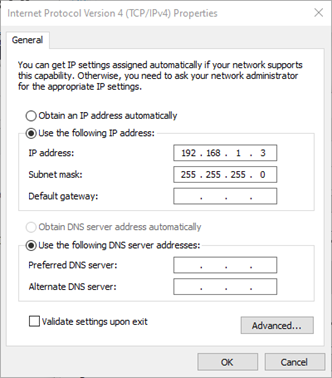
Configure Network Adapter for Camera Communication
Windows Network Configuration
- Control Panel → Network and Internet → Network Connections
- Right-click Ethernet → Properties
- Select "Internet Protocol Version 4 (TCP/IPv4)" → Properties
- Select "Use the following IP address"
- Enter appropriate IP settings:
- IP:
10.250.0.105 - Subnet:
255.255.255.0
- IP:
- Leave Gateway and DNS blank
- Click OK to apply
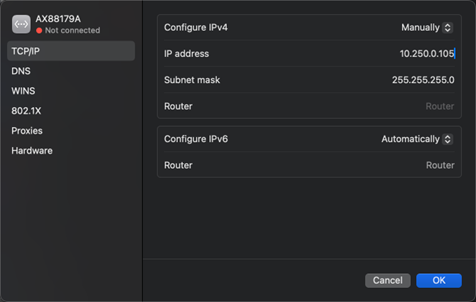
Mac Network Configuration
- System Preferences → Network
- Select Ethernet connection
- Select TCP/IP
- Configure IPv4 dropdown → Select "Manually"
- Enter appropriate IP settings:
- IP:
10.250.0.105 - Subnet:
255.255.255.0
- IP:
- Leave Router field blank
- Click Apply
Test Network Connectivity
Ping Test Procedure
ping 10.250.0.100
Interpreting Ping Results
Successful ping response:
Reply from 10.250.0.100: bytes=32 time<1ms TTL=64
Failed ping responses:
- "Request timed out" → Network configuration issue
- "Destination host unreachable" → IP configuration problem
- "Network is unreachable" → Adapter not configured properly
Browser Access and Platform Compatibility
Accessing Camera Web Interface
Browser URL: http://10.250.0.100
No HTTPS - cameras use standard HTTP.
Supported Browsers
Recommended: Google Chrome
- Best compatibility and performance
- Most testing done with Chrome
Alternative Browsers:
- Microsoft Edge
- Firefox
- Safari
Browser Troubleshooting
- Clear browser cache if page won't load
- Disable browser extensions that might interfere
- Try incognito/private mode to eliminate extension issues
- Check for corporate proxy settings that might block access
Camera Activation
When Activation is Required
- First-time setup for new cameras
- Factory reset cameras
- Cameras never previously activated
Activation Steps
When you first access the camera's web interface, you will see the Product Activation page:
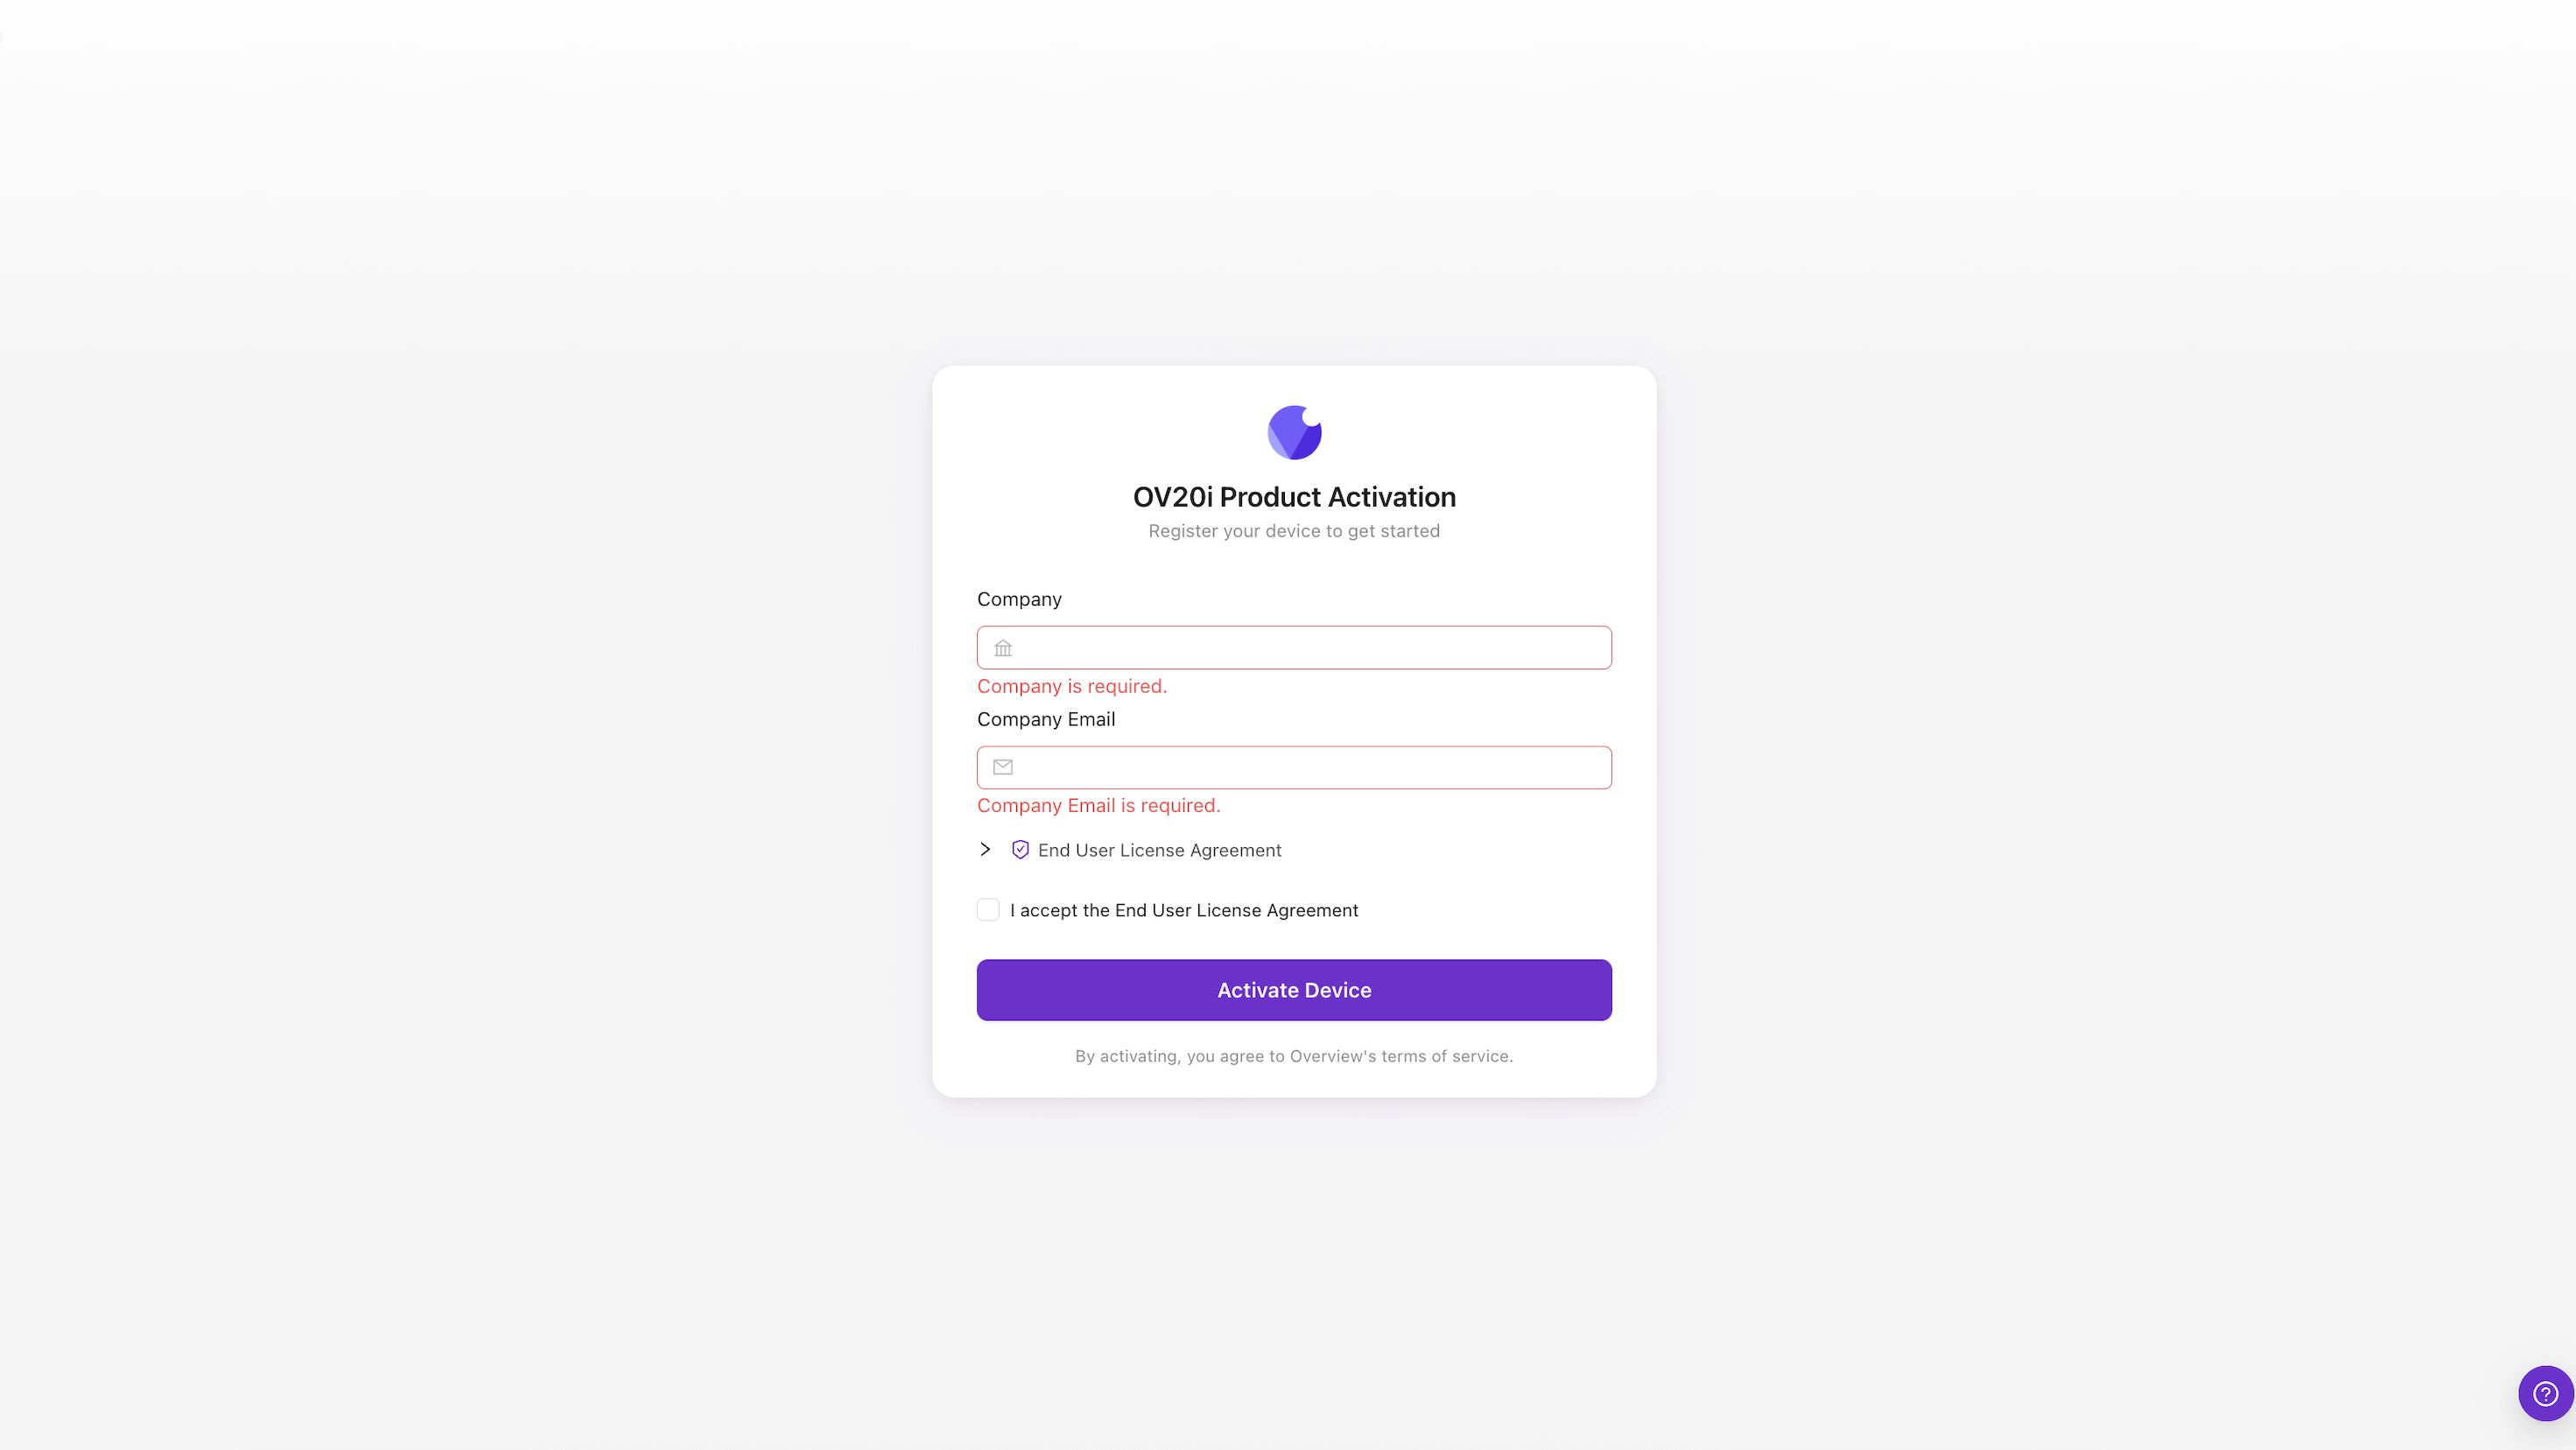
- Enter your Company name
- Enter your Company Email address
- Expand and review the End User License Agreement
- Check the box to accept the End User License Agreement
- Click Activate Device
The camera will activate and you will be redirected to the main interface.
Network Troubleshooting Quick Reference
Issue: Cannot Ping Camera
- Check Power LED - ensure camera powered properly
- Verify IP configuration - computer and camera same network
- Test Ethernet cable - try different cable
- Check network adapter - disable/enable connection
- Firewall blocking - temporarily disable for testing
Issue: Ping Works but Browser Won't Connect
- Try different browser - Chrome, Edge, Firefox
- Clear browser cache - refresh page
- Check for proxy settings - corporate networks
- Incognito mode - eliminate extension issues
- Mac Chrome specific - enable local network access
Issue: Activation Fails
- Internet connectivity - verify the camera has online access
- Form completion - ensure Company and Company Email are filled in
- Contact support@overview.ai for assistance