AI-POWERED DOCS
What do you want to know?
Remote Storage (FTP, SFTP, SMB)
Remote Storage copies files from the camera to servers on your own network. It can send three kinds of file:
| Output | What it sends |
|---|---|
| Images | JPEGs of inspected parts: the raw capture, a copy with the tool overlays drawn on it, or both |
| Metadata | The inspection result for each capture as a JSON file, and a running results log in CSV or JSONL |
| Recipe backups | Scheduled copies of your recipes, daily or weekly |
You can set up two destinations, for example one server for images and another for backups. Each destination is an FTP (or FTPS) server, an SFTP server, or a Windows SMB share.
Go to Integration → Remote Storage:
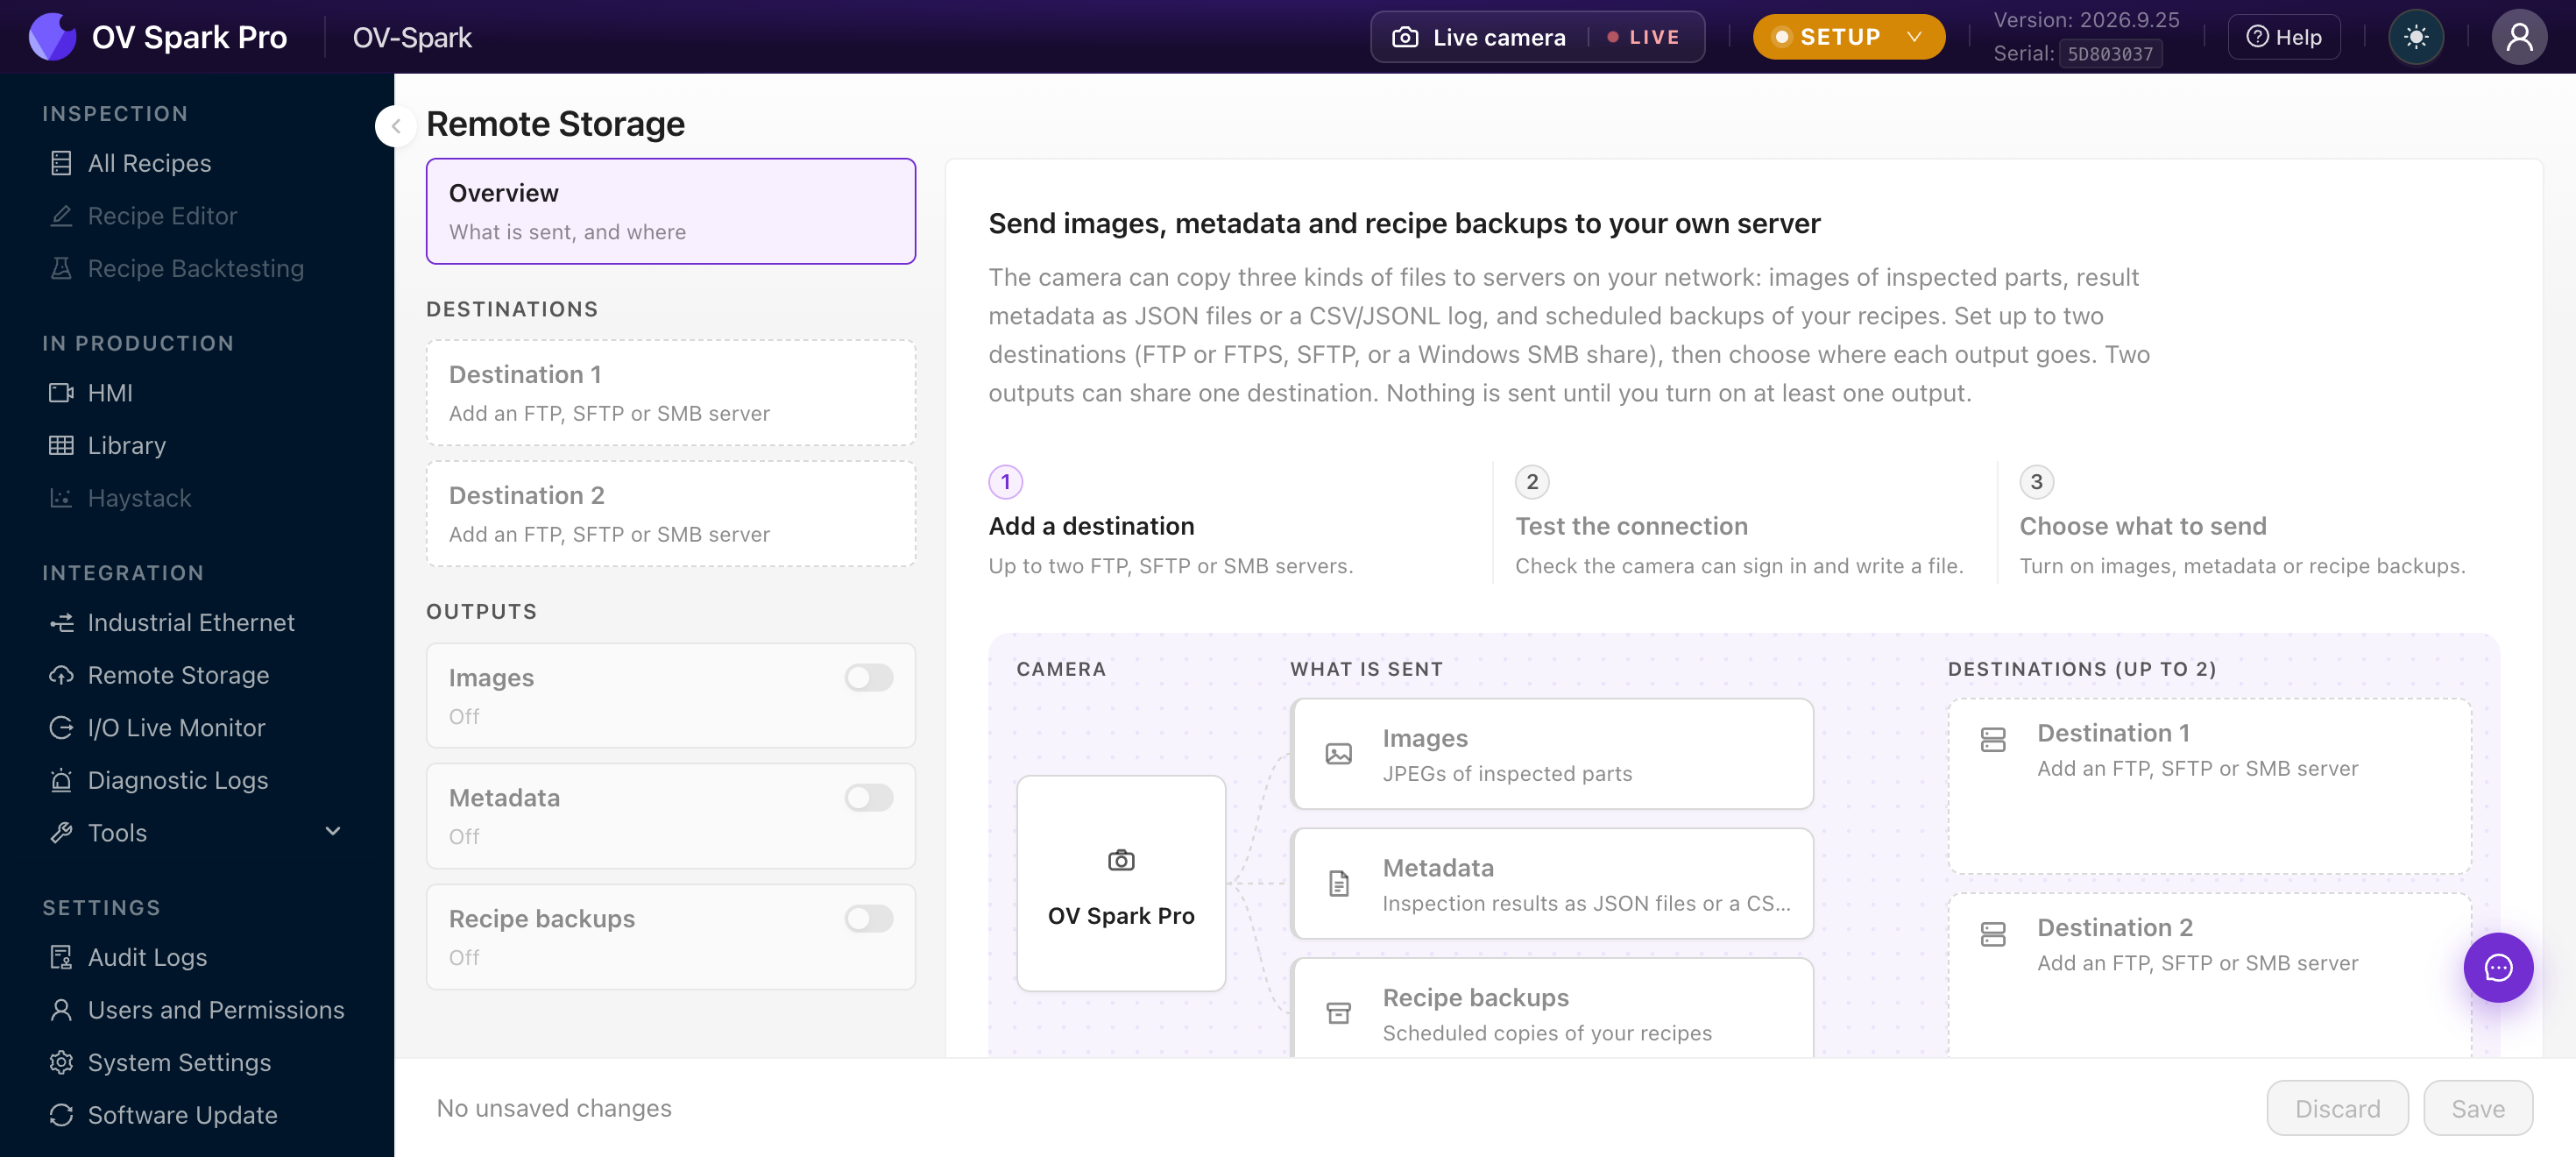
The left rail lists the Overview, your two Destinations, and the three Outputs, each with its own on/off switch. Nothing is sent until you turn on at least one output.
The screenshots on this page come from an OV Spark Pro. On OV Spark everything is the same except the image sizes, which read 1280×960, 640×480 and 320×240.
Step 1: Add a destination
-
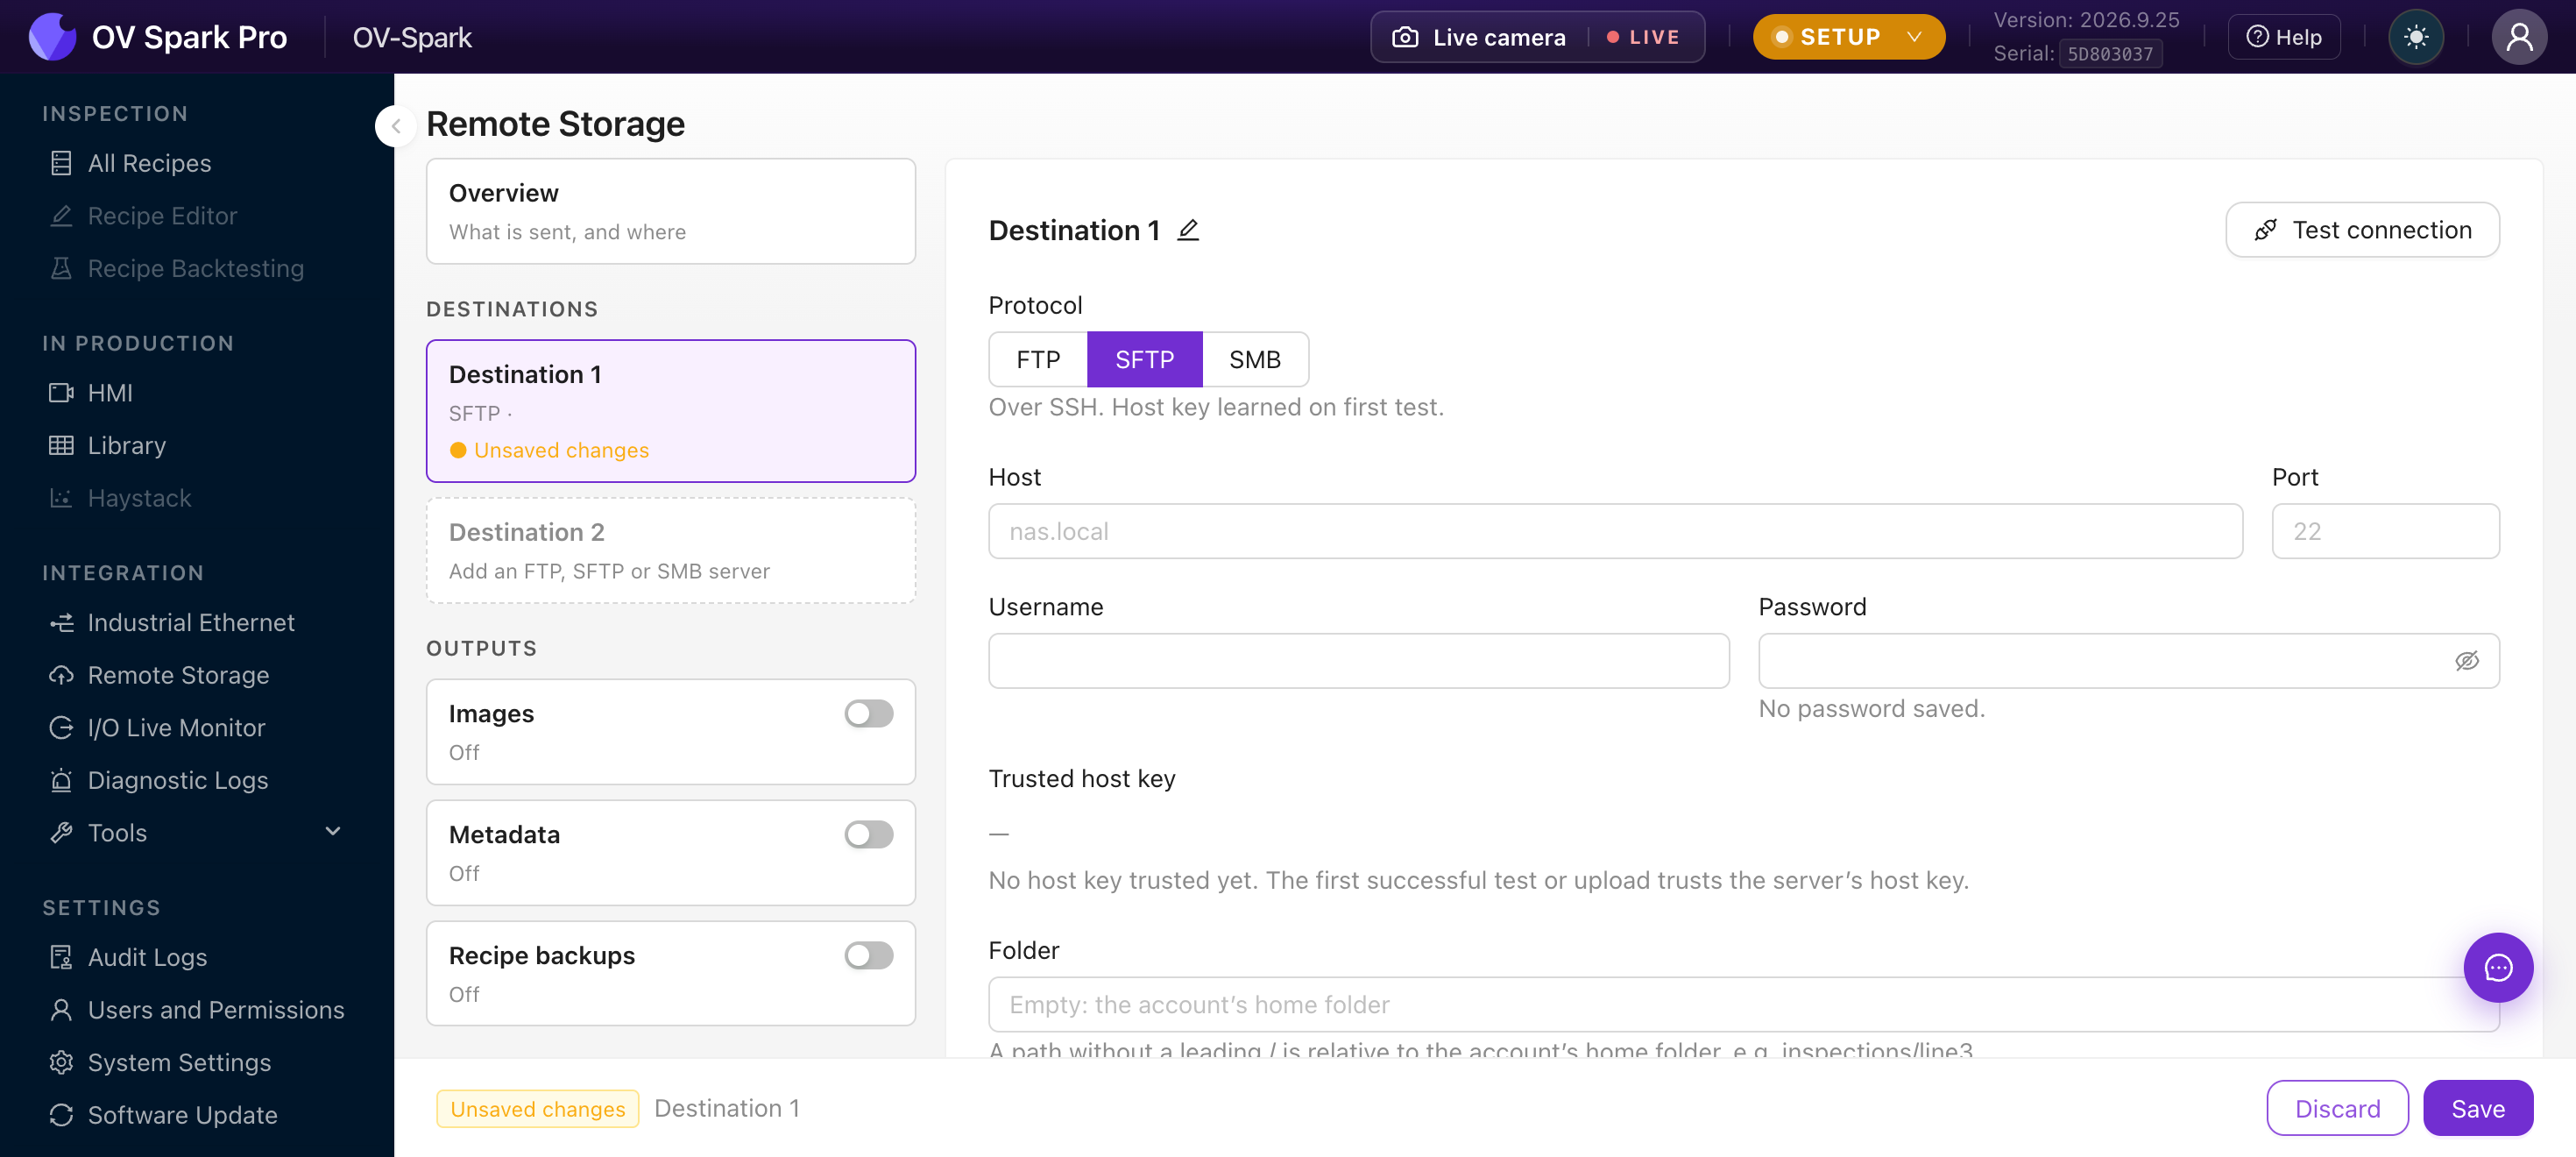
In the left rail, click Destination 1.
-
Choose the Protocol:
Protocol Use for Notes FTP Most network storage drives (NAS) and FTP servers Passive mode. Tick Use TLS (FTPS) to encrypt; the server certificate must be valid SFTP Linux servers, and anything else you reach over SSH, the secure remote login protocol The server's host key is learned on the first successful test SMB Windows file shares SMB 2 and 3. Enter the Share name, and a Domain if your network uses one -
Fill in Host (the server name or IP address only, without
ftp://, a port or a folder), Port, Username and Password. -
Optionally set a Folder. On FTP and SFTP, a path without a leading
/is relative to the account's home folder, for exampleinspections/line3. On SMB it is a folder inside the share. -
To rename the destination, click the pencil next to its name. The name appears in the rail and on the Overview.
Advanced: timeouts, parallel uploads holds the connect and idle timeouts (1 to 600 seconds) and Parallel uploads. Most FTP servers allow two connections per user.
Ask IT for an account that can only write to the inspection folder. The camera needs to create folders and write files; it does not need to delete anything, and it never touches files already on the server.
Step 2: Test the connection
Click Test connection. The camera works through five checks and stops at the first one that fails, with the reason and the fix:
- Resolve the host name
- Connect on the port (with TLS, if you chose FTPS)
- Sign in (on SMB, also open the share)
- Create the folder
- Write, append and delete a 1 KB test file
| Message | What it means |
|---|---|
| Host name not found | Check the spelling, or use the IP address |
| Connection refused | Wrong port, or the service is not running on the server |
| Timed out, Server unreachable | The server cannot be reached from the camera's network. Check routing and firewalls |
| Sign-in rejected | Wrong username or password. On SMB the domain may also be required |
| Folder creation not allowed, Write not allowed | The account lacks permission on that folder |
| Share not found | The SMB share name is wrong |
| TLS handshake failed | The FTPS certificate is not trusted, or TLS is not enabled on the server |
| Delete not allowed | Harmless. The test file was left behind; uploads do not need delete |
Then click Save in the bar at the bottom of the page.
The first successful SFTP test trusts the server's host key and shows its fingerprint. Compare it with the one your IT team gave you. If the key ever changes, the camera refuses to upload and reports Host key changed. That happens after a server reinstall, or if another machine is answering as that server. Confirm with IT before you press Forget and test again.
Step 3: Choose what to send
Click an output in the rail, pick its Destination, set it up, and turn on Enabled. Two outputs can share one destination.
Images
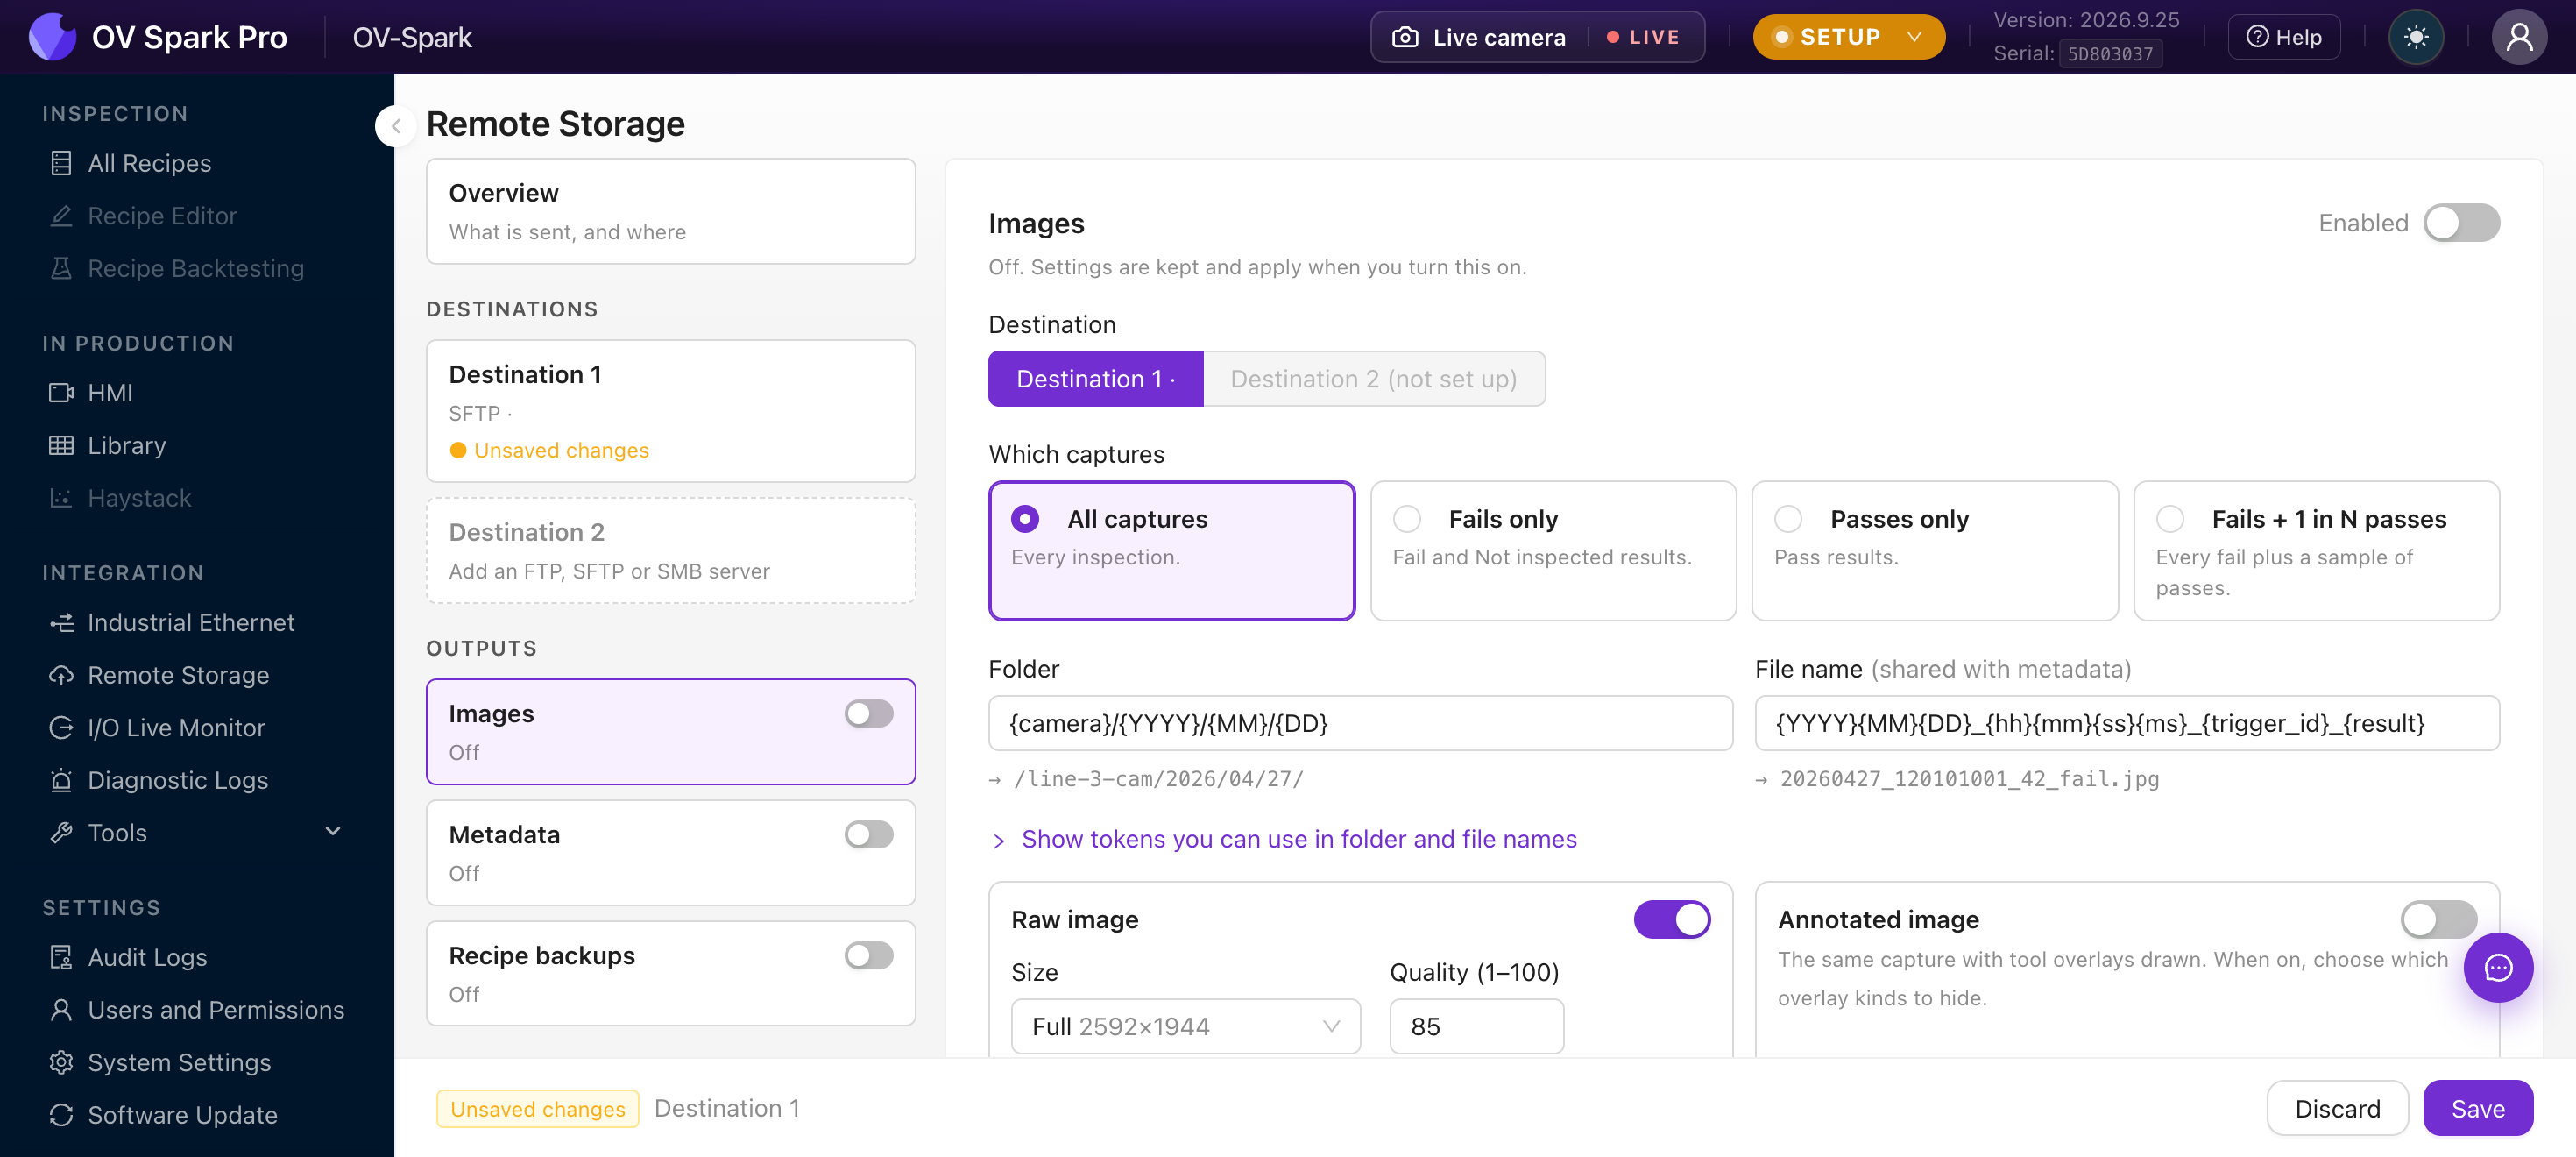
Which captures decides what is uploaded:
| Option | Sends |
|---|---|
| All captures | Every inspection |
| Fails only | Fail and Not inspected results |
| Passes only | Pass results |
| Fails + 1 in N passes | Every fail, plus one pass in every N (1 to 10,000) |
Folder and File name are templates built from tokens, and the line under each field shows an example of the path it produces. The defaults are:
- Folder:
{camera}/{YYYY}/{MM}/{DD} - File name:
{YYYY}{MM}{DD}_{hh}{mm}{ss}{ms}_{trigger_id}_{result}
Then choose the image itself. Raw image is the capture exactly as taken. Annotated image is the same capture with the tool overlays drawn on top: boxes, labels, heatmaps and regions. Turn on either or both. Each has its own:
- Size: Full 1280×960, Half 640×480 or Quarter 320×240. Smaller images save server space and bandwidth; the overlays are drawn the same at every size
- Quality (1–100): JPEG quality, 85 by default
- Hide overlay kinds (annotated only): leave out Boxes, Polygons, Arcs, Lines, Points, Text, Heatmaps or Masks
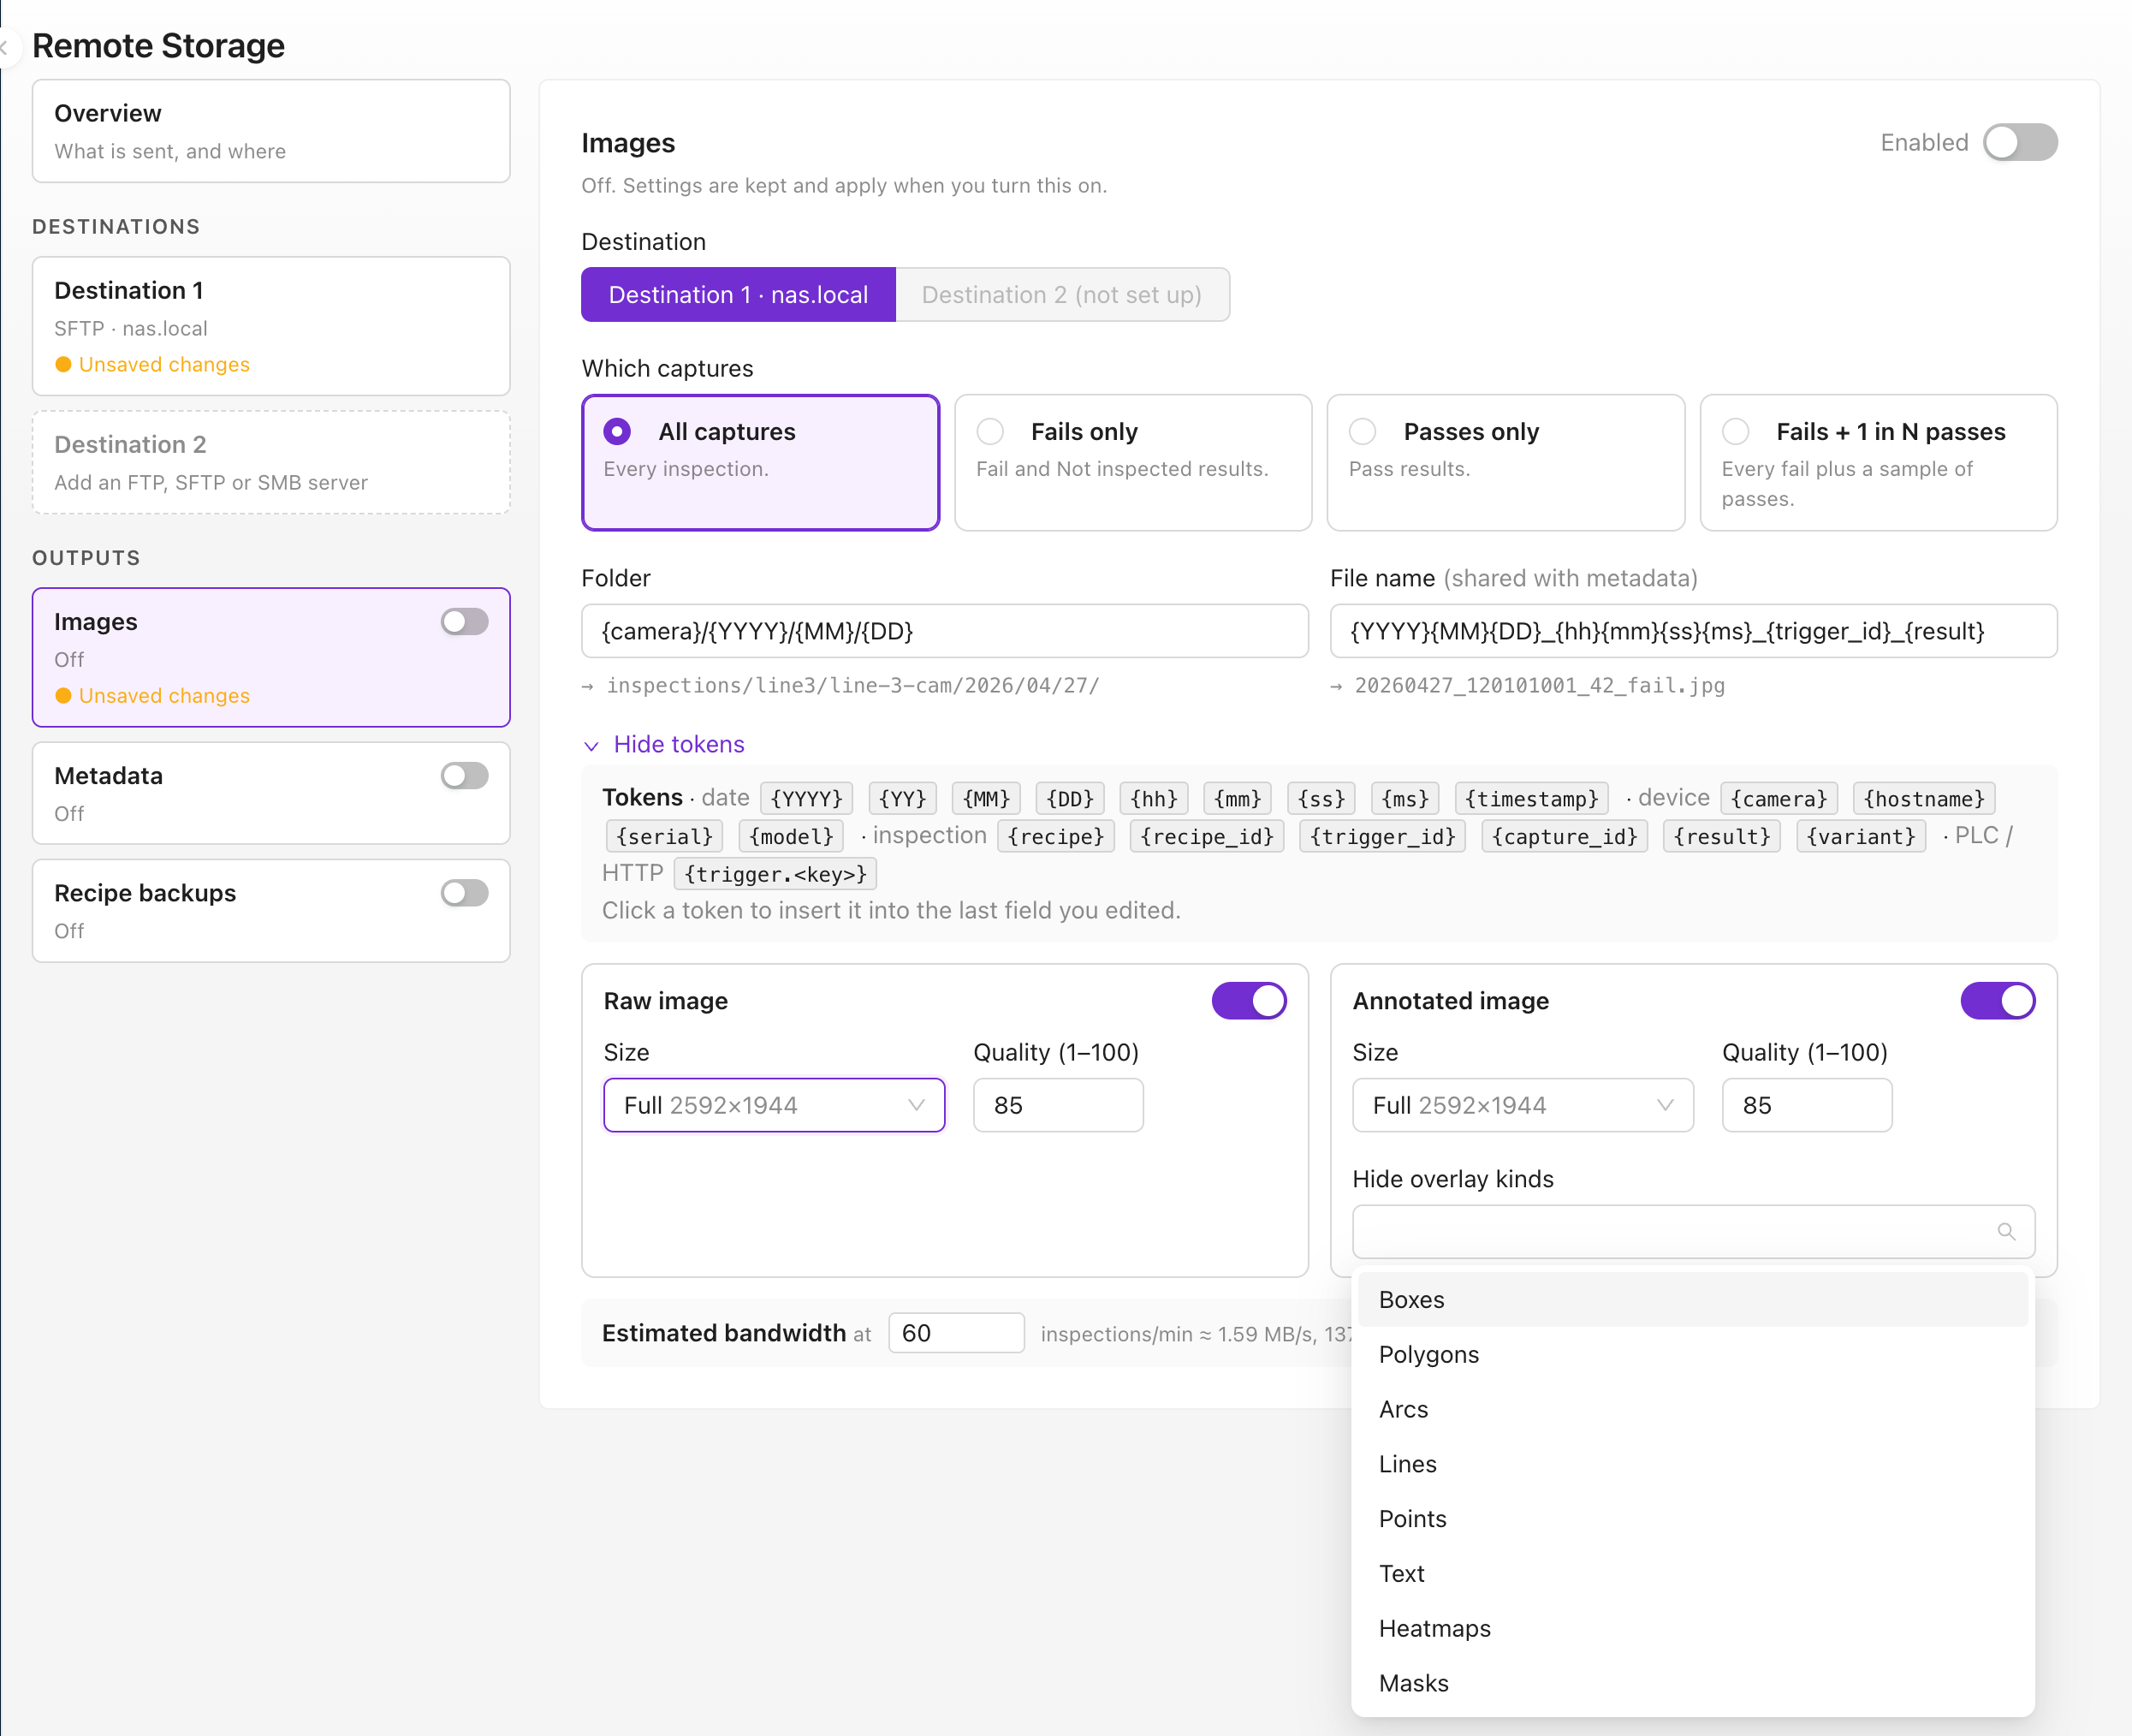
Estimated bandwidth at the bottom works out the MB/s and GB per day for your settings, at the rate the recipe is running, or at 60 inspections a minute if it has not run yet. Check it against what the server and network can take.
Which captures, size, quality, the raw and annotated switches and hidden overlay kinds can only change in Setup, because they change the work done on every inspection. The destination, folder and file name can change at any time.
Tokens for folder and file names
Click Show tokens you can use in folder and file names, then click a token to insert it into the last field you edited.
| Group | Tokens |
|---|---|
| Date | {YYYY} {YY} {MM} {DD} {hh} {mm} {ss} {ms} {timestamp} (epoch milliseconds) |
| Device | {camera} (camera name), {hostname}, {serial}, {model} |
| Inspection | {recipe}, {recipe_id}, {trigger_id}, {capture_id}, {result}, {variant} |
| PLC / HTTP | {trigger.<key>}, any field the trigger carried, such as a part number sent by the PLC |
Rules the camera enforces:
- The file name must include
{trigger_id},{capture_id}or{timestamp}, so two captures can never overwrite each other - Folders may use
/to nest; the file name may not {variant}only works in the file name. If both raw and annotated are on and you leave it out,_rawand_annotatedare added for you
If the PLC sends a part or serial number with the trigger, add it with {trigger.<key>}. Anyone looking for a specific part on the server can then find its image by name, without opening the camera.
Metadata
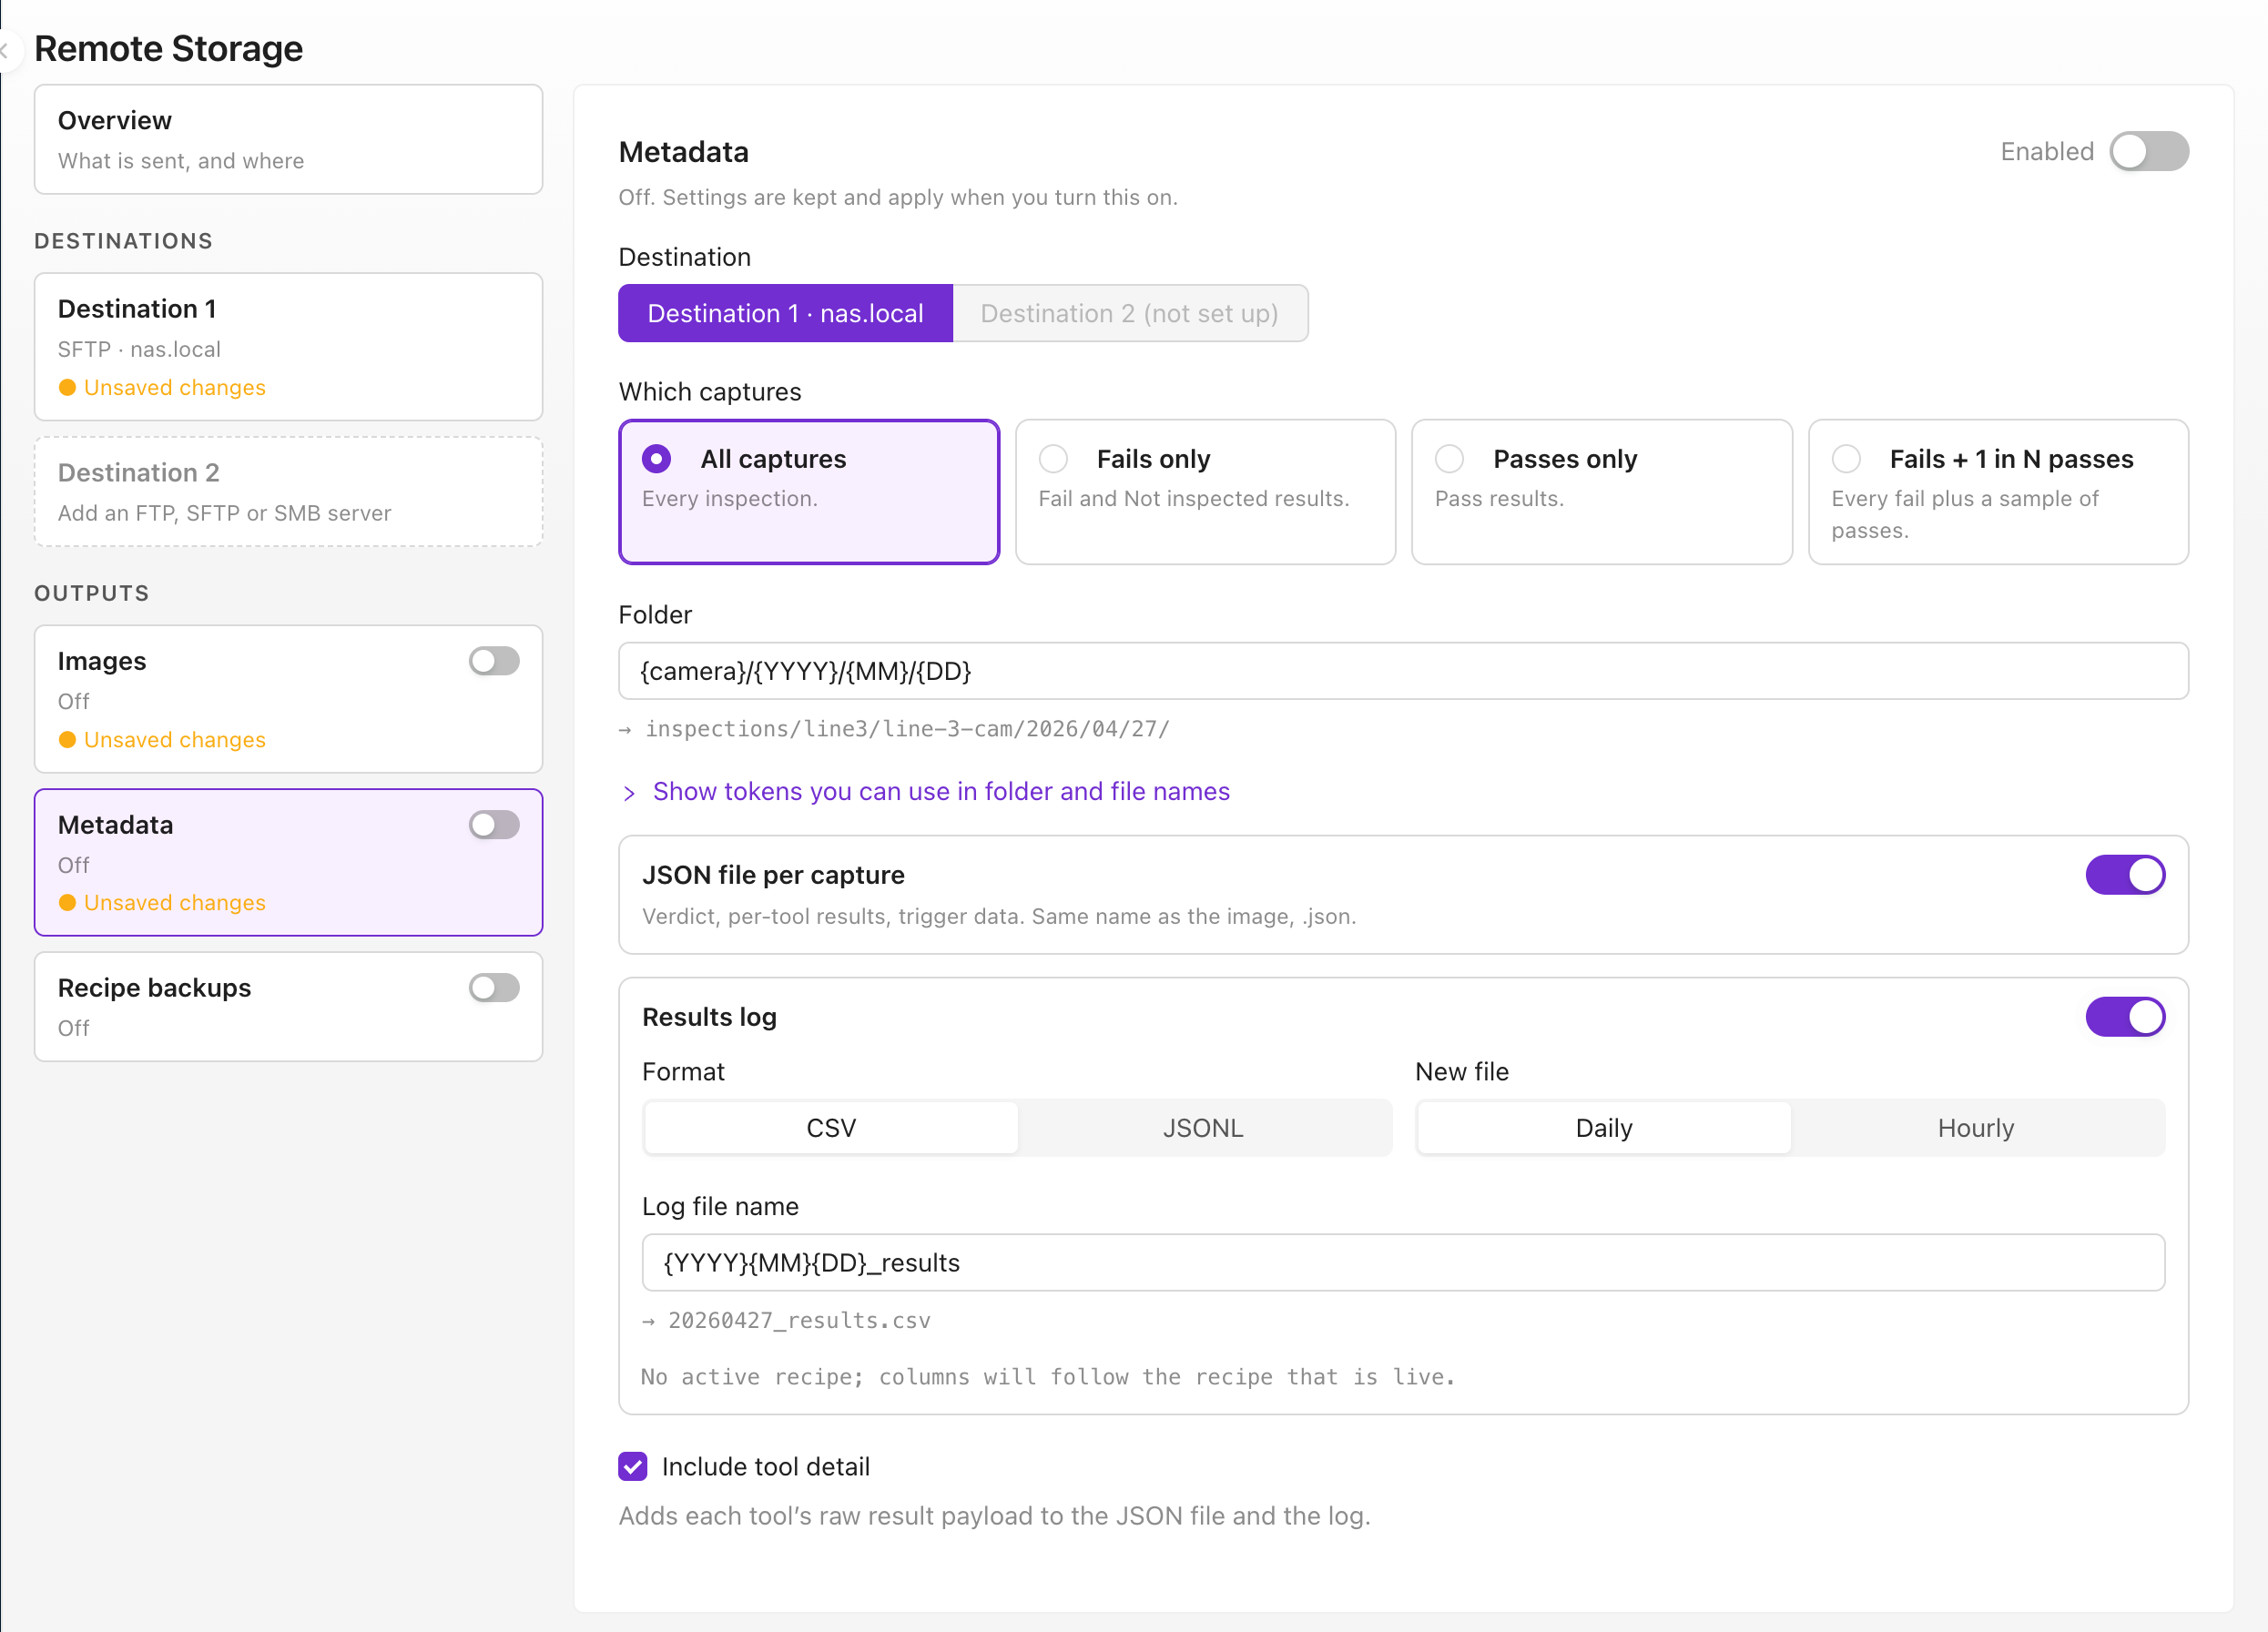
Metadata uses the same Which captures choices and the same file name as the images, so the two line up. It has two parts, and you can turn on either or both:
- JSON file per capture: one file named like its image, ending
.json. It holds the capture time, trigger data, recipe, overall result, every tool's result, score and detail, and the paths of the images uploaded with it - Results log: one growing file with a line per capture, in CSV (opens in Excel) or JSONL (one JSON record per line, for scripts and databases). Choose Daily or Hourly for when a new file starts. The log file name must include
{DD}for daily files, and{hh}as well for hourly ones
Include tool detail adds each tool's full result to both. A log never mixes recipes: if the columns change part way through a period, a new file starts rather than corrupting the old one.
If the server cannot add to an existing file, the camera says so and writes the results log as one file per capture instead. Images and JSON files are not affected.
Recipe backups
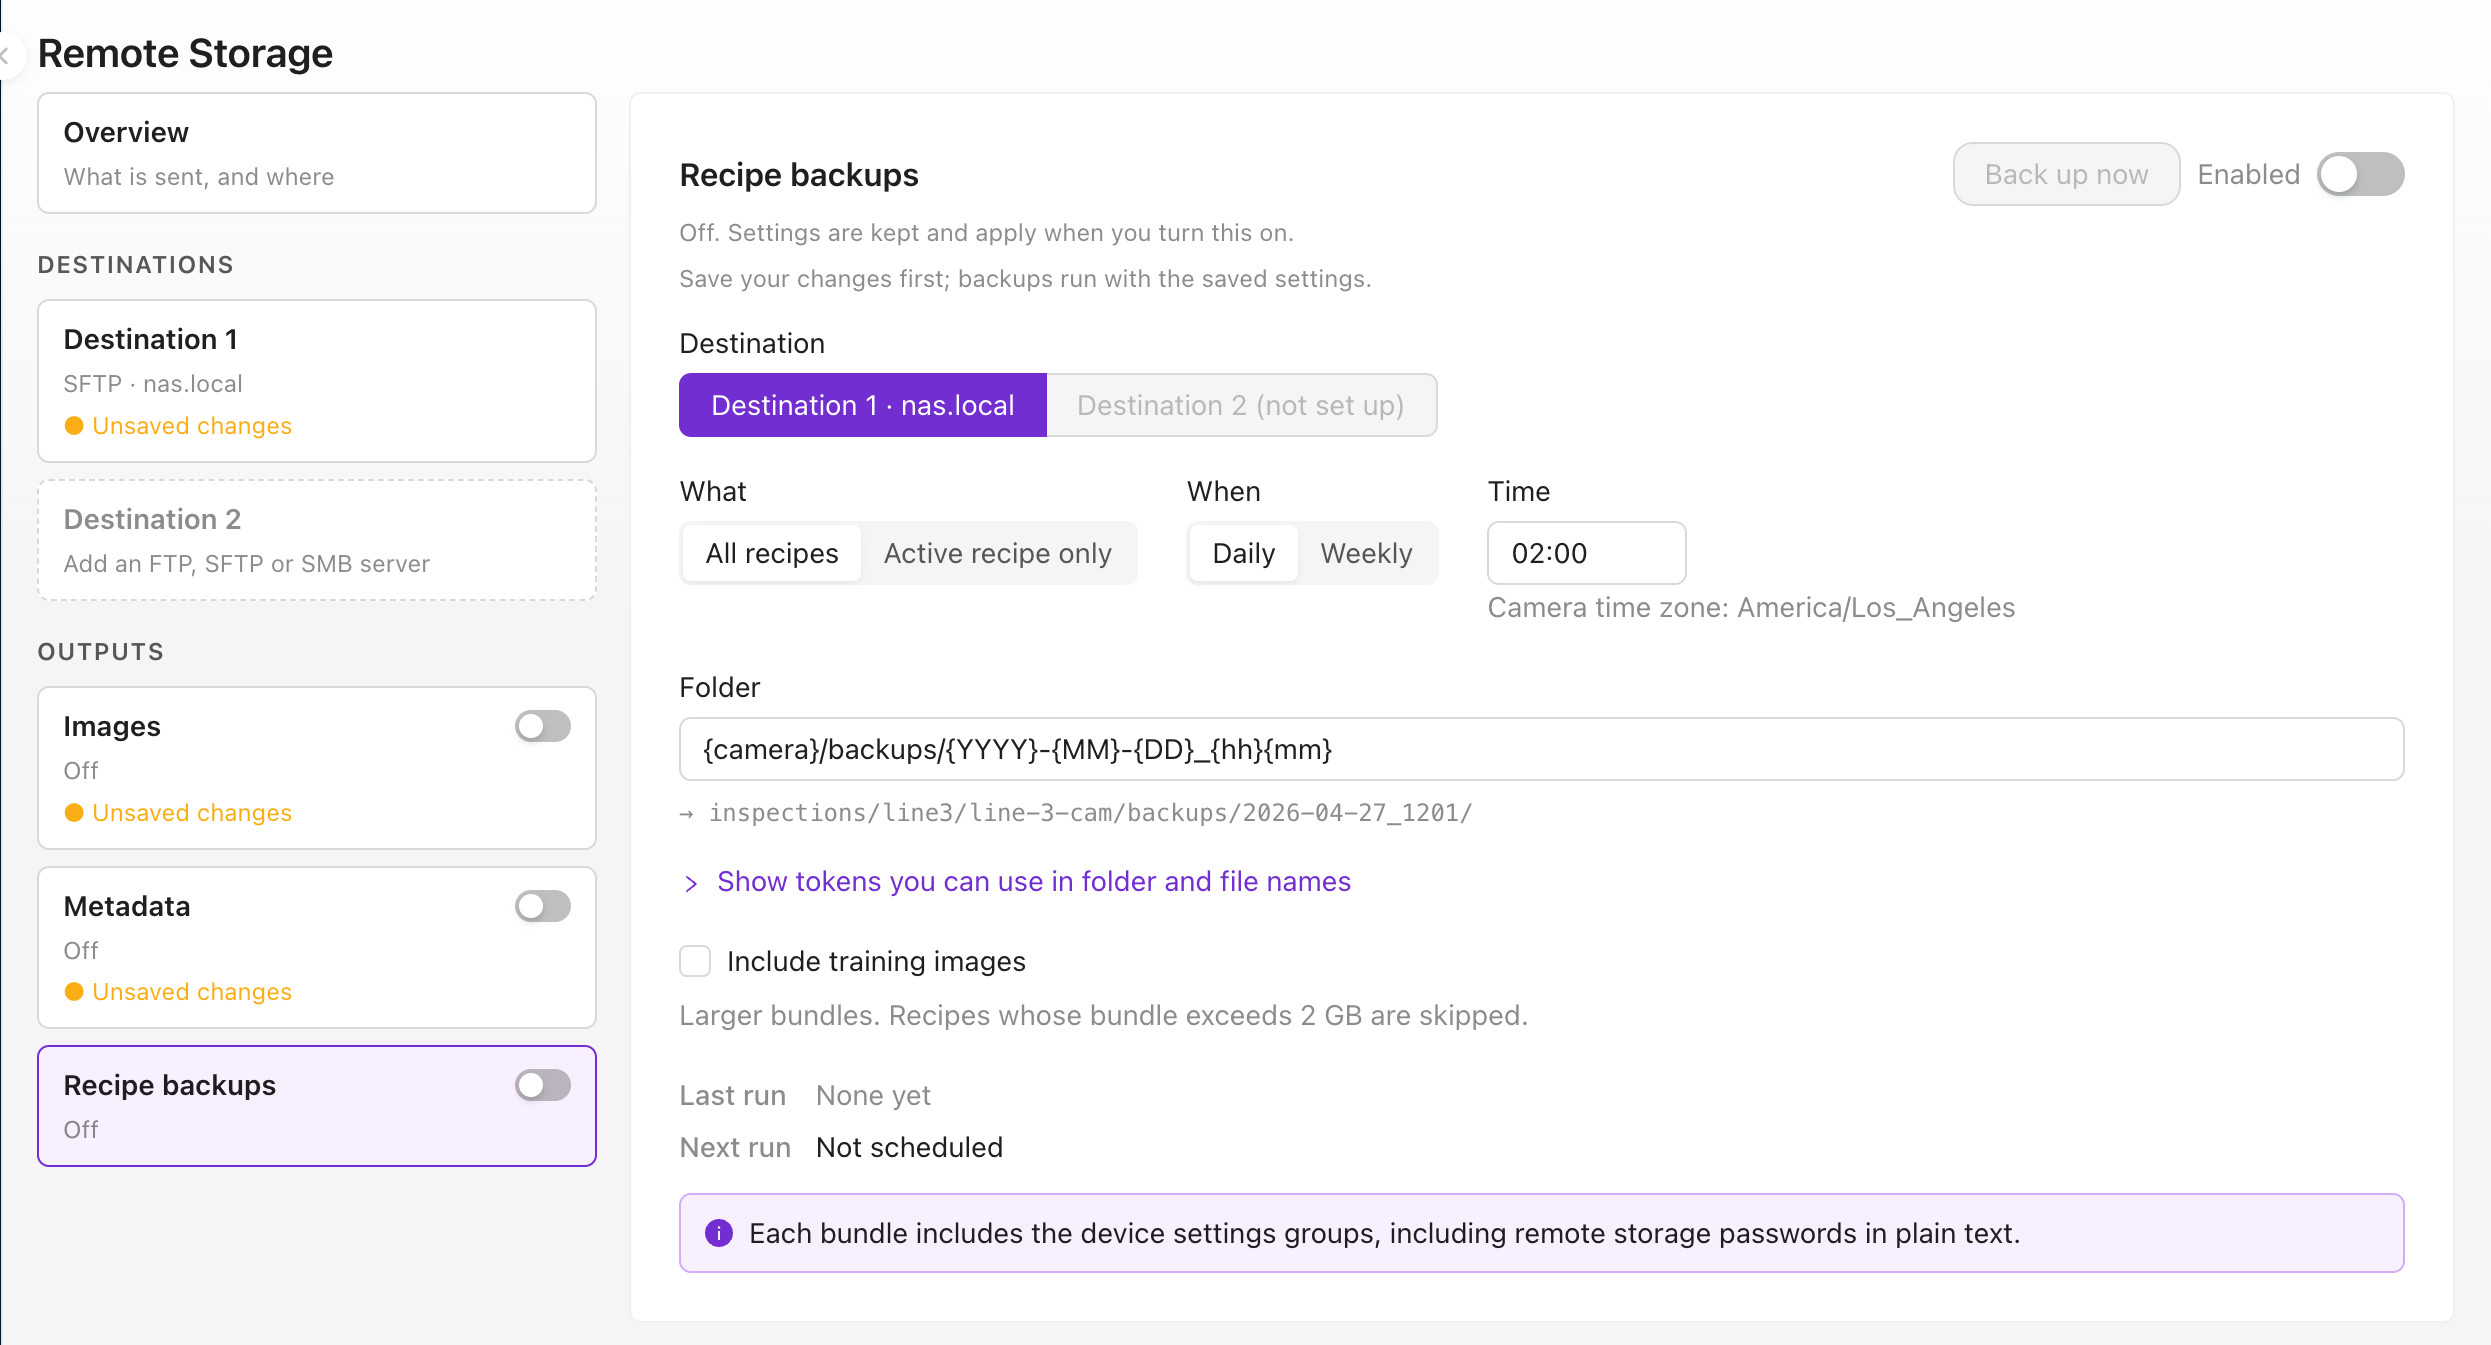
| Setting | Options |
|---|---|
| What | All recipes, or Active recipe only |
| When | Daily, or Weekly on a chosen weekday |
| Time | 24-hour time, in the camera's own time zone (shown under the field) |
| Include training images | Off: compact bundles that run but cannot be retrained. On: full bundles you can retrain from; recipes whose bundle would exceed 2 GB are skipped |
Each run writes one bundle per recipe, plus a manifest.json listing every file with its recipe, version and checksum. Back up now runs one straight away, using the saved settings. Last run and Next run show what happened and what is due.
A run that collides with another backup, import or export waits and runs as soon as it can, rather than failing. If the camera was off when a backup was due, it runs once when the camera comes back.
Every recipe bundle, scheduled or exported by hand, carries the camera's settings, including the Remote Storage passwords in plain text. Anyone who can read the backup folder can read those passwords. Protect that folder like a credentials file.
Check it is working
The Overview shows each output's summary, what has been uploaded since boot, and anything waiting in the queue.
| State | What it means | What to do |
|---|---|---|
| Sending | Files are going out normally | Nothing |
| Retrying | A connection failed; the camera retries on its own | Run Test connection to retry at once |
| Dropping captures | The server is slower than the line, so the queue filled and the oldest jobs were discarded | Send smaller images, send fails only, or add Parallel uploads |
| Blocked | A permanent error, such as a certificate failure. Uploads to that destination stop | Fix the setting, then run Test connection; a passing test resumes uploads |
Inspection keeps running whatever happens to the server, and the camera's own Library stays the full record. A failed upload is logged in Diagnostic Logs, but the part is still inspected and its result still reaches the PLC.
Where to go next
- All Recipes, to export or import a recipe by hand
- Library, the captures kept on the camera
- Diagnostic Logs, for failed uploads
- System Settings, for the camera name, time zone and NTP that tokens and backup times rely on