AI 驱动文档
您想了解什么?
连接到 Tulip
Tulip 是一个无代码 MES /互联前线运营平台。OV80i 摄像头通过运行在摄像头上的 Node-RED 与 Tulip 进行桥接 — 这与您用于 PLC、MQTT 及其他 I/O 集成的流程编辑器相同。Tulip 可以:
- 通过操作员按钮或应用事件触发检测。
- 接收每个 ROI 和全局通过/失败结果以及捕获元数据。
- 当操作员扫描零件条形码或选择不同产品时,切换活动程序。
- 在 Tulip 应用中显示实时图像(带有边界框覆盖层),让操作员看到 AI 所看到的内容。
本指南将端到端地讲解上述四个集成点。
架构
┌────────────────────────────┐               ┌──────────────────────────────┐
│            TULIP           │               │           OV80i              │
│                            │               │                              │
│  ┌──────────────────┐      │   HTTP/MQTT   │   ┌──────────────────────┐   │
│  │ Operator Button  │──────┼───trigger─────┼──▶│ Node-RED HTTP IN     │──▶│
│  │ in Tulip App     │      │               │   │ /trigger             │   │
│  └──────────────────┘      │               │   └──────────────────────┘   │
│                            │               │              │               │
│  ┌──────────────────┐      │               │              ▼               │
│  │ Tulip Connector  │◀─────┼─── results ───┼─── All Block Outputs         │
│  │ Function (HTTP)  │      │               │   (image_url, pass/fail,     │
│  └──────────────────┘      │               │    per-ROI classes)          │
│                            │               │              │               │
│  ┌──────────────────┐      │               │              ▼               │
│  │ Image Widget     │◀─────┼── live-feed ──┼─── http://CAMERA_IP/live-feed│
│  │ (iframe URL)     │      │  (HMI w/ ROI  │   (shows bounding boxes      │
│  └──────────────────┘      │    overlays)  │    on the captured image)    │
│                            │               │                              │
│  ┌──────────────────┐      │               │   ┌──────────────────────┐   │
│  │ Recipe Selector  │──────┼─── HTTP ──────┼──▶│ /pipeline/activate   │   │
│  │ (barcode / btn)  │      │               │   │ {id: <recipe_id>}    │   │
│  └──────────────────┘      │               │   └──────────────────────┘   │
└────────────────────────────┘               └──────────────────────────────┘
中间的桥接始终是运行在摄像头 IO模块 内的 Node-RED — 您可以在这里构建全部四个集成。
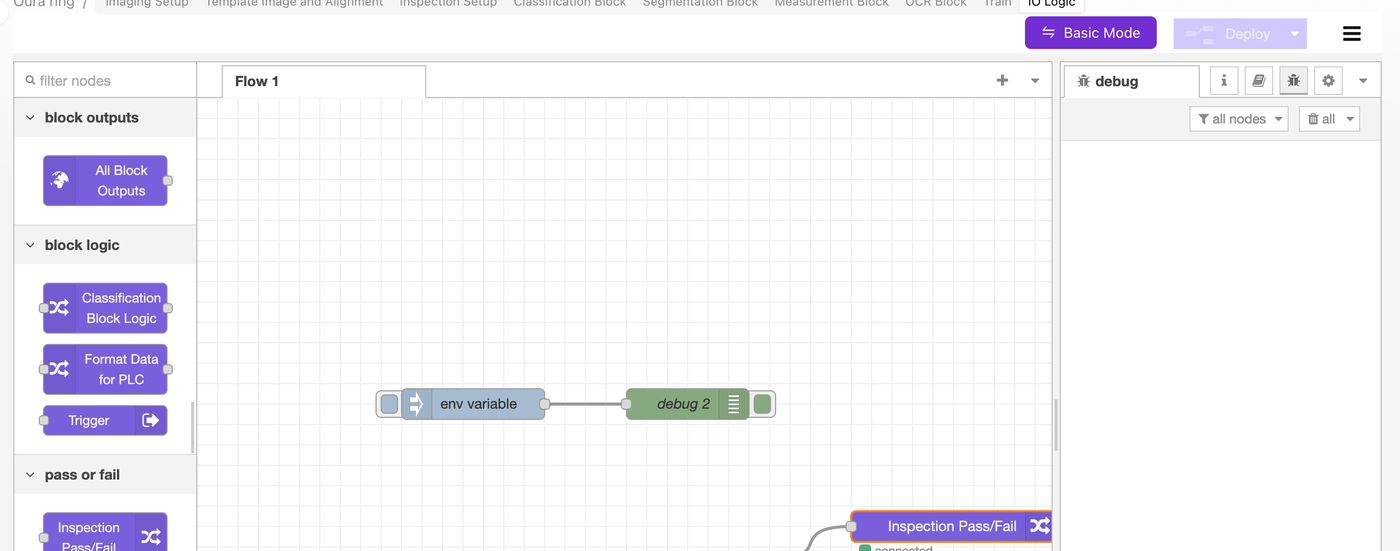
将 Tulip Connector URL 硬编码到 Node-RED 流程中会将流程绑定到单一部署。请在系统设置 → 环境变量中定义 TULIP_ENDPOINT 环境变量,然后在 HTTP 请求节点中通过 ${TULIP_ENDPOINT} 读取它。这样您就可以导出相同的流程并将其重新导入到生产线上的每台摄像头。完整模式请参见环境变量。
选择传输方式:HTTP 或 MQTT
| 选项 | 适用场景 | 说明 |
|---|---|---|
| HTTP(推荐用于大多数 Tulip 部署) | Tulip Connector Functions 原生调用 HTTP 端点。从 Tulip 小部件按钮触发的最简单方式。 | 无需任何额外基础设施即可工作。Tulip → 相机和相机 → Tulip 均使用普通 POST。 |
| MQTT | 您的工厂已经运行 MQTT broker(Sparkplug B、IT/OT broker 等),并且 Tulip Edge Connector 已配置为与之通信。 | 适合高吞吐信号传输,延迟更低。需要 broker。 |
| OPC UA | 您正在运行带有 OPC UA Connector 的 Tulip Edge MC 实例。 | OV80i 出厂预装了 OPC UA Node-RED 模型。 |
本指南其余部分的示例使用 HTTP —— 这是大多数 Tulip 部署的默认方式。同样的模式也适用于 MQTT(将 HTTP IN / HTTP Request 节点替换为 MQTT in / MQTT out 节点)。
1. 从 Tulip 应用触发相机
Tulip 操作员按下按钮 → Tulip 的 Connector Function 调用相机 Node-RED 正在监听的 HTTP 端点 → Node-RED 触发一次捕获。
Node-RED 端:接收触发
在相机的 IO模块(Advanced Mode → Node-RED)中,构建:
[ HTTP IN: POST /trigger ]──▶[ Trigger node ]──▶[ HTTP Response: 200 ok ]
- 从 network 类别中拖入一个 http in 节点。
- Method:
POST - URL:
/trigger
- Method:
- 将其连接到 OV 专用的 Trigger 节点(位于 OV 面板的 block logic 下)。Trigger 节点会触发相机的捕获流水线。
- 添加一个 http response 节点,以便 Tulip 的 Connector 立即收到
200 OK响应(不要让 Tulip 等待 AI 推理结果 —— 让结果异步返回,参见第 2 节)。 - 点击 部署。
该端点现已在 http://<CAMERA_IP>/node-red/trigger 上线(Node-RED 的 HTTP 根路径挂载在 /node-red/ 下)。
Tulip 端:从按钮调用触发
在您的 Tulip 账户中:
- 转到 Apps → Connectors,如果还没有,创建一个新的 HTTP Connector。
- 将 Host 设置为您相机的 IP,Port 设置为
80(如果已启用 HTTPS,则为443)。 - 创建一个名为
Trigger Camera的新 Connector Function:- Method:
POST - Endpoint:
/node-red/trigger - 基本触发不需要请求体或输入参数 —— 相机会使用当前活动的程序。
- Method:
- 保存并测试该 Connector Function。您应该能看到 200 响应,并且相机应捕获一张图像。
- 在您的 Tulip 应用中,添加一个 Button 小部件。在其操作中,选择 Run Connector Function → Trigger Camera。
当操作员点击按钮时,相机会触发拍摄。
如果您希望随每次触发发送序列号或零件 ID,请更改 Tulip Connector Function 以接受输入(例如 serial_number),并将其放入请求体。在相机端,您的 HTTP IN 节点将其作为 msg.payload 接收,您可以将其暂存到流变量中,以便结果发送流(第 2 节)可以将其附加到检测报告中。
2. 将结果发送回 Tulip
相机捕获后,All Block Outputs 节点将随完整检测结果触发。模式如下:
[ All Block Outputs ]──▶[ Function: format for Tulip ]──▶[ HTTP Request: POST to Tulip ]
构建流程
- 在 All Block Outputs 节点下游连接一个 function 节点。
- 该函数将每个 ROI 的结果合并为单个全局 pass/fail,并将载荷精简为 Tulip 实际所需的内容:
// Read the camera's full inspection payload
const p = msg.payload || {};

// Consolidate per-ROI classifier predictions into a global pass/fail
const preds = p.classification?.predictions || [];
const allPass = preds.length > 0 && preds.every(r => r.predicted_class === 'pass');

// Optional: count segmentation defects (e.g., for thresholded fail)
const defectPixels = (p.segmentation?.blobs || [])
  .reduce((s, b) => s + (b.pixel_count || 0), 0);

// Build a flat object for Tulip (Tulip Connector Functions like flat fields)
msg.payload = {
  result: allPass ? "pass" : "fail",
  inspection_id: p.inspection_id || null,
  timestamp: new Date().toISOString(),
  image_url: p.image_url || null,            // see Section 4 for displaying this in Tulip
  defect_pixel_count: defectPixels,
  per_roi: preds.map(r => ({
    roi: r.roi_name,
    class: r.predicted_class,
    confidence: r.confidence,
  })),
  // If you stashed a serial number from the trigger (see Section 1), add it:
  // serial_number: flow.get('lastSerial') || null,
};

// Set headers for the outbound HTTP request
msg.headers = { 'Content-Type': 'application/json' };
msg.method = 'POST';
return msg;
- 将其连接到 http request 节点:
- Method:
POST(或使用上述函数中的msg.method) - URL:
${TULIP_ENDPOINT}(从环境变量读取)或硬编码的 Tulip Connector URL - Return:
a UTF-8 string(如果您的 Tulip 端点返回 JSON,则使用 JSON)
- Method:
- 在 HTTP 请求之后连接一个 debug 节点,以便您在测试时检查 Tulip 的响应。
- 单击 Deploy。
Tulip 侧:接收结果
在 Tulip 中:
- 在接收方向上创建 HTTP Connector Function——一个 webhook 端点,或使用 Tulip 的 Tables API 将结果写入 Tulip Table。
- 配置您的 Tulip 应用逻辑以响应入站载荷(例如,更新状态指示器、记录到 Table、递增计数器)。
对于 Tulip Tables,具体模式是向 https://<your-tulip-instance>.tulip.co/api/v3/tables/<table_id>/records 发送包含 result、serial_number、timestamp 字段的 POST 请求。在 Authorization 标头中使用 Tulip API 令牌——将该令牌作为凭据存储在 HTTP Connector 上,而不是存储在 Node-RED 流中。
3. 从 Tulip 更换程序
当产品类型发生变化时(条码扫描、下拉菜单、调度),操作员通常需要切换到不同的程序。相机提供了一个内置的 HTTP 端点,可按 ID 激活程序。
查找程序 ID
- 在 程序编辑器 中打开程序。
- 查看浏览器地址栏:
/recipes/15/editor→ ID 为15。
构建程序切换流程
[ HTTP IN: POST /change-recipe ]──▶[ Function: format request ]──▶[ HTTP Request: POST localhost:5001/pipeline/activate ]──▶[ HTTP Response ]
- HTTP IN 节点:
POST /change-recipe。Tulip 将通过类似{ "id": 15 }的请求体调用此端点。 - Function 节点 — 将程序 ID 传递给相机的内部 API:
const recipeId = msg.payload?.id;
if (!recipeId) {
  msg.statusCode = 400;
  msg.payload = { error: "missing 'id' field" };
  return msg;
}
msg.headers = { 'Content-Type': 'application/json' };
msg.payload = JSON.stringify({ id: recipeId });
msg.method = 'POST';
return msg;
- HTTP Request 节点:
- Method:
POST - URL:
localhost:5001/pipeline/activate - Return:
a parsed JSON object
- Method:
- HTTP Response 节点,以便 Tulip 的 Connector Function 获得返回的状态码。
在相机的 Node-RED 中,程序切换端点为 localhost:5001/pipeline/activate — 这是相机内部的管理 API。您是通过 Node-RED 将 Tulip 的请求代理到本地 API。不要尝试从相机外部直接调用 5001 端口;它仅对相机内部流程开放。
对于较旧的固件(v18.92 之前),URL 为 http://[CAMERA_IP]/edge/pipeline/activate。如果您使用的是较旧的固件,且 localhost:5001 无响应,请回退到 v17/v18 的 URL。请将相机固件升级至 v18.92+ 以使用现代路径。
Tulip 端:调用程序切换
- 在同一个 HTTP Connector 上添加一个 Connector Function
Switch Recipe。 - Method:
POST,Endpoint:/node-red/change-recipe。 - 添加一个输入参数
recipe_id(数字)。 - 将请求体设置为
{ "id": $recipe_id }。 - 在您的 Tulip 应用中,连接一个条码扫描器触发器或一个下拉控件,以使用匹配的程序 ID 调用此函数。
操作员扫描条码 → Tulip 查找该零件对应的程序 ID → Connector Function 调用相机 → 相机在一秒内切换程序。
4. 在 Tulip 中显示实时图像(带边界框)
Tulip 的图像控件可以显示任何返回图像的 URL。OV80i 具有一个内置的 HMI URL,可返回最近一次捕获的图像,并在其上绘制边界框和 ROI 叠加层:
http://<CAMERA_IP>/live-feed

要将其嵌入 Tulip 应用中:
- 在您的 Tulip 步骤中添加一个图像控件。
- 将图像 URL 设置为从检测结果填充的 Tulip 变量,或者,如果每台相机都有自己的仪表板步骤,则设置为静态 URL。
- 最简单的模式:硬编码
http://<CAMERA_IP>/live-feed,并让它在每次捕获时自动刷新(当 URL 或查询参数发生变化时,Tulip 的图像控件会刷新 — 追加?t={{timestamp}}以强制刷新)。
如果您想要原始捕获图像(不带边界框),请改用 msg.payload 中的 image_url — 这是每次捕获的 URL,指向相机库中保存的图像。
如果您在同一条产线上有多台相机,每台都有自己的 IP,请在每个应用步骤中将相机 URL 存储在 Tulip 变量中,并让操作员选择要查看的工位。当变量改变时,图像控件会立即切换。
参考流程(可导入的 Node-RED JSON)
下面的流程结合了所有四种集成:触发 HTTP IN、结果发送 HTTP Request、程序切换器和调试节点。复制 JSON,打开 Node-RED → 汉堡菜单 → Import,然后粘贴。
[
  {
    "id": "tulip_trigger_in",
    "type": "http in",
    "name": "POST /trigger",
    "url": "/trigger",
    "method": "post",
    "x": 160, "y": 100, "wires": [["tulip_trigger_fire"]]
  },
  {
    "id": "tulip_trigger_fire",
    "type": "trigger-camera",
    "name": "Trigger camera",
    "x": 380, "y": 100, "wires": [["tulip_trigger_resp"]]
  },
  {
    "id": "tulip_trigger_resp",
    "type": "http response",
    "name": "200 ok",
    "statusCode": "200",
    "x": 580, "y": 100, "wires": []
  },
  {
    "id": "tulip_results_format",
    "type": "function",
    "name": "Format for Tulip",
    "func": "const p = msg.payload || {};\nconst preds = p.classification?.predictions || [];\nconst allPass = preds.length > 0 && preds.every(r => r.predicted_class === 'pass');\nmsg.payload = {\n  result: allPass ? 'pass' : 'fail',\n  timestamp: new Date().toISOString(),\n  image_url: p.image_url || null,\n  per_roi: preds.map(r => ({roi: r.roi_name, class: r.predicted_class, confidence: r.confidence}))\n};\nmsg.headers = {'Content-Type':'application/json'};\nmsg.method = 'POST';\nreturn msg;",
    "x": 380, "y": 200, "wires": [["tulip_results_send"]]
  },
  {
    "id": "tulip_results_send",
    "type": "http request",
    "name": "POST to Tulip",
    "method": "POST",
    "url": "${TULIP_ENDPOINT}",
    "ret": "obj",
    "x": 600, "y": 200, "wires": [["tulip_results_debug"]]
  },
  {
    "id": "tulip_results_debug",
    "type": "debug",
    "name": "Tulip response",
    "x": 800, "y": 200, "wires": []
  },
  {
    "id": "tulip_recipe_in",
    "type": "http in",
    "name": "POST /change-recipe",
    "url": "/change-recipe",
    "method": "post",
    "x": 160, "y": 300, "wires": [["tulip_recipe_format"]]
  },
  {
    "id": "tulip_recipe_format",
    "type": "function",
    "name": "Format request",
    "func": "const id = msg.payload?.id;\nif (!id) { msg.statusCode = 400; msg.payload = {error:'missing id'}; return msg; }\nmsg.headers = {'Content-Type':'application/json'};\nmsg.payload = JSON.stringify({id});\nmsg.method = 'POST';\nreturn msg;",
    "x": 380, "y": 300, "wires": [["tulip_recipe_call"]]
  },
  {
    "id": "tulip_recipe_call",
    "type": "http request",
    "name": "/pipeline/activate",
    "method": "POST",
    "url": "localhost:5001/pipeline/activate",
    "ret": "obj",
    "x": 600, "y": 300, "wires": [["tulip_recipe_resp"]]
  },
  {
    "id": "tulip_recipe_resp",
    "type": "http response",
    "name": "to Tulip",
    "x": 800, "y": 300, "wires": []
  }
]
您仍然需要将 All Block Outputs 节点连接到 tulip_results_format(它不在上面的 JSON 中,因为该节点是 OV 特有的,且已存在于每个流程中)。
故障排除
| 现象 | 原因 / 解决方法 |
|---|---|
Tulip Connector 返回 connection refused | 相机和 Tulip Edge Device 不在同一网络,或相机防火墙阻止了端口 80。两者必须能够相互访问;请先从 Tulip Edge Device ping 相机。 |
| 触发 HTTP IN 从不触发 | 添加节点后忘记在 Node-RED 中Deploy,或 URL 有拼写错误(必须以 / 开头,而不是 /node-red/)。 |
| 程序切换返回 404 | 您的固件使用了错误的端点。v18.92 之前使用相机 IP 的 /edge/pipeline/activate;v18.92+ 在 Node-RED 内部使用 localhost:5001/pipeline/activate。 |
/live-feed 在 Tulip 中显示黑色图像 | 相机尚未进行捕获,或图像未刷新。追加 ?t={{Date.now()}} 以强制 Image Widget 重新获取。 |
| Tulip 收到 200 但没有结果正文 | 相机触发后立即返回 200——结果通过结果发送流程异步返回(第 2 节)。请确保该流程已连接并部署。 |
| 每个 ROI 的结果太杂 / Tulip 只需要 pass/fail | 这就是 Function 节点在发送前将所有内容整合为单个 `result: "pass" |
后续步骤
- 环境变量 — 将
TULIP_ENDPOINT和其他特定部署配置移出流程。 - 连接到 PLC(EtherNet/IP 和 PROFINET) — 用于与 Tulip 并行的 PLC 集成。
- Overview Node-RED 自定义模块 — OV 专用面板节点(Trigger、All Block Outputs 等)的参考。
- 设置输出(第 5 步) — Node-RED 在更广泛的通过/失败流程中的位置。