AI-POWERED DOCS
What do you want to know?
Connect to the Interface
OV Spark Pro is configured entirely from a browser. There is no client software to install.
How the camera gets its address
Out of the box the camera runs DHCP with fallback:
- It asks your network for a DHCP address.
- If a DHCP server answers, the camera uses the address it is given.
- If nothing answers before the timeout, the camera falls back to a fixed address.
| Setting | Fallback value |
|---|---|
| IP address | 10.250.0.100 |
| Netmask | 255.255.255.0 (/24) |
| Gateway | None |
| Hostname | ov-spark-<serial>, for example ov-spark-5D803037 |
When the camera is on its fallback address, only devices on the same 10.250.0.x subnet can reach it. That is expected. It is a way to get in and configure the camera, not a production network setting.
Connect for the first time
The quickest way to find an OV Spark Pro is OV Configurator, Overview's desktop app for all its cameras. It finds every camera on the network, even one on a different subnet from your computer, and shows its address. If a camera will not answer, use it to flash the camera's LED so you know which unit is which, and to repair its IP address and subnet so your computer can reach it.
The rest of this section is the manual route, for when you cannot install software on the computer.
If your network has DHCP, ask your IT team for the address leased to the camera, or try the hostname:
http://ov-spark-<serial>
The serial is printed on the camera and shown in the interface header.
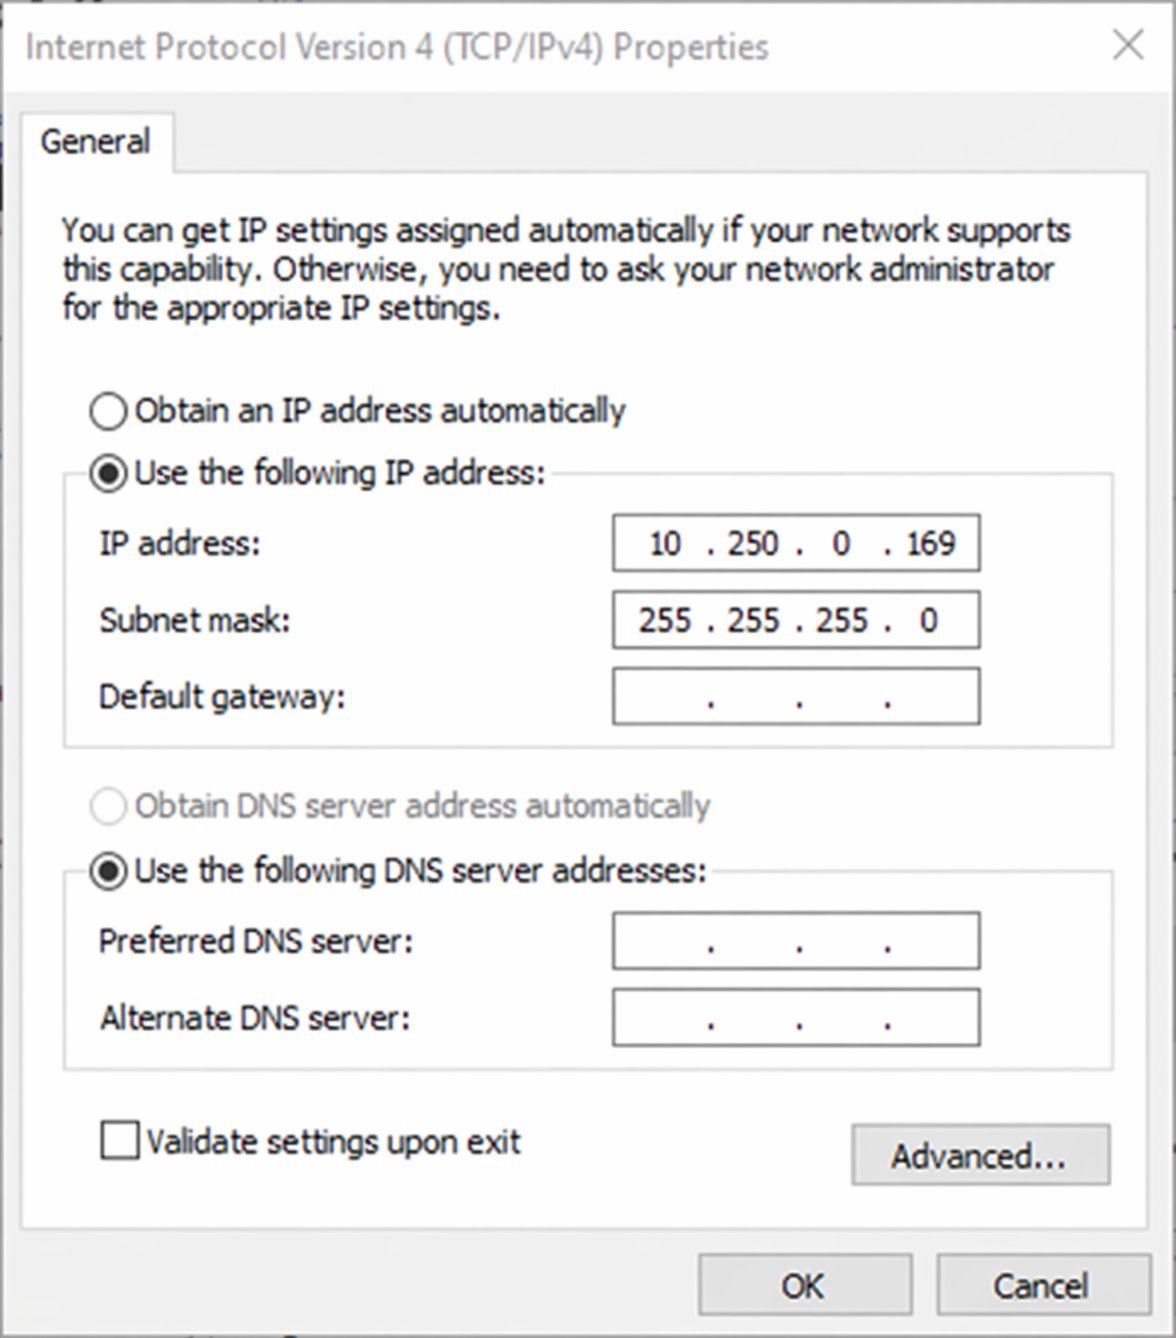
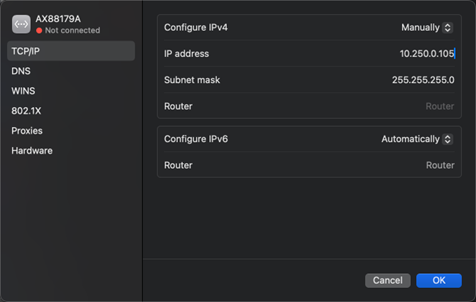
If there is no DHCP server, connect a laptop directly to the camera with an Ethernet cable and give the laptop a static address on the same subnet:
| Setting | Laptop value |
|---|---|
| IP address | 10.250.0.50 (any free address from 10.250.0.1 to 10.250.0.254, except .100) |
| Netmask | 255.255.255.0 |
| Gateway | Leave blank |
Put your computer on the same subnet
Your computer can only reach the camera if both addresses are 10.250.0.X and both use the netmask 255.255.255.0. The last number in the IP address must differ, and must not be 100, which is the camera.
Windows: open Network Connections, right-click your Ethernet adapter, choose Properties, select Internet Protocol Version 4 (TCP/IPv4), then Properties. Choose Use the following IP address and enter the values above.
Mac: open System Settings, then Network, select your Ethernet adapter, choose Details, then TCP/IP. Set Configure IPv4 to Manually and enter the values above.
A laptop left on a static 10.250.0.x address will not get onto your office or plant network. Set the adapter back to automatic (DHCP) once you have given the camera its permanent address.
For more on subnets, planning addresses for several cameras, and avoiding IP conflicts, see Networking: IP and subnet. The same steps are shown for the OV80i in Get on the same network; the subnet and fallback address are identical.
Then open:
http://10.250.0.100
Check the connection
The Network page tells you exactly which path the camera took, so you do not have to guess:
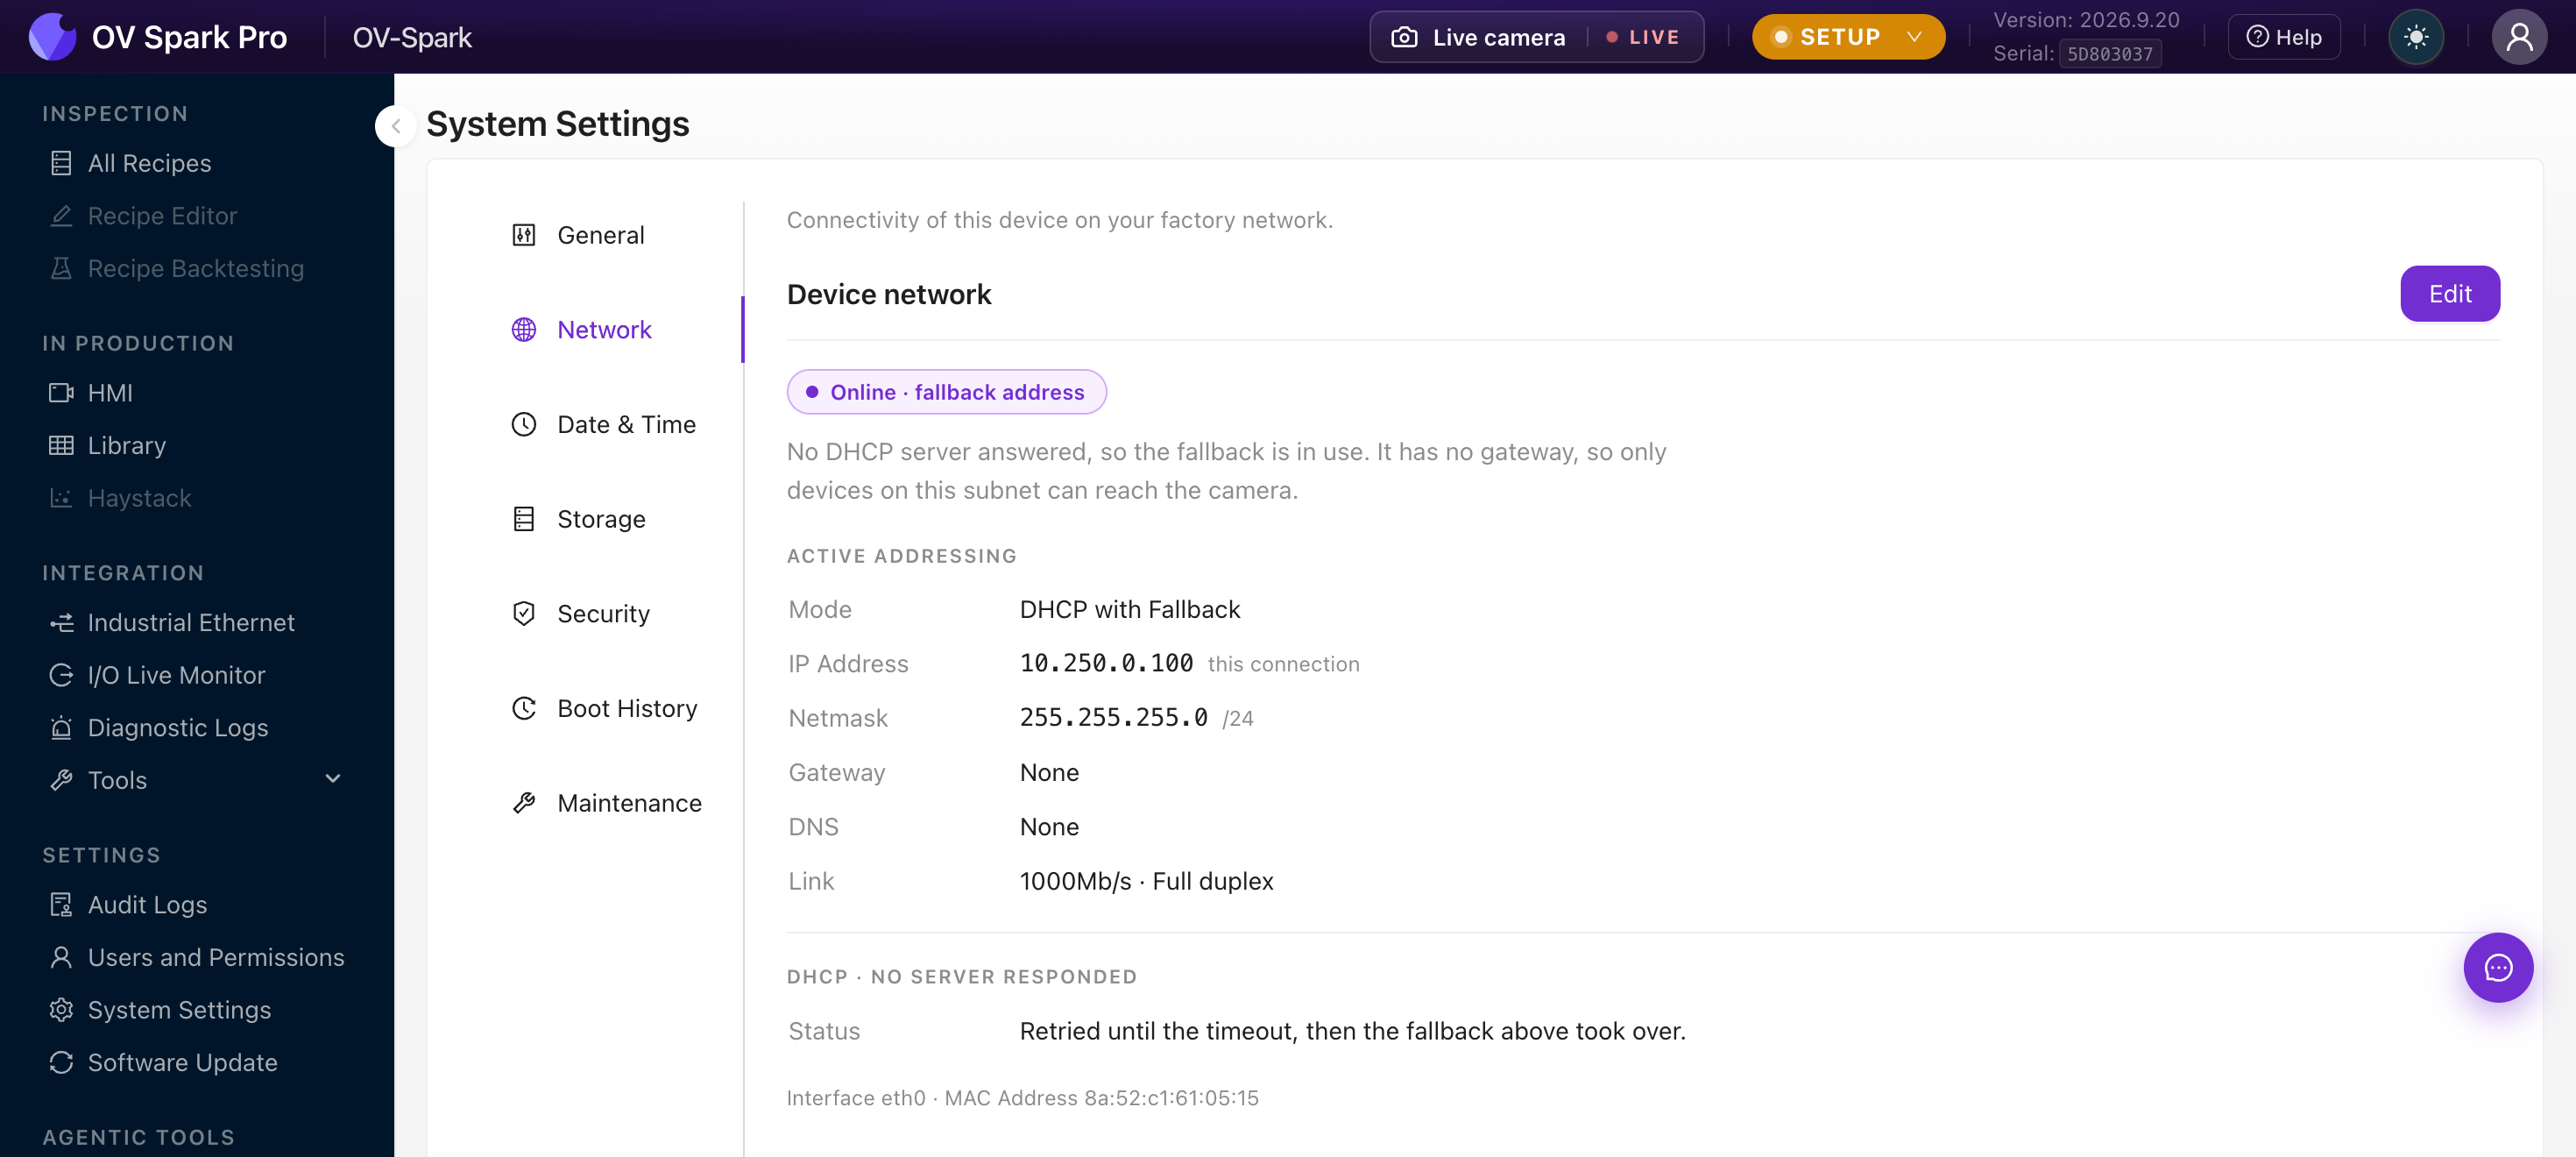
It reports:
- Mode: DHCP with Fallback, and whether the fallback is currently in use
- IP address, netmask, gateway, DNS: what is actually active right now
- Link: negotiated speed and duplex, for example
1000Mb/s · Full duplex - DHCP status: plain language on whether a server answered
- Interface and MAC address: for your IT team's records
Set a permanent address
Once you are in, set the address the camera will keep in production:
- Go to System Settings → Network
- Next to Device network, click Edit
- Choose DHCP or a static address, and apply
If you set a static address on a subnet your laptop cannot reach, you will lose the interface and have to get back on the fallback subnet to recover. Note the new address somewhere before you apply it.
Troubleshooting
| Symptom | Check |
|---|---|
| Page will not load | Is the LAN LED green? Is your laptop on the same subnet? OV Configurator finds the camera on any subnet and can repair its IP settings |
| Camera not on the expected IP | It may have taken a DHCP lease. Check with your IT team, or try the hostname |
| Reachable, then drops | Check Link diagnostics. A duplex mismatch from a hard-coded switch port causes packet loss |
| Nothing at all | Confirm power first: PWR LED green. See Install the camera |