AI 驱动文档
您想了解什么?
Auto-Integration Builder
它解决的问题: 设置工厂集成(PLC 通信、邮件警报、数据记录)需要 Node-RED 专业知识,而您可能不具备。
它的功能: 根据简单的英文描述生成完整、可投入生产的 Node-RED 流程。无需了解 Node-RED。只需描述您想要的内容,AI 就会为您编写所有逻辑。
入门指南
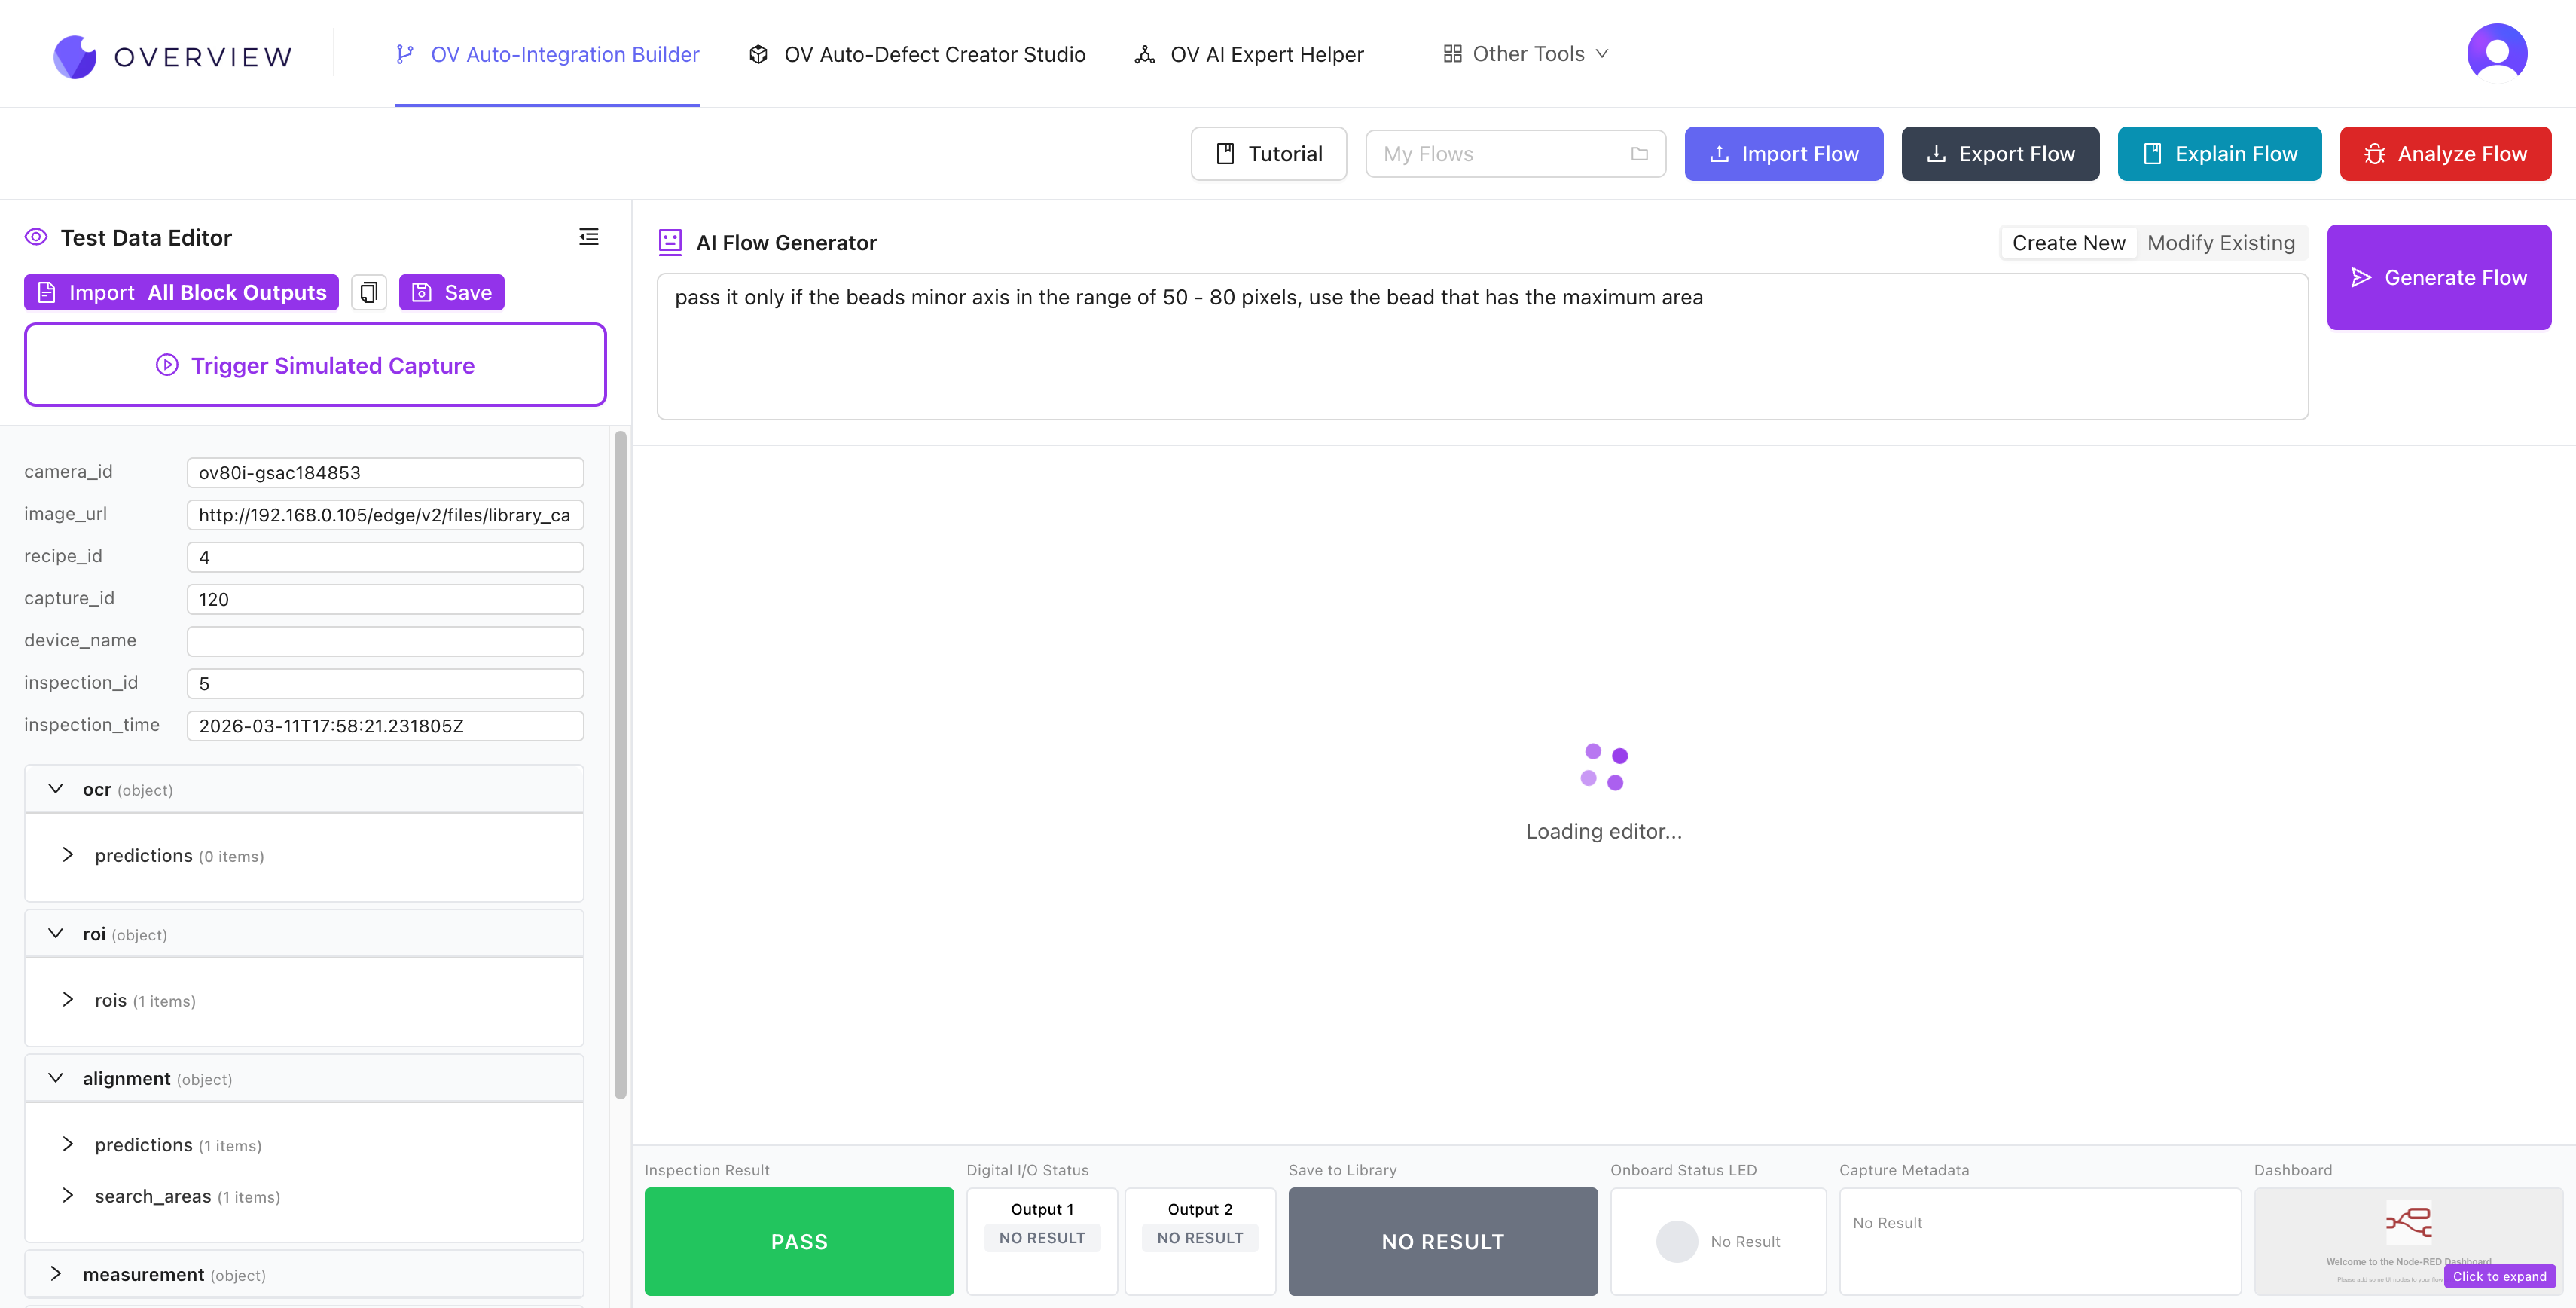
- 打开 tools.overview.ai 并选择 Auto-Integration Builder
- 导入您的相机数据。 点击左侧面板中的 Import All Block Outputs 加载相机的实际检查数据(JSON)。这会告知 AI 哪些数据字段可用(blob、分类、测量、置信度分数)。如果您尚未连接相机,请点击 Load Example Data 以使用示例数据开始。
- 在 AI Flow Generator 文本框中描述您的流程。例如:"Check if gaps are detected, if yes then fail, otherwise pass" 或 "Send an email when 3 failures happen in a row"
- 点击 Generate Flow,AI 会构建完整的 Node-RED 流程
- 使用导入的数据进行测试。结果会实时显示在底部:Inspection Result、Digital I/O Status、Save to Library、Onboard Status LED、Capture Metadata 和 Dashboard 面板。
界面介绍
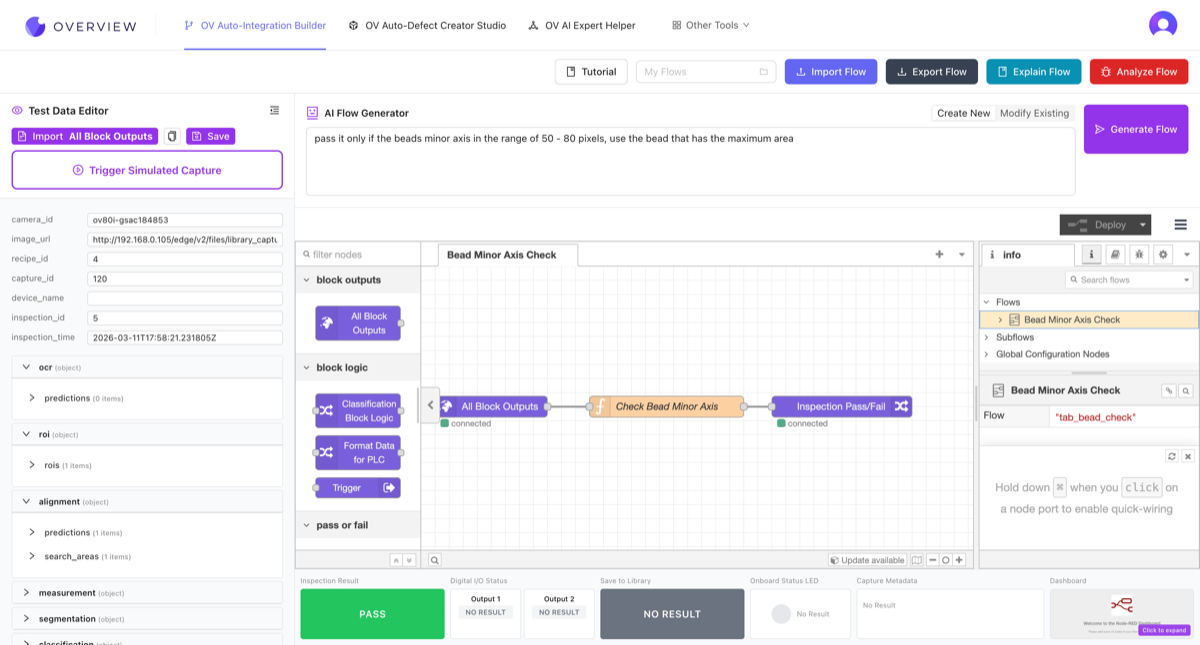
Integration Builder 包含四个主要区域:
- 顶部工具栏: Tutorial 按钮、My Flows 下拉菜单(保存/加载流程)、Import Flow、Export Flow、Explain Flow(AI 解释当前流程的功能)和 Analyze Flow(AI 检查问题)。
- 左侧面板(Test Data Editor): 加载相机的检查数据,以便针对真实值测试流程。
- 中心区域(Node-RED canvas): 可视化流程编辑器,您可以在此查看和手动调整生成的流程。
- 底部状态栏: 实时测试结果,显示 Inspection Result(通过/失败)、Digital I/O 输出、Save to Library 状态、LED 状态、Capture Metadata 以及 Dashboard 预览。
编写有效的提示词
细节越多,效果越好。包括阈值、通过/失败条件以及要触发的输出。模糊的提示词只会产生模糊的结果。
| 质量 | 示例提示词 |
|---|---|
| 好 | "Pass if blob count is 5 AND average confidence is above 0.85" |
| 好 | "Turn on Output 1 when it fails, send email after 3 consecutive failures" |
| 差 | "Check for defects"(过于模糊) |
Modify Mode
已经有一个流程?使用 Modify Mode 描述您想要更改的内容。AI 会在保留现有逻辑的同时更新流程。例如:"Change the threshold to 0.9" 或 "Add an email notification on failure."
导出到您的相机
工具栏包含 Import Flow 和 Export Flow 按钮,用于在构建器和相机之间移动流程:
将流程导出到相机:
- 点击工具栏中的 Export Flow 将流程下载为 JSON 文件
- 在您的相机上,进入 IO模块 并点击 Advanced Mode 打开 Node-RED
- 点击 Node-RED 右上角的汉堡菜单(三条水平线)
- 选择 Import,粘贴 JSON 或选择下载的文件,然后点击 Import
将相机中的流程导入到构建器:
- 在相机的 Node-RED 编辑器上,点击汉堡菜单并选择 Export
- 点击 Copy to clipboard 或 Download JSON
- 在 Integration Builder 中,点击 Import Flow 并将 JSON 粘贴或拖放到编辑器中
无需了解 Node-RED
您无需了解 Node-RED 即可使用 Integration Builder。用简单的英文描述您想要的内容,AI 会处理其余事项。生成的流程使用与您相机原生使用相同的 Node-RED 格式。
实际演示
它在工作流程中的位置: 您将在 第 5 步:设置输出 期间使用 Integration Builder 配置工厂通信。