AI-POWERED DOCS
What do you want to know?
Haystack
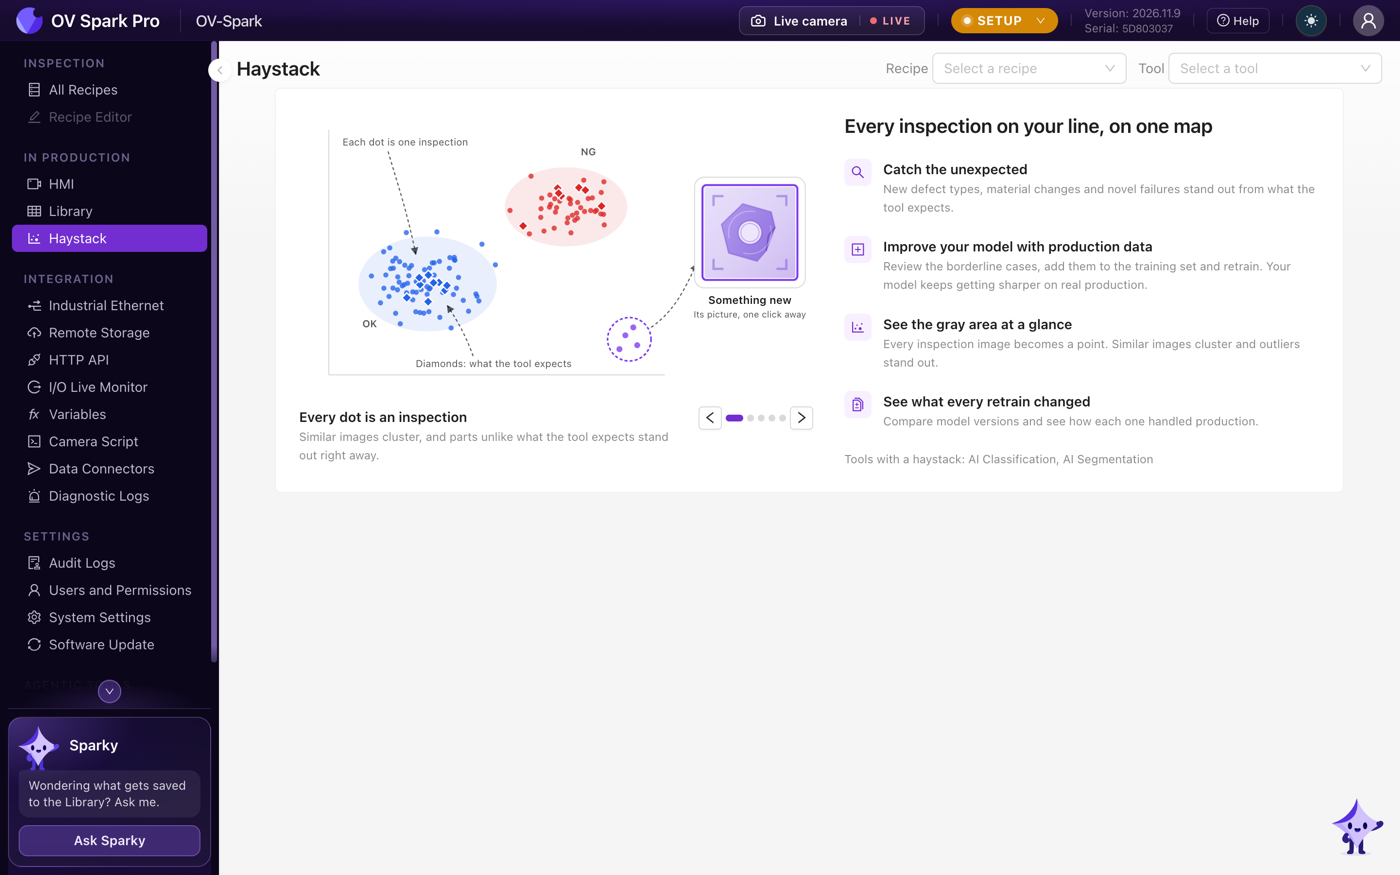
Haystack puts every inspection a tool has made on one map. Each dot is one inspection, and similar images sit close together. Parts unlike anything the tool was trained on stand out on their own, and parts the tool was unsure about sit between the groups. That makes it the quickest way to answer: which of my production images would actually improve this model?
Haystack works for AI Classification and AI Segmentation tools, with other tools to come. It works in both Setup and Production.
Open it from the left-hand menu: In Production > Haystack.
Why use it
Adding lots more training images at random mostly wastes time, because the model already handles most of them. What improves a model is the images it finds hard: the ones near the line between two classes, and the ones unlike anything it has seen. Haystack shows you where those are.
- Catch the unexpected. New defect types, material changes and novel failures stand out from what the tool expects
- Improve your model with production data. Review the borderline cases, add them to the training set and retrain
- See the gray area at a glance. Every inspection image becomes a point. Similar images cluster and outliers stand out
- See what every retrain changed. Compare model versions and see how each one handled production
Open a tool's map
- Open In Production > Haystack.
- Pick the Recipe, then the Tool, at the top right. Or scroll down to Pick a tool to open its haystack and click Open next to the tool. The active recipe is listed first.
- The map opens. If the tool has not been trained yet, it says Train tool to start its map. If it is trained but has not inspected anything yet, points appear as it inspects parts.
You can also get there from the tools themselves: AI Segmentation's Learn step has Open in Haystack, and AI Classification's teach step shows a small Haystack panel with Expand.
If no recipe on the camera has an AI Classification or AI Segmentation tool, the page lists the recipes you could open instead.
Read the map
Click Guide, next to the page title, for a short explanation that stays open beside the map while you work. The legend under the map says what this tool's colours, shapes and shading mean.
| On the map | What it means |
|---|---|
| Production ROI | One inspection on the line. Click it to see the image behind it |
| Training sample | An image the tool was trained on: what it expects |
| Training spread | How far the training images for each class spread |
| Reference region | The tolerance this tool checks against |
The camera also flags dots worth a look:
| Flag | Meaning |
|---|---|
| Anomalous | Farther from the nearest class center than that class's training samples spread |
| Class disagreement | Predicted as one class but sits closest to a different class |
| Low confidence | Prediction confidence below the threshold you set with Low confidence below |
| Outside training spread | Beyond the training samples' range for its class on these axes |
| Blobs truncated | AI Segmentation only: more blobs in this region than the map keeps per region |
For AI Segmentation, the View switch at the top shows the map by Regions or by Blobs.
Narrow it down
- Model version shows one version of the model, or All versions. The version running on the line is tagged Running. Compare versions to see what a retrain changed
- Captured between limits the map to a time range, for example one shift
- Filters set a minimum and maximum on any value
- Color by, Shape and Size choose what each dot's look shows
- Fit to view (Shift+F) zooms back to the whole map. Drag to pan and scroll to zoom
The images behind the dots you select appear as thumbnails beside the map. Sort them with Sort by, and open any one with Open in Library or Open in Teach.
Add images to the training set
- Select the dots you want, for example every Class disagreement in the last shift. Click a dot, Shift+click to add more, or hold Shift and drag to draw around a group. Select all in the thumbnails selects every image shown.
- Click Add n to dataset.
- For AI Classification, choose the Class to assign. For AI Segmentation, you can Pre-fill with the predicted mask and correct it while labeling.
- Confirm. The images are copied into the tool's dataset.
- Retrain:
- AI Classification: click Open Teach and retrain. Retraining needs Setup: in Production the button says Switch to Setup to retrain.
- AI Segmentation: click Open Label step, include the new regions, then train.
Adding images works in Production too, so you can collect them while the line runs and retrain later.
Assign each image the class you can see in the camera image. If a defect is not visible in the image, the model can't learn it, and labelling it as a defect only teaches the model noise.
Good to know
- Haystack needs a trained AI Classification or AI Segmentation tool. Other tool types say This tool type does not have a haystack yet.
- It needs permission to edit recipes. See Users and Permissions
- Keyboard shortcuts are listed under Help > Keyboard shortcuts > Haystack
Where to go next
- Library: every capture, with filters
- Inspection tools: AI Classification and AI Segmentation