AI 驱动文档
您想了解什么?
图像设置操作指南
本指南将引导您在 OV10i 上配置图像和照明设置,以达到最佳检查质量。内容包括对焦、曝光、照明和触发模式的设置。
视频指南
查看本主题的实际操作演示:在几分钟内部署 AI 检查
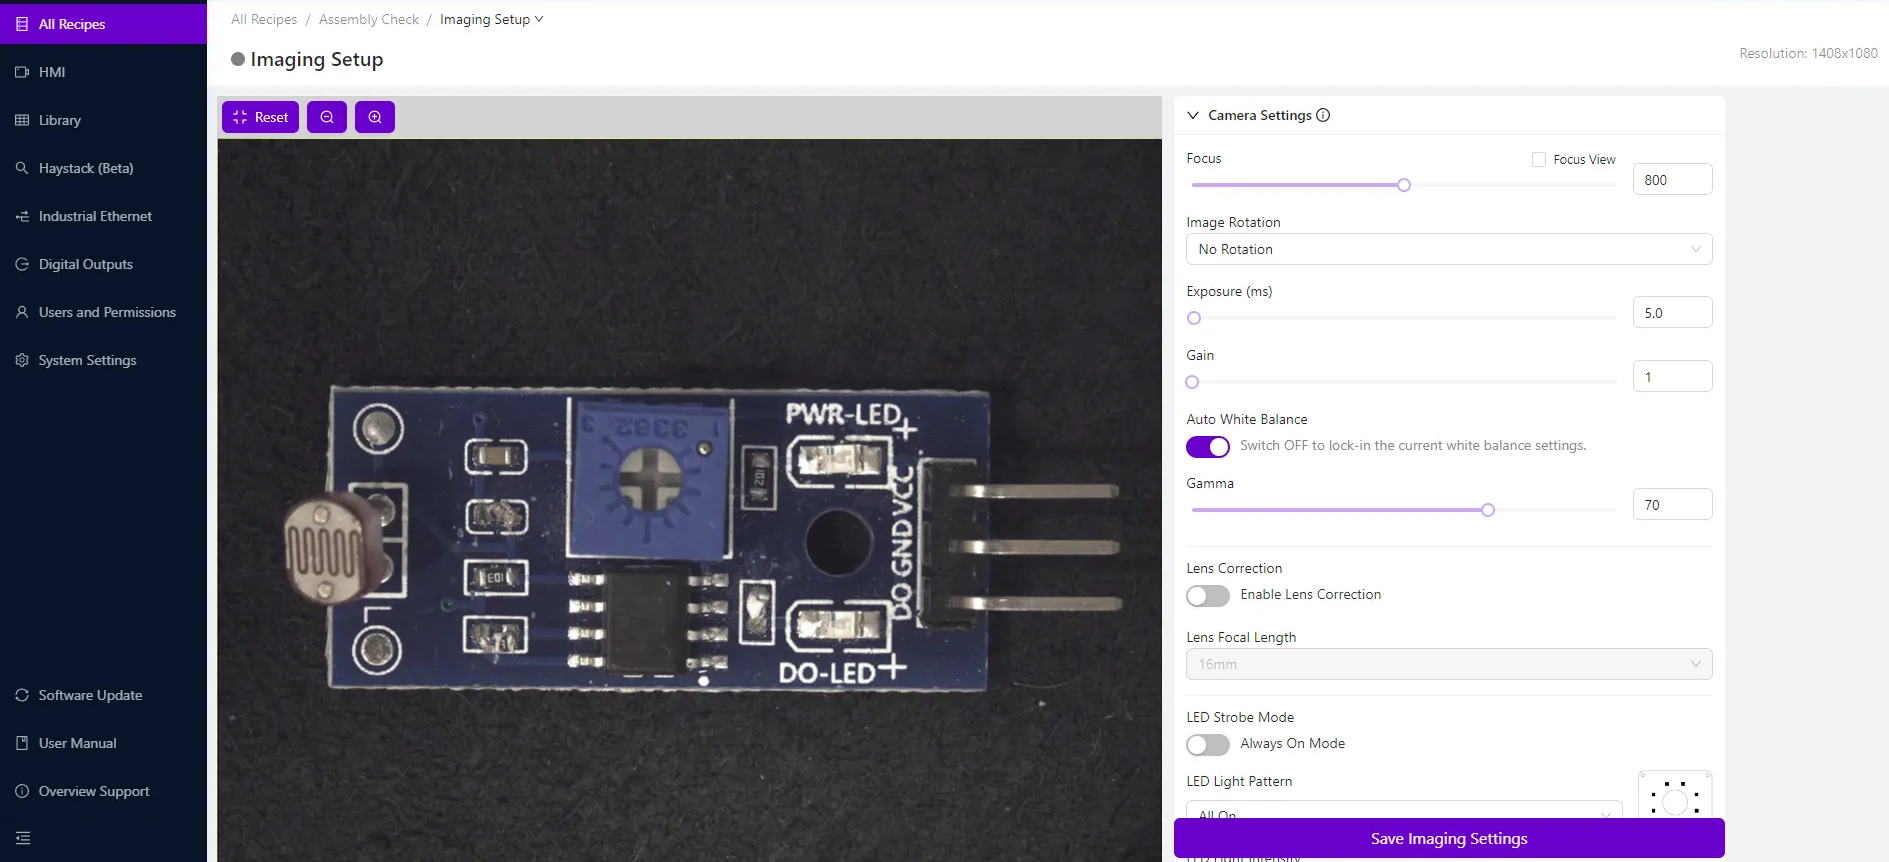
实时预览与缩放
- 预览窗格(左侧)显示 OV10i 相机的实时画面。
- 使用放大 / 缩小工具(左上角)或鼠标滚轮调整预览放大倍数。
- 点击重置或切换页面可将缩放恢复至默认值。
备注
缩放仅影响屏幕显示,不影响相机的实际视野。
相机设置
| 设置 | 说明 |
|---|---|
| Focus(对焦) | 使用滑块或数值输入框调整。向左移动用于近处物体,向右用于远处物体。 |
| Focus View(对焦视图) | 启用后将突出显示边缘,并显示对焦评分(右上角)。评分越高 = 对焦越清晰。 |
| Image Rotation(图像旋转) | 翻转视图(180°)以匹配用户方向。不影响模型数据。 |
| Exposure (ms)(曝光时间) | 设置快门时间。值越高 = 图像越亮,但运动模糊越明显。 |
| Gain(增益) | 以数字方式提亮图像。请谨慎使用,以避免噪点。 |
| Auto White Balance(自动白平衡) | 默认启用。自动调整颜色。在保存图像设置前请关闭。 |
| Gamma(伽马) | 直接从相机传感器调整图像对比度。 |
| Lens Correction(镜头校正) | 启用并选择焦距,以补偿镜头畸变。 |
照明设置
| 照明选项 | 说明 |
|---|---|
| LED Strobe Mode(LED 频闪模式) | 启用时,LED 仅在图像捕获期间闪烁。禁用时,LED 持续点亮(设置期间推荐)。 |
| LED Light Pattern(LED 灯光模式) | 选择哪些 LED 象限处于活动状态:左、右、上、下,或组合方式。 |
| LED Light Intensity(LED 灯光强度) | 使用滑块或输入框调整集成 LED 的亮度。 |
光度控制
启用此功能可改善对压花、纹理或反光等具有挑战性表面的成像效果。
- OV10i 在不同照明角度下捕获多张图像。
- 生成合成图像以减少阴影并增强特征可见性。
| 选项 | 说明 |
|---|---|
| Sequence(序列) | 可选择:左+右、上+下、所有方向。 |
触发设置
选择您期望的图像捕获方式:
| 触发类型 | 说明 |
|---|---|
| Manual HMI Trigger(HMI 手动触发) | 使用 HMI 页面上的 Capture 按钮。设置期间推荐使用。 |
| Hardware Trigger(硬件触发) | 通过物理输入触发(按钮、传感器等)。 |
| PLC Trigger(PLC 触发) | 通过来自 PLC 的数字信号触发。需要配置 Ethernet/IP 或 PROFINET。 |
| Interval Trigger(间隔触发) | 按固定时间间隔自动捕获。 |
| Aligner Trigger(对齐器触发) | 仅当对齐模块检测到匹配时捕获。 |
高级触发选项
| 设置 | 说明 |
|---|---|
| Trigger Delay (μs)(触发延迟) | 触发信号与图像捕获之间的延迟。 |
| Trigger Debounce (μs)(触发去抖) | 信号必须保持稳定的最短时间才能被视为有效。 |
| Interval (ms)(间隔) | 自动捕获之间的时间间隔(用于间隔触发)。 |
| Throttle (ms)(节流) | 任意两次捕获之间的最小时间。 |
备注
在 PLC 和硬件触发模式下,实时预览将被禁用。
设置和测试期间请使用 Manual HMI Trigger(HMI 手动触发)。
保存设置
调整对焦、光照或触发配置后,请始终点击保存图像设置(右下角)。
图像设置技巧
- 将 OV10i 定位为使部件尽可能充满画面。
- 尽量减少环境光 — 依靠 OV10i 内置的 LED 以减少阴影。
- 对于运动部件:降低曝光、提高增益以避免模糊。